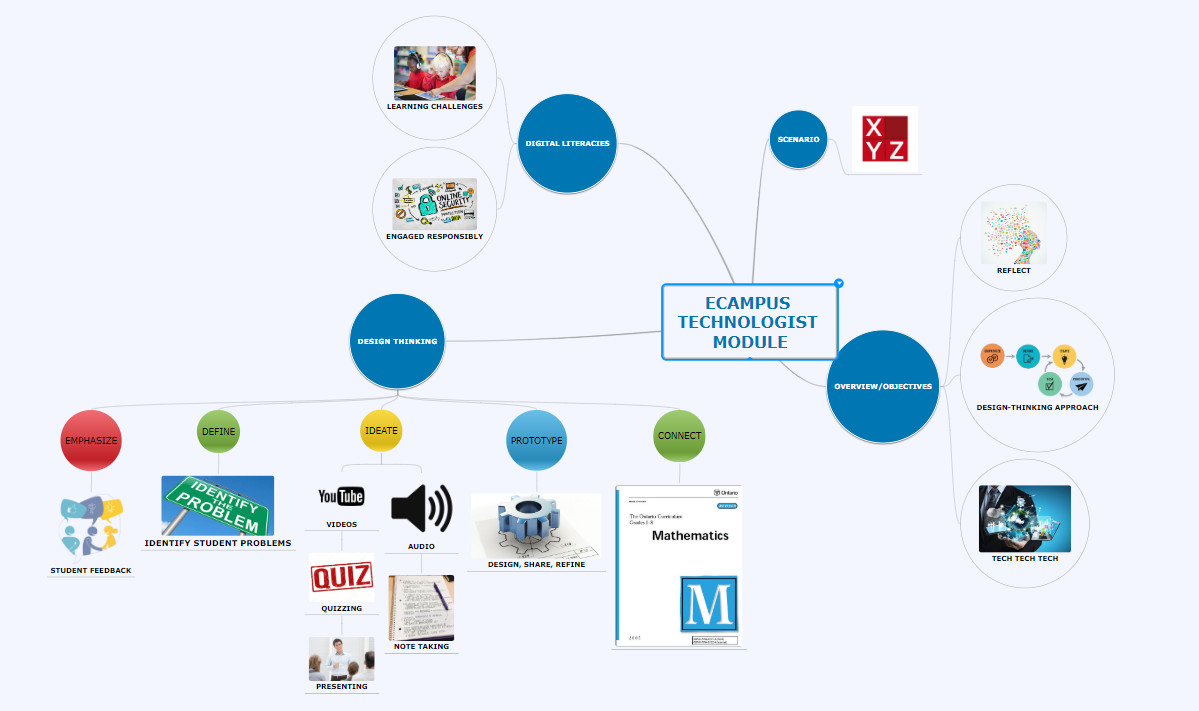
This is not a twitter thread so I will apologize in advance. For the first time ever, I used Mindomo to represent the main ideas from the module of Technologist. Although it was my first time using this site, it was definitely very easy for me to create my mind map. It was such a great site that I will be incorporating it into my own classroom for students to use to organize information in an organized way. It is extremely student friendly and I think they would enjoy the process from start to end. The Boards are pushing the use of technology in the classroom and I support it as it can be very useful to address the needs of students if it is being used properly. This module was a great tool to show how technology can be integrated in the classroom and I would strongly recommend it to other teachers to educate them on the benefits of technology.
The scenario given to us was an educator named Terry who wants to incorporate technology in a way that will benefit his learners. After talking to colleagues and completing the technologist module, he incorporates XYZ technology. Digital literacies can address specific learning challenges of our students and can effectively locate, use, summarize, evaluate, create, and communicate information while using digital technologies and web-based platforms. It also includes the knowledge to engage safely and ethically in online communities. The overview section stated that the objectives of the module were:
- Reflect on your own digital literacies
- Address student-centered challenges with technology
- Find new tools
- Create a learning activity using a design-thinking approach with technology
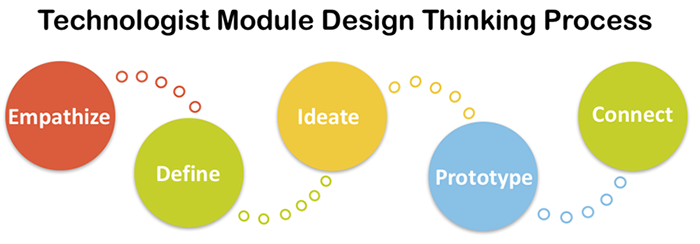
Design thinking is a 5 step approach that sparks new ideas through creating and experimenting. It is human-centered so the people creating and experimenting will actually benefit from the product. In the classroom, it allows students to work together to come up with a solution to a known challenge.
- 1) Emphasize – you must first understand what the need is from your students. You can do this by gathering info through course evaluations, feedback, or other communications. As a teacher you do this unconsciously when you create a lesson and think about the resources you have in the classroom and the types of students there are.
- 2) Define – identify the problem of your learner(s). A good learner challenge frames the challenge, inspires, provides evaluation, captures mind of users, and meets the needs of majority of your people. You’ll never be able to 100% please everyone involved.
- 3) Ideate – This is where you plan and build the features and characteristics of how technology could address your learner challenge. Best way is to ask yourself “how might I?”. Try mind mapping using the Canva, Mindomo, pen and paper, etc. There are several approaches that include: podcasting, videos, audio, editing, quizzing, notetaking, presenting, etc. Use the SECTIONS Model to evaluate your tool to determine if the tool is a good fit for your students (Students, Ease of use, Cost/time, Teaching, Interaction, Organizational issues, Networking, Security and privacy).
- 4) Prototype – This step involves putting a small tangible creation in front of your users instead of talking about abstract ideas. It results in much richer feedback. The 3 basic steps are Design, Share, Refine. You want to prototype by digging into the tool and using creative materials. Then share your creation with peers/learners and ask them what worked, what didn’t, if they have questions or other ideas. The last step is to refine it based on the feedback you have. Sometimes after a lesson I ask students for feedback to see how they liked it and what I could do better to engage them. Their opinions really matter.
- 5) Connect – Finally, connect to the curriculum and indicate how the different elements fit together and link the activity to your learning outcomes.
If you would like to view it larger, click here: Mind Map
Michael Popel