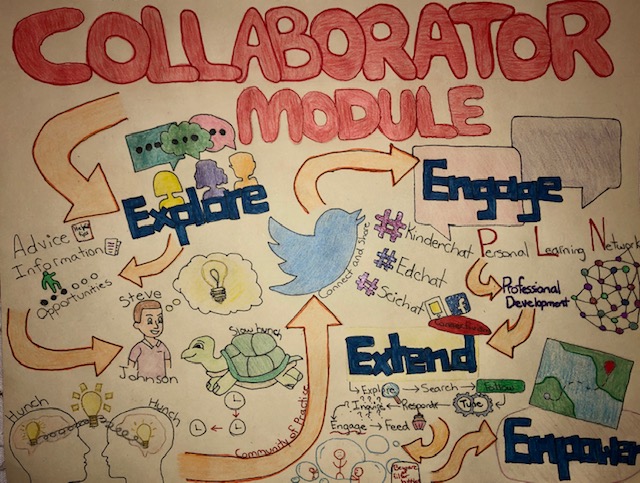
I decided to focus on the Collaborator module for this multimedia assignment. The purpose of this module is to outline the collaborator route of education, this being the utilization of a healthy PLN (personal learning network) to help educators create, connect, and collaborate to form well-established creations.
Sketchnote Full Size
For my first multimedia assignment, I decided to document my progress through the means of a twitter essay. This made for an interesting project as I was discussing the limitations of certain technologies in the classroom, yet the very means of conveying my content was limiting in itself.
GIPHY.COM
I was limited to a set amount of characters per post and was forced to paraphrase rather important criteria. It is for this reason that my second attempt at the multimedia assignment was by hand-drawing my own sketchnote, and I am pleased to confirm that I found this technology more fulfilling.
GIPHY.COM
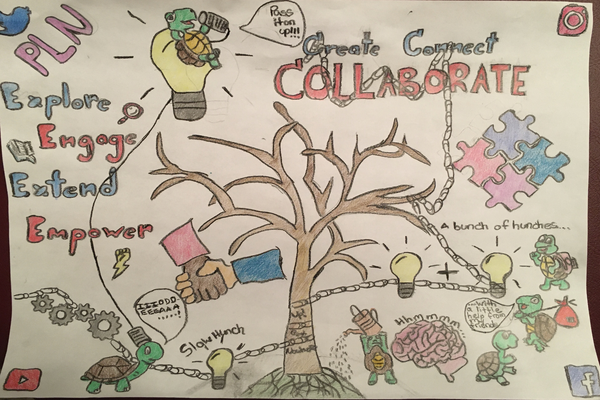
In order for collaboration to occur, there must first be a complimentary agreement between two small ideas. In his video “Where Good Ideas Come From,” Steven Johnson refers to these small ideas independently as small hunches, the seed of great ideas that can take many years to develop. When two or more of these small hunches are pieced together — and often these hunches come from the minds of different individuals — a bigger creation is formed that is larger than either of the small hunches independently. For example, more often than not the modern musical is comprised of both the play’s book (the story itself including the scriptwriting, characters, and order of events), and the musical score (the written arrangement of the show’s musical numbers). Separately, one is a script and the other is notated music. When mashed together, they create musical theatre. My sketchnote depicts this concept of collaboration throughout.
Collab Tree
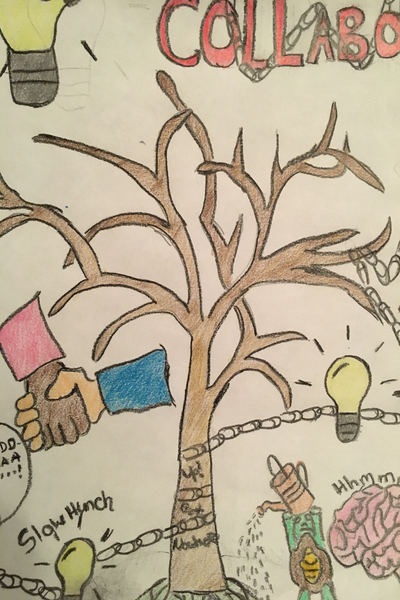
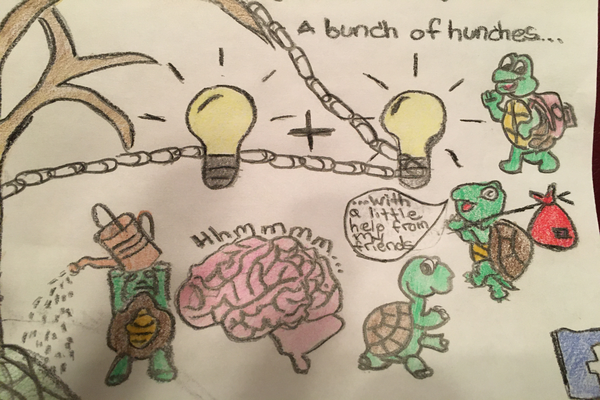
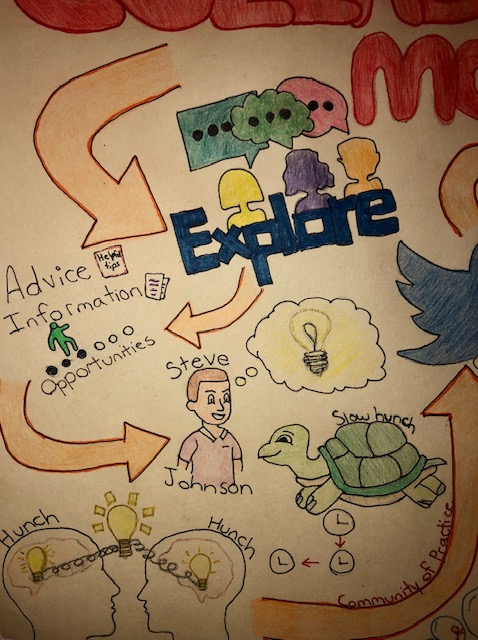
Like small hunches, trees take years to grow and fully sprout. This is why I decided to place a tree in the centre of my sketchnote; I call it the Collab Tree. At the tree’s base are a few images that depict early concepts: the seeds of creation. One of these images is a tiny, single lightbulb signalling the spark of an idea, another is a brain in mid-thought, likely developing that very idea, and the third is a series of gears grinding together much like a mind at work. As we move up the tree there are signs of collaboration: an image of a handshake, a series of puzzle pieces fitting into place with one another, and the combination of two lightbulbs that make twice as much light as the first. At the tree’s top is an even larger lightbulb symbolizing the end product of multiple collaborations: the great creation.
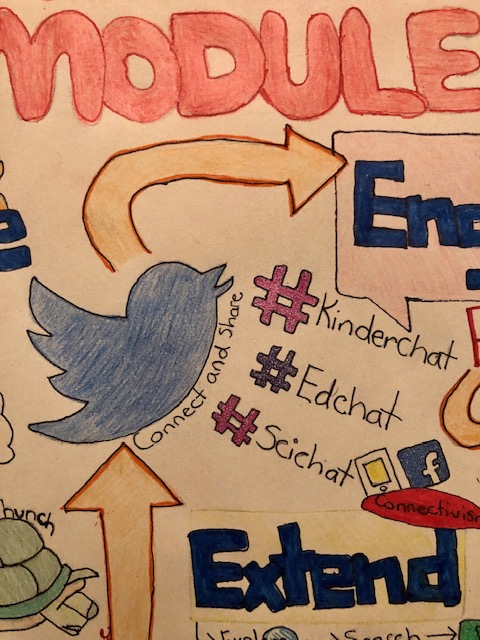
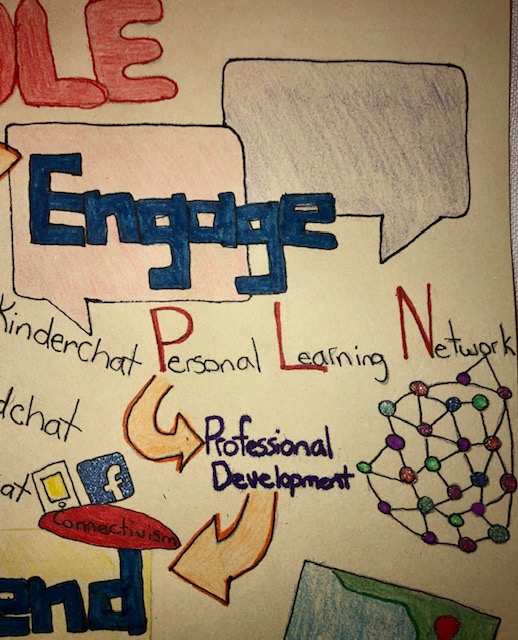
At the top of the page, I was sure to include “PLN,” an important tool for developing one’s professional growth. The “Understanding and Creating Profession Learning Networks” video on the ENGAGE tab of the module describes how PLNs extend personal resources and connections. PLNs are responsible for forming professional relationships between individuals… let’s say, individuals with their very own small hunches. How have PLNs evolved since the turn of the millennium? With the help of social media. This is why I chose to represent four major social media in the corners of my sketchnote.
Collaborations are very much like long journeys. Turtles are often associated as wise and slow-moving; this is why you can view so many in my work. Much like the Collab Tree, the turtles depict the process of a great idea. At the bottom, one turtle proclaims that he has an idea. The second turtle is shown to be feeding this idea while the trio featured next appears to be climbing the ranks by working together.
Turtle Power
The final turtle sits at the top of the big lightbulb, encouraging the first to “pass” on up his slow hunch. How is he doing so? With the help of technology, of course!
“Pass it on up!!!”
Threading the entire concept together is a series of paperclips that outline both the tree’s growth and the turtles’ journey. The paperclips rest atop the words “Create, Connect, Collaborate”: the three Cs for succcess.
Have you ever worked with others and thought to yourself afterwards, wow I would have never thought of that on my own? The insight and refection that can come from others experiences and education is truly valuable. Collaboration is a gateway that allows for this sharing of ideas, and professional growth and development. I have chosen to critically evaluate the Collaborator Module on the Ontario Extend website. In this module, we are introduced to the idea of collaboration by using technology tools, to develop intentional, global, interactive and engaging connections with others of our choosing. The way to accomplish this collaboration is to create a professional learning and teaching network, also known as a PLN. This PLN is a digital space where teachers learn from other’s ideas, opinions, connections, and references which ultimately fosters new views, enhanced understanding, growth and a sense of community.
In the overview section on the scenario page, the main objectives of the collaborator module are highlighted and include; exploring tactics to build PLN, approaches to engage and extend your PLN and ways to empower teachers to develop a PLN. For me this process will involve reflection of my goals, and purpose, looking at what individuals I want to engage with and why. In going through this process, I will effectively extend my professional connections, and experiment with digital tools such as Twitter, YouTube and Educators PLN, as suggested in this section.
In the “Explore: Why Collaborate?” section of the module we critically examine the why behind collaboration and look at the role of digital communities such as Twitter. In the video entitled “Where good ideas come from?” Steven Johnson talks about how we are all interested in creative, innovative and intrinsic work, however often ideas need time to develop, flourish and grow. Often these ideas lay latent, until ideas of others come together with “hunches”of our own, to formulate something new. This has been the cornerstone of innovation through the decades. Today we can research instantaneously all throughout the world and tap into our PLN to find the missing piece of the puzzle we seek.
When I reflect on all of the major science, chemistry and engineering advances that have been made over the last 100 years, I think about how much slower the process was, and how in comparison little connectivity and sharing of ideas took place before the internet. There may have been hunches, however the ability to bring them together, collaborate and build on them, took much longer, due to lack of connectivity and collaboration. Think about the works of Henry Ford as he built his first car, the works of Ernest-Rutherford as he constructed the model of atom, the works of Einstein and his theoretical physicist teachings, and the list would go on and on. How much closer would we be to curing cancer and tackling our environmental issues if scientists and researchers could connect globally with a developed specialized PLN, 75 years ago? Also imagine the time and resources saved by billions of researchers and collaborators!
Alec Couros in the Explore section of the module highlights the affordances of Twitter in relation to a PLN, and how through the ages Twitter has worked to transform collaborative online communication. He explains how educators are no longer “hoarding” their knowledge, but instead sharing relevant up to date perspectives and knowledge. This encapsulates a “growth mindset” practice for all, which should be what teacher’s aspire for, not only for their students but also for their colleagues.
As educators we have the responsibility to explore online learning communities, and incorporate multiple perspectives in our teaching and learning. Therefore having PLN members with varing opionions is vauable and insightful. Following new hashtags such as #edchat, #scichat as well as new people such as professors, and influential teachers, my associate teacher, teacher candidates within my disciple will help me to remain up to date. Thank you Bonnie for exposing me to the world of Twitter through this class. Since joining Twitter I now follow #Ontarioextend, #apchemistry, #chemchat, and #chemEd.
A PLN is a network you create, with people you wish to engage and share with or even just simply follow or “lurk” among, as Marc-Andre Lalande points out in his video. As a biology and chemistry teacher I have begun to create a PLN of educators, scholars, community officials, and influencers, who would actively engage in conversation about ways to combat global warming and explore genetic and drug research as well as help to develop teaching, learning and assessment aids.
These diverse topics are very personally relevant to me, and covered in the curriculum, so creating a PLN devised around my interests, passions, personal needs, ambitions and goals aligns with the purpose of a PLN. My goal is to gather new ideas, share, collaborate, build off of each other’s insights and contribute to building new ideas or expanding previous works. In my future school I would hope to be involved in the “Eco Team” and connecting with other schools, who have made impressive gains towards the implementation of the zero waste policy. I would also like to connect with other chemistry and biology labs teachers as it can be difficult to think of new exciting ways to teach the cirriculum and develop new labs.
Connectivism is one of the major theoretical frameworks that validates the use of PLNS. Here we recognize that learning is socially constructed, and involves the expansion and augmentation of others work and hence the adaptation of our own. Here the learner is seeking knowledge and constructing their own reality. In my placement, many of my students worked best, by constructing their knowledge with hands on activities, especially in the applied and locally developed classes. The learning idea of a constructivist as Piaget describes, is centered around learning being an active process where students construct information actively rather than receiving it passively. The Social Cognitive Theory, aligns to a greater extent with the development of a PLN, as knowledge is constructed by the interactions with others in a social world, through modeling, teaching self-efficacy and active co-construction.
It is important to follow the steps outlined in the Extend and Empower, module where it describes how to cultivate and map your PLN. To begin the cultivation process, it is important to find a professional group that aligns with your interests. Then going where your people are, being strategic, strengthening connections, limiting your follows and culls as well as looking critically at the identity you are creating, are al vital steps of the process. In cultivating my PLN having etiquette and creating an on-line identity are of utmost importance to me as an educator, as you never know who you will see at a conference or collaborate with in the future.
In mapping my PLN I had to think about my focus, which is science and chemistry education. I placed my science topics on the map (global warming, genetics, and drug advancements) and identified the nodes (names) of at least 5 individuals or industries I wish to network with. Then I identified their roles, weight of connection and tried to identify any relationships between nodes. Surprisingly there were connections between nodes that I had forgotten about, which made me think of potential collaborative research projects in the future for my students.
In the Extend module there is a Ted talk “Beward of the Online Filter Bubbles.” Here Eli Pariser describes invisible algorithmic editing of the web that occurs with online tools like Google and Facebook. This means that your inquiry results are personally tailored, and we are seeing only what the internet thinks you need to see, and is filtering out the rest. Because of this it is important to look critically at our internet searches, and make sure we are always looking for ways to understand the other side of the story. Adding people to our PLN who have opposing views is therefore of extreme value in the “era of the filter bubble.” I have successfully begun the process of cultivating my PLN through Twitter, and have seen many of the lesson plans, assessment strategies, science projects, conferences and media groups science educators are a part of.
I used Canva to make my final artifact. Canva would be a great educational tool as it allows for reflective and creative expression in a variety of forms including a poster, logo, video, presentation, flyer, card and info-graphic. Giving students choice in how they wish to apply what they have learned, is appealing to me as an educator, because not everyone can apply and display their knowledge in the same way. Plus adding the text, color and pictures adds to the meta-cognitive processing of the material, and its creativity thereby increases the likelihood that the material will really stick. Creative projects by design, always engage students in analytical, evaluative higher order thinking. These projects are not focused on supplying the right answer, rather they are concerned with extending and applying information to find solutions or develop new ideas, much like a PLN!
I decided to create a sketchnote that summarizes the key points of the collaborator module created by Ontario Extend. The collaborator module emphasizes the importance of connecting individuals who share a similar interest. It is essential that teachers build connections with others, ask and solve questions collaboratively, and strengthen their independent thoughts. This is possible and easily accessible by using technological tools.
I created a sketchnote because I enjoy the way they look. I like how you are not restricted to a specific template. I knew that this would be challenging for me since I am not a drawer, however, I was excited to see what the outcome would look like. The process of creating the sketchnote was very time-consuming. I first created a rough draft to make sure I knew all the ideas I wanted to incorporate. I then started to make the final copy by drawing a template that was later coloured in. Overall, I had a good experience creating the sketchnote. This would be something that I would share with my students in the future.
The first thing I drew was people communicating with each other. This emphasizes what collaboration is all about. People sharing their thoughts with others. Teachers being open to collaborating is key to developing a personal learning network (PLN).
Steven Johnson explains a concept where ideas take time to form and people are usually in a dormant state where their ideas are slowly processing. He calls this idea “slow hunch”. I’ve always felt that when two minds come together, there is a greater opportunity for something great to come from it. In my experience, I’ve always found it easier and faster to create something when you can share your thoughts with others. For this reason, I recreated the illustration that was shown in the video. I drew two people, each with their own ideas. When they come together, they are able to share their thoughts and build upon them to create something new. I drew a turtle with clocks around it to represent that creating important ideas is a timely process.
In my own experiences of teaching and learning, I would say that you are always needing to collaborate. You need to be able to bounce ideas off of each other. For example, when planning for a lesson, a teacher may seek assistance from others around them. With technology being a medium of communication, it becomes a much simpler task that can be done at any moment. When I am creating lessons, I almost always search the web to find creative ideas that other teachers are sharing. This greatly facilitates the overall process. I found it interesting listening to the “Using Twitter Effectively in Education” video because I had never really thought of the importance of hashtags in the learning community. There are hashtags devoted to helping teachers communicate with other teachers, such as #kinderchat, which is specialized for primary school teachers. This is something that I would like to further explore and utilize in the future.
Marc-andré Lalande explains that a PLN is a group of people you choose to interact with in order to learn from their questions and reflections. The people that you are associating with are connected to others, which ultimately leads to a large network of individuals. The primary goal is to learn from others and have others learn from you. In the sketchnote, I wrote out the acronym PLN and what it stands for. I thought this was important to incorporate as PLNs are the basis of collaboration. As a teacher, this would be a good thing to create since your personal development will be easily accessible.
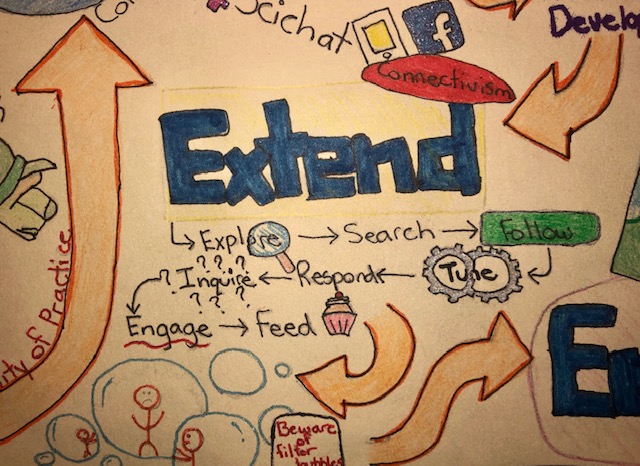
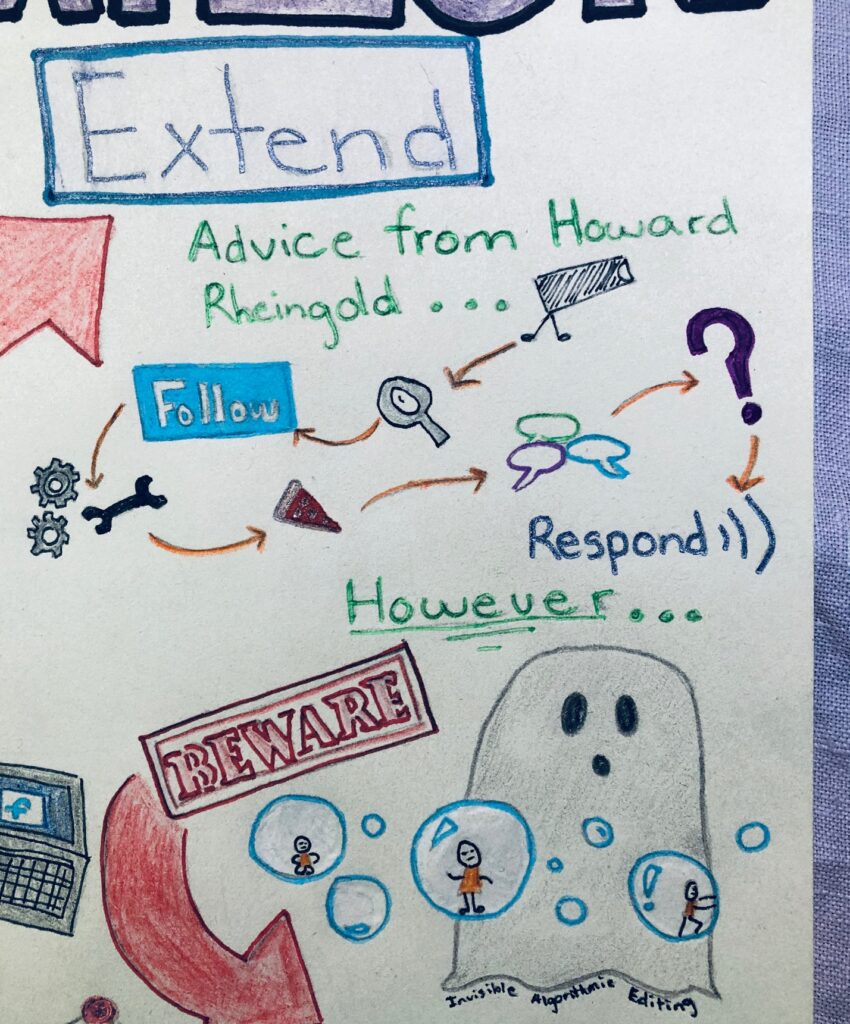
Howard Rheingold provides steps on how professionals can build their PLN. He explains how they first need to explore multiple media such as blogs, Twitter, and Facebook. They then need to search to get a sense of the community surrounding the space of interest. They can then follow other activity streams and tune their network by choosing who is worth paying attention to and who is not. They need to feed their followers with valuable information and engage with them. When you have questions or responses, don’t hesitate to engage. I believe that these are important steps for teachers to follow when creating their own PLN, which is why I added these steps to the sketchnote.
Eli Pariser’s TED talk video describes invisible algorithmic editing as filter bubbles. These bubbles trap us in our own online universe that is tailored to our preferences and blocks us from information that could broaden our view on society. As teachers, we need to inform our students about these filter bobbles that occur in our online world. We need to teach students to be aware of them so that they can understand that there is a world that they may not be seeing. To represent these thoughts in the sketchnote, I drew bubbles that are surrounding individuals and preventing them from reaching each other. In reality, that is what these filter bubbles are doing; shielding people from a greater world of information and knowledge.
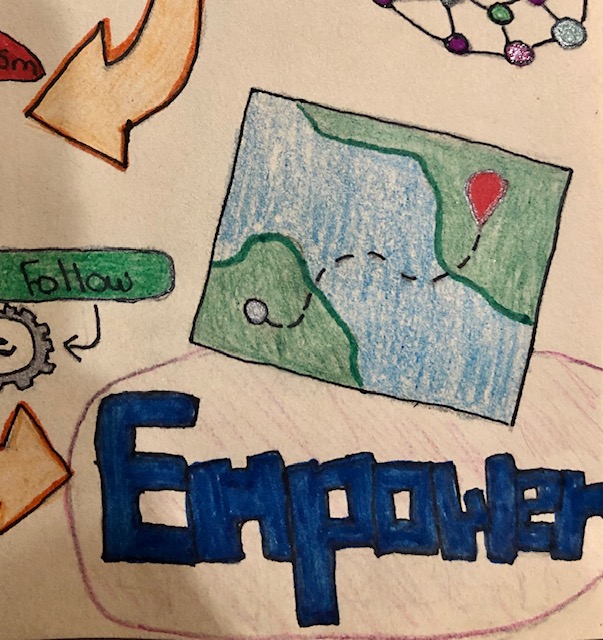
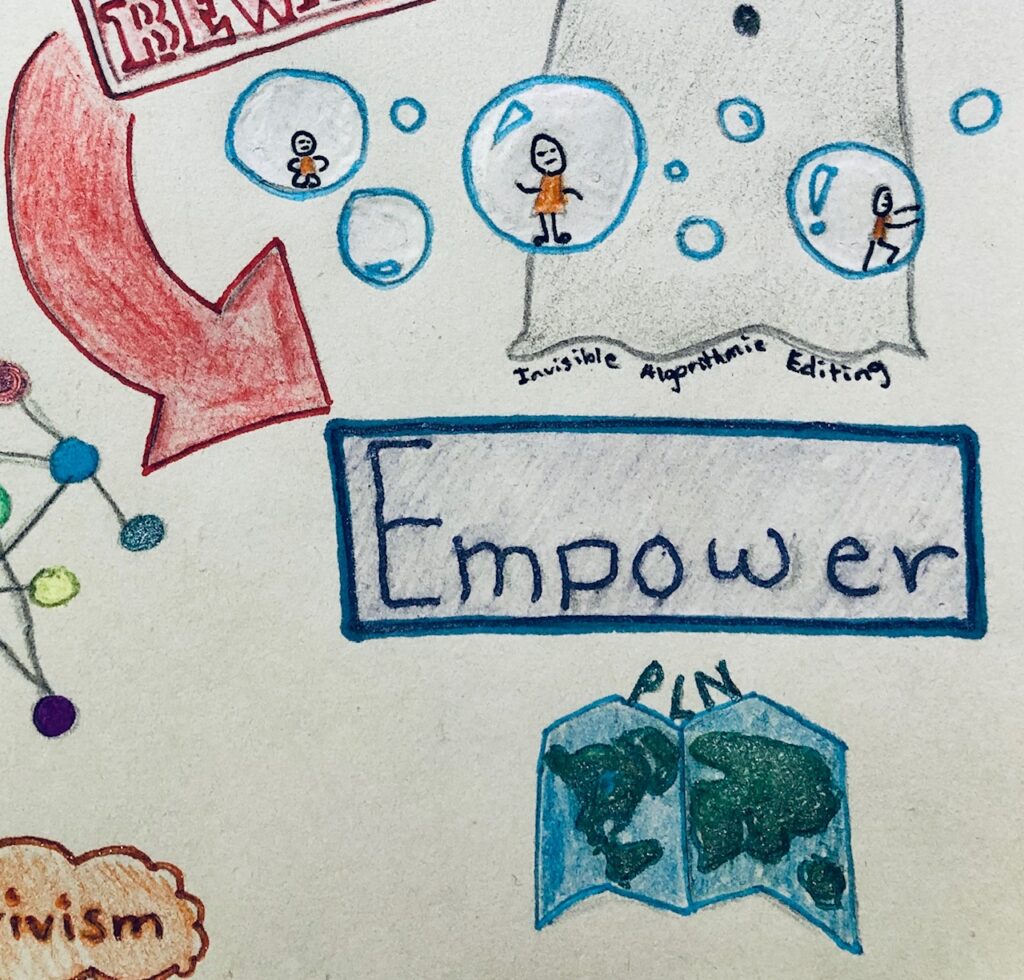
Mapping your PLN is an imperative process as it allows you to visually see your network. Using tools such as Coggle, Google Drawing, PowerPoint, etc. are great ways to create this. Some also offer collaborative value by allowing users to share their knowledge and creations with others, such as Coggle. In the sketchnote, I drew a map. This symbolizes mapping out your PLN to make connections from one place to another.
I believe that collaboration is an important aspect of teaching. As teachers, we must be constantly adapting to the latest technological platforms. Being able to communicate with others around the world who have insightful and useful information greatly helps to develop as a professional.
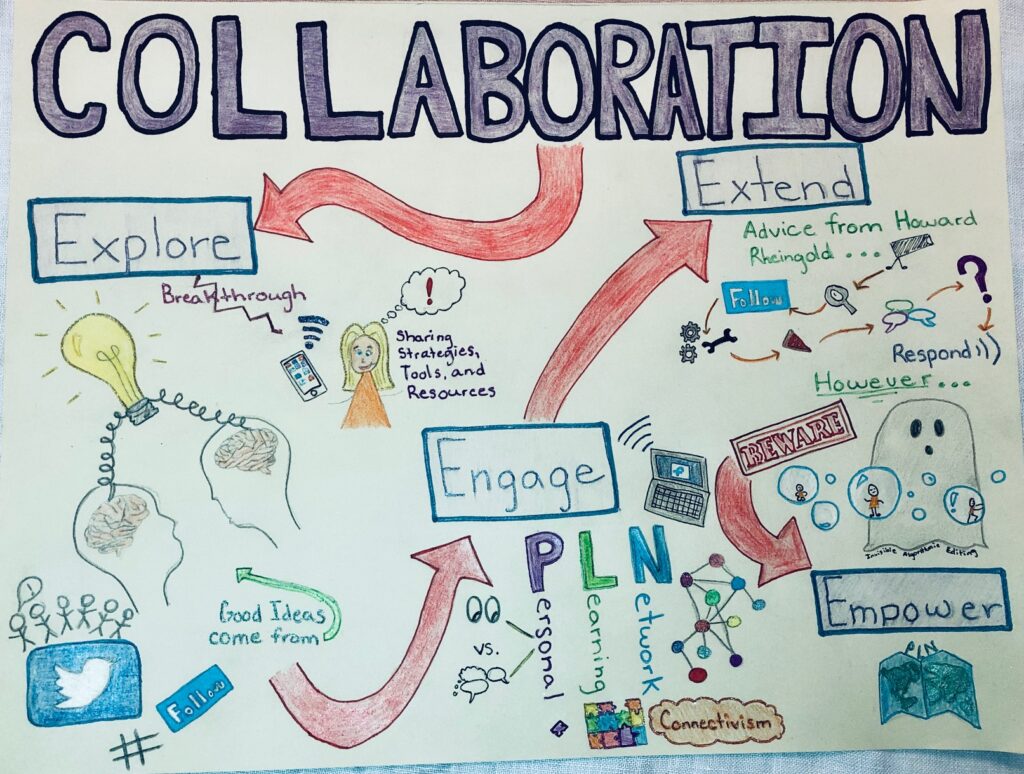
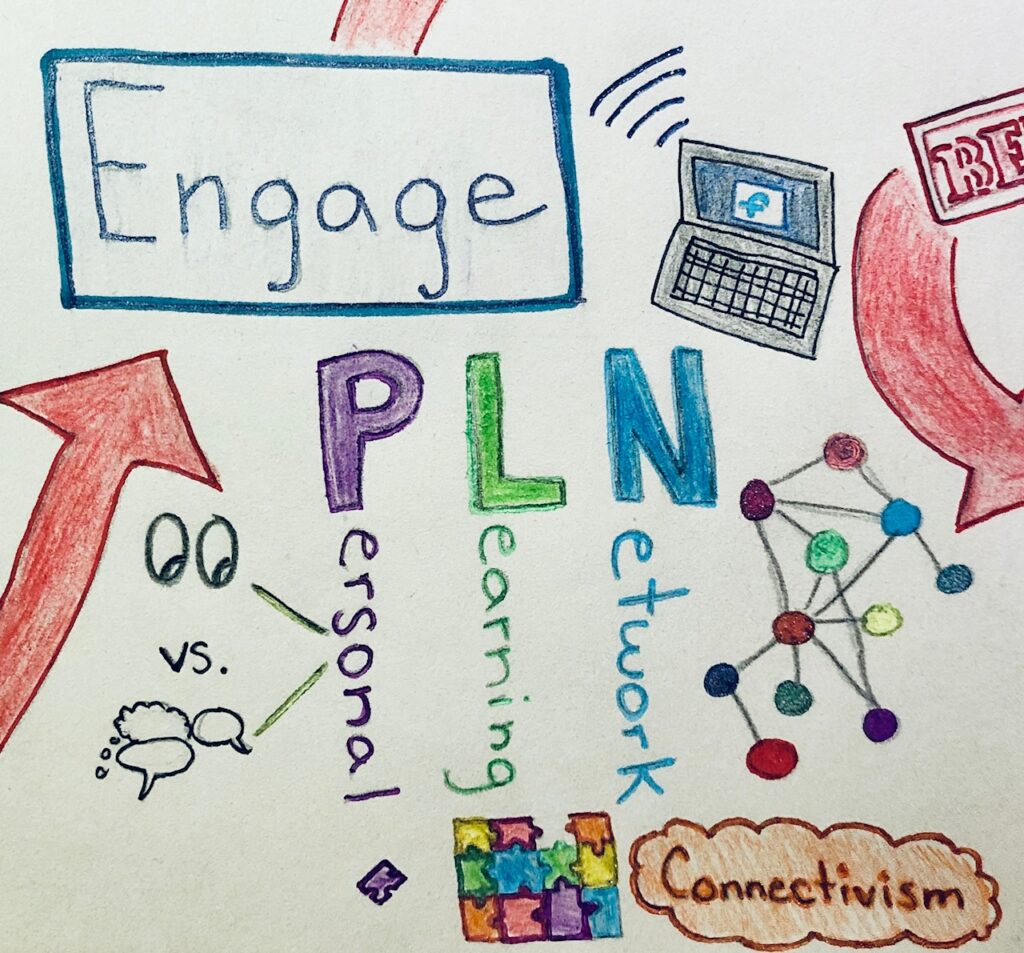
I decided to explore the Collaborator Module by Ontario Extend. This module is a resource intended for open education to share and spread knowledge. In order to share its main concepts, I decided to create a sketchnote that represents my understanding of it. At the top of my sketchnote, I wanted to highlight the word “collaboration”. Collaboration is the main focus of this module. I added arrows as connectors to represent the important points we need to have to achieve collaboration.
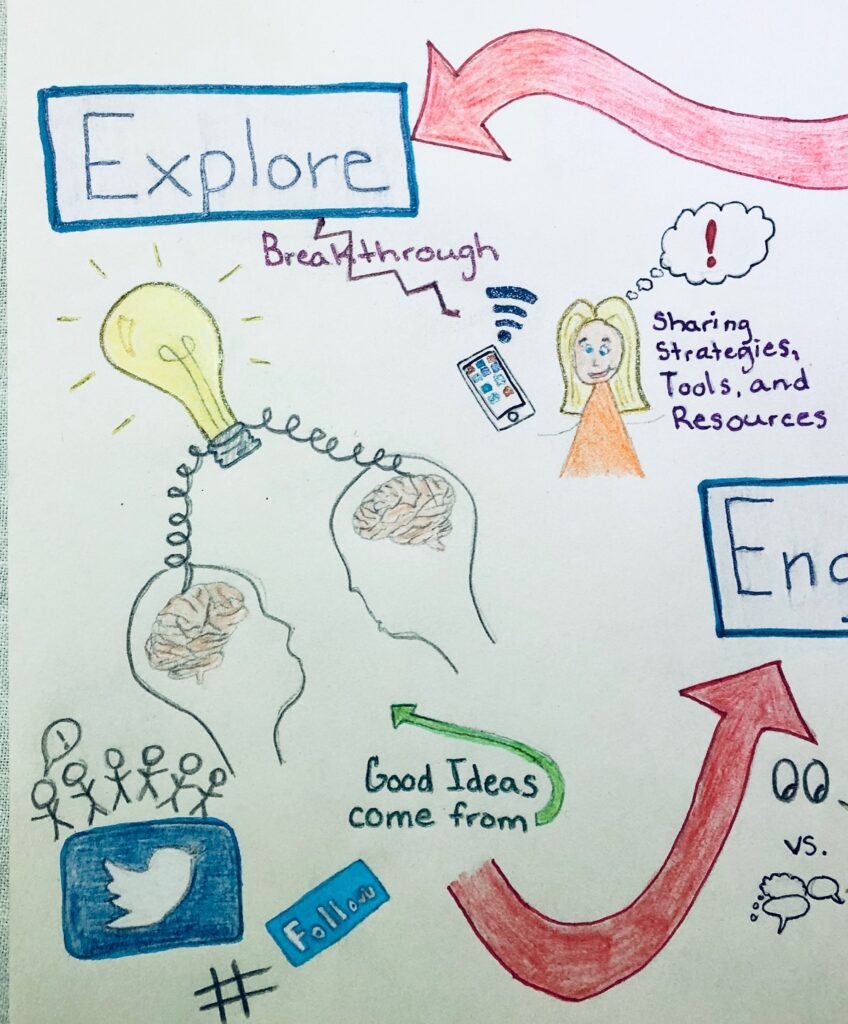
The Explore section of the module, focuses on the importance of collaboration and explains ways in which we can collaborate. It discusses how collaboration provides the opportunity for new ideas to appear and spread. When one idea lurking in someone’s mind can be shared with someone else who may have a slightly different idea, these ideas are able to converge and potentially develop into a larger “breakthrough” idea. This is where good ideas are made. Therefore, to ultimately share thoughts and ideas with others, we need to develop ways to connect with society. This can be done by creating online networks. To accomplish this, it is important to participate in digital communities for learning such as Twitter or by building your own personal learning network.
Keeping the Explore section in mind when creating my sketchnote, I decided to include a sketch of two individuals who are sharing an idea (represented by a lightbulb). This is meant to symbolize how it requires connections with other individuals in order to create breakthrough ideas.
Under the Engage section of the module, it discusses personal learning networks (PLNs). PLNs are organized around your own personal or professional learning interests. You decide who is included in your network and you choose how you would like to engage with them. Thus, every PLN is unique to the individual. PLNs are based on a theory of connectivism. This is the idea that when someone is knowledgeable it reflects how they have connected concepts and ideas over time. Someone gains this knowledge by forming networks and sharing ideas.
When designing this section in my sketchnote, I chose to include bolded letters “PLN” to turn the focus on this concept. Underneath, I chose to include what each letter stands for. “P” for personal, this is because PLNs are personalized to the individual. Attached to that, I included a sketch of a pair of eyes and dialogue bubbles. These represent how individuals can choose whether they want to be lurkers (check out what people are saying) or sharers (share and distribute information) within their PLN. As well, I chose to incorporate a puzzle under this section. This represents how knowledge is connected by different ideas that ultimately produce a deeper understanding of that subject.
Under the Extend section of the module, it describes how you can build your own PLN. Howard Rheingold provides 8 key steps to help you begin building your PLN: explore, search, follow, tune, feed, engage, inquire, and then respond. I chose to incorporate these points into my sketchnote because I believe these are easy to follow and would benefit someone who needs some direction when planning their PLN. This section of the module also cautions users to beware of getting trapped in their own online universe. They term this as getting stuck inside “filter bubbles”. Filter bubbles are created by invisible algorithmic editing that personally tailors your search results to your own interests. This prevents individuals from being exposed to new ideas and perspectives that can broaden their view of society and ultimately reduces the opportunity for collaboration. In my sketchnote, I incorporated a drawing of people trapped inside bubbles. This symbolizes how people can become stuck in their own online universe. The ghost located behind these bubbles symbolized how the algorithmic editing that occurs is invisible.
In the final section of the module, Empower, they want you to map your own PLN. By mapping your PLN, it allows you to reflect on your own learning network and determine ways in which you can improve it.
I enjoyed being able to explore this module and deepen my understanding of collaboration. Collaboration is an important aspect of learning and teaching. It’s how ideas are created and strengthened. As well, being able to create a sketchnote based on this module was a great learning curve for me. I have never created a sketchnote before. This enabled me to see the importance of imagery and symbols when representing concepts. Although, I did find some concepts challenging to represent in a picture form and thus, included some writing. I enjoyed how much creativity you can have while creating it. In the future, I would love to incorporate sketchnotes into my classroom, perhaps by including it into an assignment for my students.
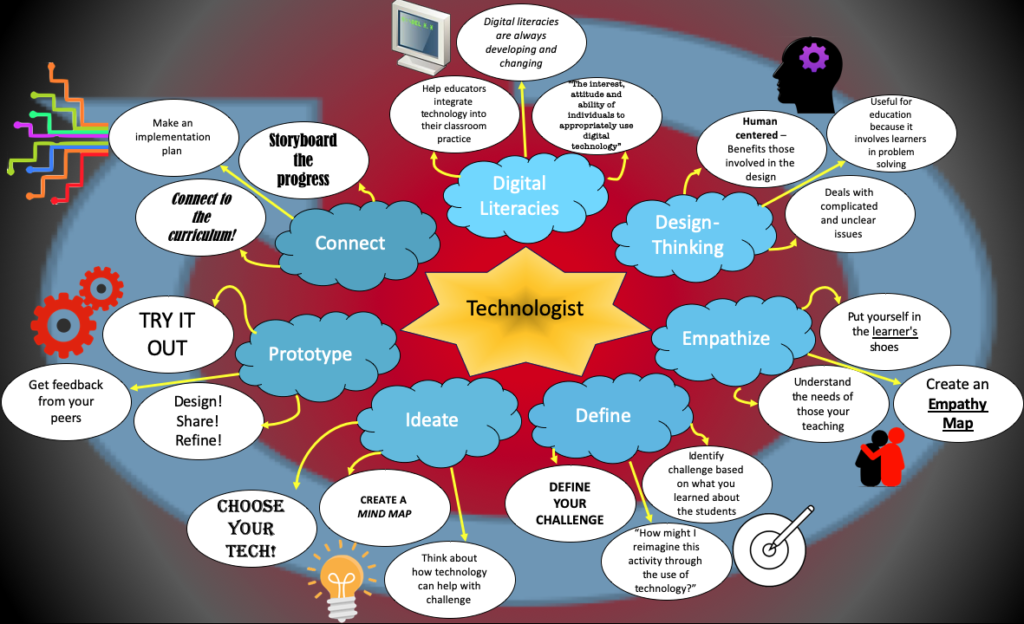
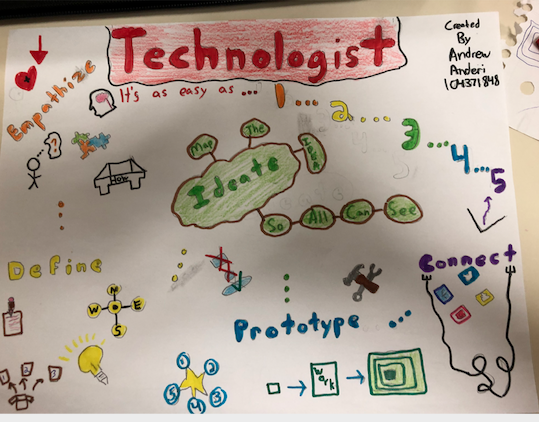
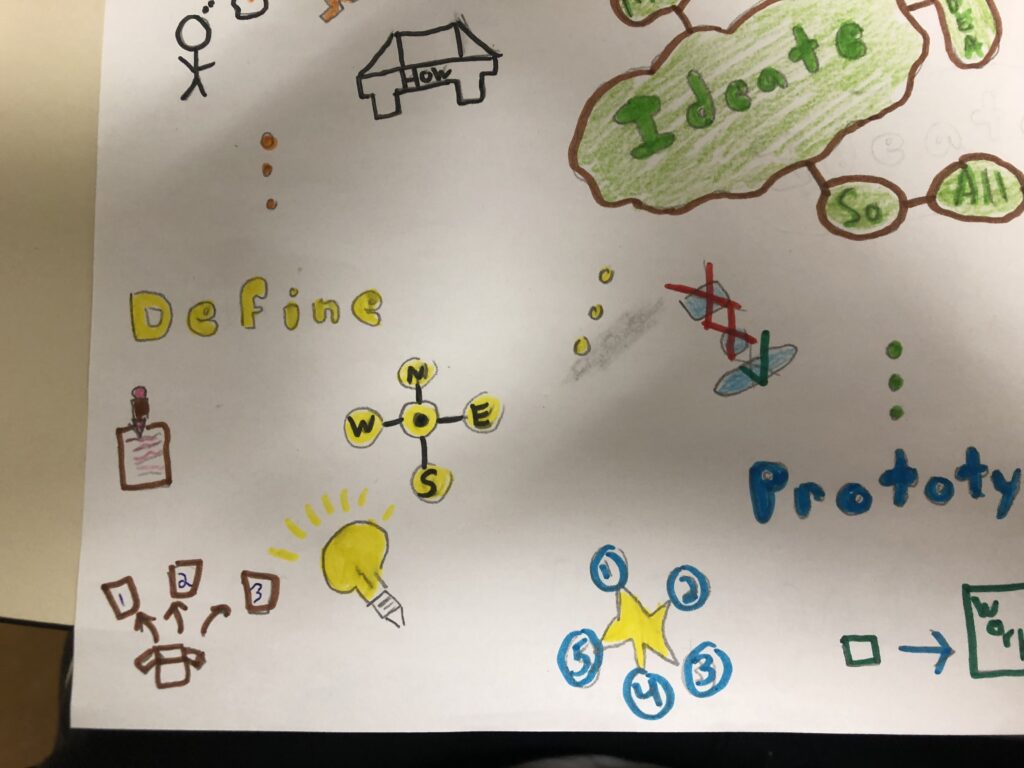
After reading the Technologist, I made a mind map to help summarize and organize the information. This module discusses the process that teachers should go through when they want to integrate technology into the classroom. As I read through the different parts, I felt that I would now know how to properly plan to integrate technology into the classroom. This guide helps take the guesswork away from know whether technology will be integrated successfully into a teachers lesson and helps restore the teachers confidence in their lesson plan. Educators will be able to implement technology to supplement student learning after reading this module.
Mind Map for the Technologist
I found that making the mind map really help me understand the information. Not only did I have to read all of the information, but the mind map caused me to have to find the key points and summarize the information into a few key points. I ended up drawing inspiration from sketch notes when designing my mind map. Since the module flows in steps, I decided to have my mind map direct the reader to follow the information in a specific order. I did this by including a guiding arrow in the background to show the reader to read the points in the clockwise direction. I also made the key idea clouds progressively change shades. I believe that this allows the reader to gain a better understanding of the order an educator should take when implementing technology into the classroom.
This module explains the steps needed to properly plan technology integration in the classroom. The first step is empathize, and this is where you need to evaluate the needs of the learners, and figure out what their needs are. The next step is define, which is a matter of finding what the challenge will be based on what you previously learned from the students. Once you figure out what the challenge is, you can move on to the ideate step. This is when the educator brainstorms ideas for what technology to use and how to implement it. The fourth step is prototype, which is where you need to do a test and see how it works. This is a great opportunity for feedback. Finally, the last step is connect. This is where the educator needs to make connections to the curriculum. A fun tech activity is only effective if the students learn what they are supposed to once finished. Following these five steps any educator should be able to successfully bring technology into the classroom.
The Technologist Module is a step-by-step guide on how to design, create, and then implement technology into a classroom setting. It outlines various methods that educators can use to utilize technology, and provides many resources that can aide in the creation/usage of a tech platform. To present my findings on the module, I utilized the artifact of a twitter essay.
1. Just as society has rapidly morphed and evolved as the information age has peaked, so to should education. As teachers, we need to incorporate technology into our classrooms to "keep up" with changing devices, platforms, and student mentalities. #uwindig#ontarioextendpic.twitter.com/aqopX3Tgev
I found twitter to be a very good format for submitting this essay style. It was good too be able to condense different parts of the module into individual, easy to read tweets. The format allows users to compartmentalize their thoughts, but still make one coherent thread. I find Twitter to be very simple, useful, and accessible. I will certainly be using Twitter in my future classrooms.
4. To accomplish this, the Design-Thinking model should be utilized. The model is primarily human centered meaning that the people involved in the design directly reap the rewards of the product or solution they create.#ontarioextend#uwindigpic.twitter.com/mEHenfi2Y1
In my personal opinion, I think the technologist module breaks up a process that is already internalized for the majority of people living in the information age. It reminds me of a game we used to play at school where we had to break down making a PB&J sandwich into the smallest, most specific steps possible (first, walk to your kitchen, then open the drawer, then grab a knife etc). The module seems to preach many unnecessarily specific steps making it occasionally difficult to read.
9. -subsequent ideas, captures the hearts and minds of users, and helps you focus on developing concepts and plans that meet the needs of the majority of the class. After you have identified the challenge, make sure it is written down. #uwindig#ontarioextendpic.twitter.com/Dnwgy3GLyr
However, I can understand that the module may be more beneficial for older teachers who do not have a solid grasp on technology. For the technologically illiterate the specific breakdown the module provides would likely be very beneficial.
11. At this stage, a technological tool should be chosen. Options include: Blogs, Curation, Audio/Podcasting, Digital images, Learning Tools, collaborative docs, screencasting, creating videos, and synchronous communication. #uwindig#ontarioextendpic.twitter.com/zh8bfF3SnO
I think that the best part of the module is the resources it provides. The program is very useful for bringing together ideas from educators all over Ontario. I will certainly be accessing the module in the future to utilize the plethora of resources on the website and possibly even be making contributions.
17. Congrats! You now have implemented technology into your curriculum. Your students will thank you for it. If your idea is especially great, share it on the module or tweet it using the hashtag #ontarioextend ! Thanks for reading! #uwindigpic.twitter.com/2nwP7Q24o5
Overall, I like the concept of the module and what it can do for teachers. It’s most helpful aspect is the collaboration that it provides. I will be gathering materials from the module for as long as possible.
For my final artifact, I decided to do a sketch note to show my deep dive into Technologist, written by OntarioExtend. I have never been an artist before, but nonetheless I wanted to try something new; something that all teachers can do. This module emphasizes integrating technology into the classroom while using the design-thinking process. Even though I didn’t use technology for my artifact, developing digital literacies is a process and reading this module is just the beginning.
My sketch note expands my thoughts into the design-thinking process. from finding out what is needed, narrowing the tool search to designing and connecting the technology with the curriculum.
Let’s start with Empathize; however before we can get going we need to understand that our tool or design will be used by other people. It is important to know what is needed before determining the task at hand. Challenges will arise, once we narrow down the search but that’s why we determine ways to work and fix them through(hopefully with technology).
Once we have the focus on what is needed, it’s time to narrow that search down. It’s important to start small and work you’re way up. Now that the challenge is identified, it’s time to lock in. If your first solution didn’t work then try adding technology!
It can be a extremely demoralizing trying to find the perfect technology tool, especially when there is always the new and improved tools being released each day. In the Ideate portion, of digital thinking we try and decipher between the perfect situation and what just simply works. In an ideal situation, you consider all the tools; however its not always practical so we try and consider a few before moving on to actually implementing.
After everything is figured out, it’s time to get working! Let’s put it all together with a real life prototype. Before teacher’s can use certain tools with their classrooms, it would be smart to do a little trial and error themselves. What better way to be an expert than by doing yourself? (I can now say I’m a semi-professional Canva user.) Prototypes incorporate designing, sharing and refining. We can’t be perfect without knowing what works and doesn’t work. The key to a good prototype is refining through the mistakes. Listen! Listen! Listen to all the feedback; both positive and negative.
Finally, let’s reflect and connect. Curriculum documents are the backbone of our lessons, as teacher candidates it’s important to establish reflecting and connection through these documents and our lesson. Learning goals can be taught and achieve in many different ways. As a future educator and a technologist, connecting technology and learning goals is just another way to ensure the student is learning and achieving all the necessary goals to be successful.
The infographic above was made using Canva. Ever since I learned about the platform, I wanted to experiment with its functions. For someone with little-to-no experience using editing software like Photoshop, Canva was a good step to explore my creativity. Creating this infographic was a healthy challenge for me and I think I will continue to use this platform for other projects.
This was the first time I had ever been introduced to the Extend Ontario modules for educators, and I was pleasantly surprised at its simple format and accessibility. Of course, what else can you expect of a site that aims to promote technological integration?
For this part of the course, I decided to explore the Technologist module in-depth. As a student, I was often taught using the traditional lecture-style method: teacher talks, words are on a board or a screen, and students copy. I found myself falling into the same pattern during my first practicum, so I wanted to use this opportunity and see if I could glean anything from the module for myself.
Boredom in the classroom, as illustrated by Spongebob
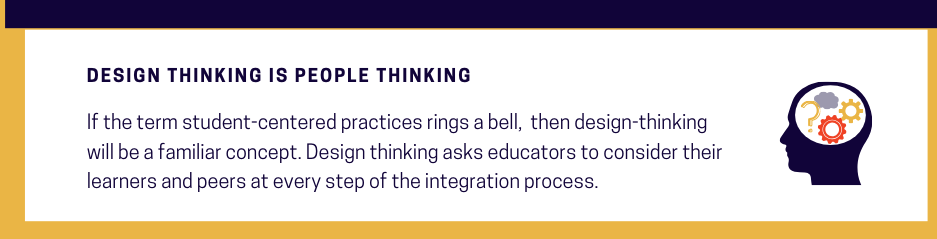
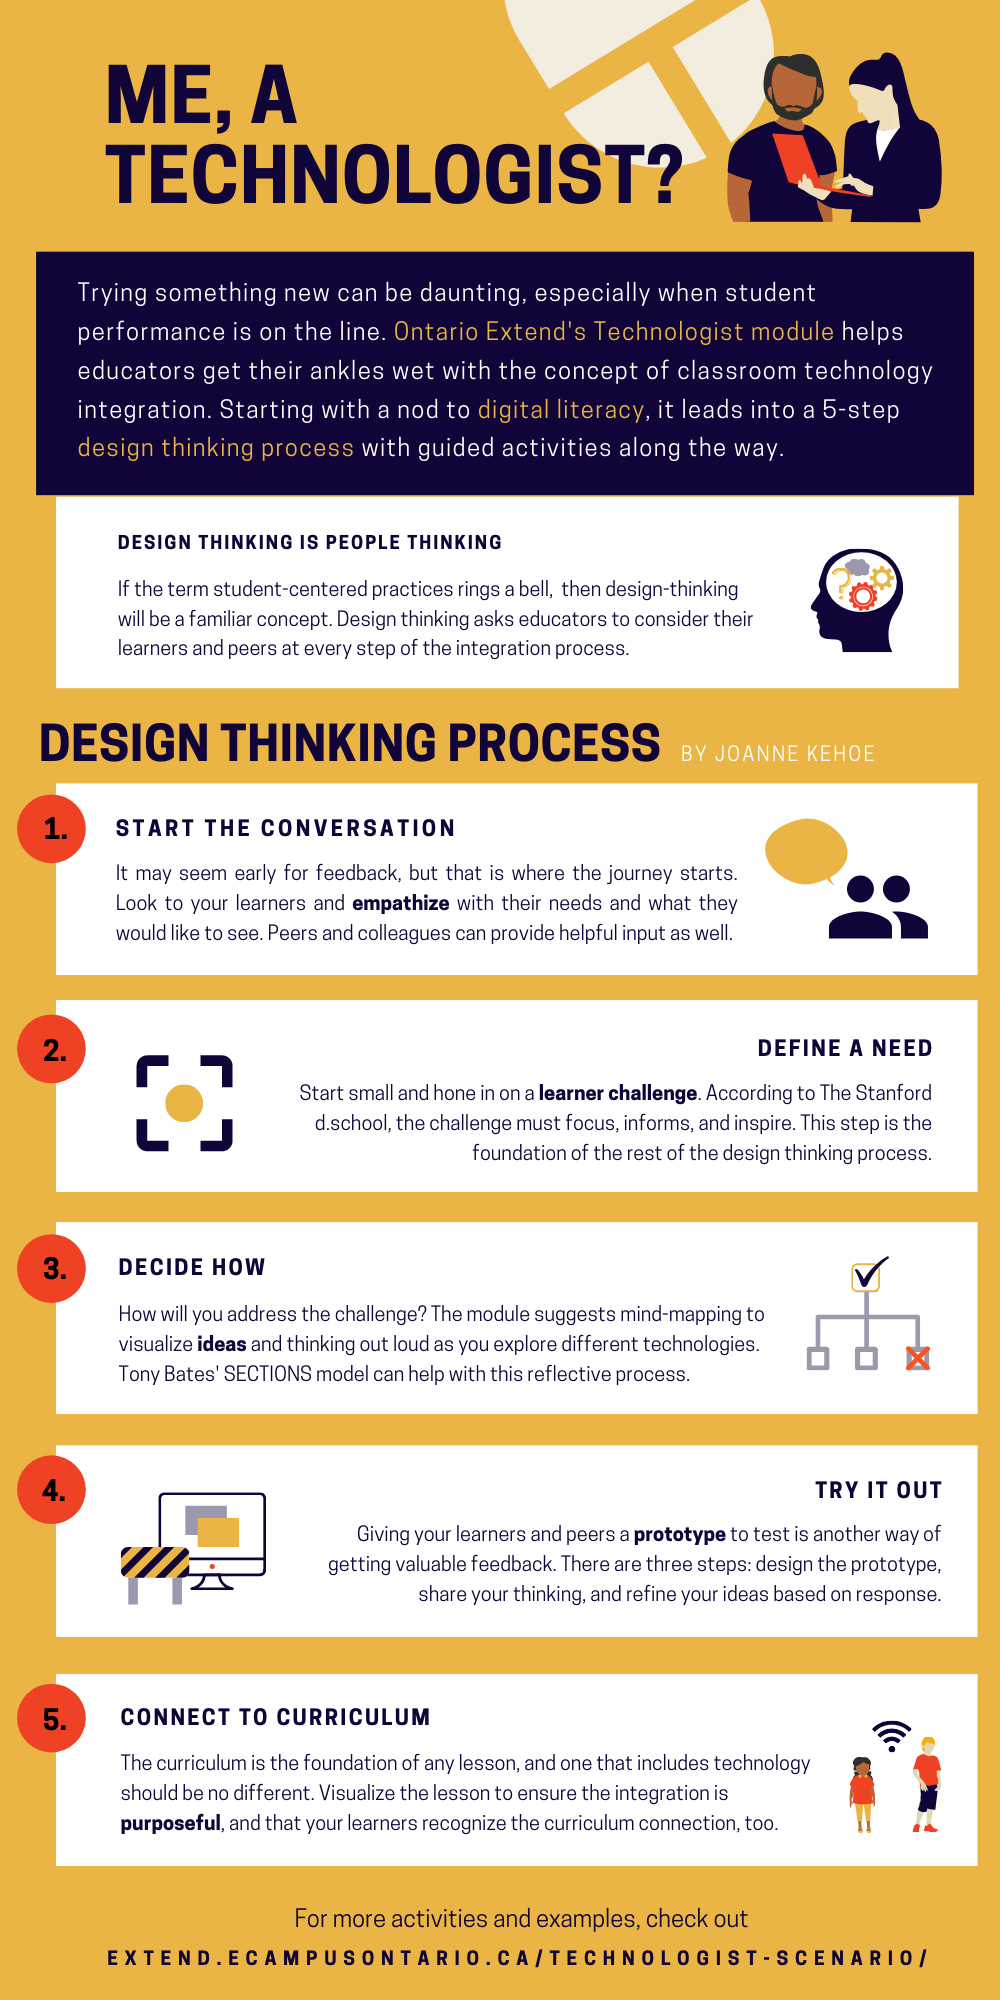
The main message I received from this module was that every step of a technology integration initiative should involve those affected by it. As I mention in the infographic, there are clear parallels between Extend Ontario’s definition of design thinking and student-centered practices. In other words, how teachers use technology in the classroom is intricately tied to constructivist views of teaching and learning. Because my own teaching beliefs are also centered on how students construct their own learning experiences, I found the module easy to follow.
Snippet of my infographic: design thinking is people thinking
The module pursues one design thinking process – empathize, design, ideate, prototype, and connect and test – but it is not the only pathway. An embedded link to UXBeginner.com describes several design thinking methodologies and their associated terms. The particular process used in the module places a strong emphasis on feedback and reflection at each of its five steps. If there is one thing I have learned so far during my time as a student teacher, it is that reflection is the cornerstone of personal and professional development. The Technologist module taps into this concept in a very practical way by including Extend Activities at the end of each design thinking step. Every stage is part of a work in progress, and educators should not expect perfection after a single try at technological integration.
An example Extend Activity from the ‘Ideate’ step
One thing I would like to see in included in the Technologist module is educator testimony about how the module has helped them. Similar to how different products and services include customer interviews in their promotions, anyone new to the world of technological integration may gain reassurance learning about the experience of those who have been through the wringer. Although the module includes embedded links to various digital collaboration platforms, such as a Learner Challenge Bank Padlet, using photos or a video provides a more personal connection.
After all, making a personal connection is one of the key ingredients to a successful educational experience. This is why ‘people thinking’ is so important in the Technologist module and in all other aspects of classroom pedagogy.
Thanks for reading! Cheers to you, people educator.
In this post for #UWINDIG2020, I will dive into the Technologist Moduleby Ontario Extend. This resource is a form of open education, which allows us to interact with Professional Learning Networks (PLN’s) and gain knowledge from free, collective resources made by educators, for educators, around the world. By writing this blog post, I hope to contribute something valuable to this PLN, and learn how to be intentional with my technological choices in the classroom.
(1) Welcome students and educators! Today’s discussion is on digital literacy in the classroom. Stay tuned as I reflect on a Technologist Module from #OntarioExtend. We all love a good Kahoot, but I’m learning how to take technology further in my teaching. #UWinDig2020. pic.twitter.com/7ZXGMiSo0t
I chose to develop a Twitter Essay for my offering, which was a surprisingly difficult process. As an avid twitter user in my youth, I thought it would be easier to formulate coherent tweets in 280 characters or less, with appropriate visual additions. It’s safe to say I was wrong. However, I had fun with it, and found myself laughing while picking from the culturally-relevant GIF’s.
(3) The core principle of being a capable technologist in the Education sector is Design Thinking. Educators can act as innovators, centering their design process around their students to collaboratively engage learners! Take a look at the process. #OntarioExtend#UWinDig2020pic.twitter.com/68UryTBEBb
The Design Thinking process was easy to follow, and is a good addition to the SAMR framework proposed in class. Design Thinking focuses on being learner-centered and receiving feedback along the way, while ensuring that learning outcomes are still being met. Thus, the new, carefully-curated technological offering, is likely to be a Modification or Redefinition of a previous task. The point that stood out for me here was empathizing – responding to the real needs of students.
(4) Don’t you hate when your school implements an initiative that you didn’t want or ask for, instead of something that was much needed? Me too. That’s why the first step for every teacher, for every lesson, should be to empathize with our students. #OntarioExtend#UWinDig2020pic.twitter.com/nQ70PZxi45
Most of my classmates (and teachers) have heard me express my own frustrations with educators and administrators failing to listen to the needs of students. Frivolous projects that students did not ask for (cough, Math Proficiency Test), are unfortunately prevalent in our Education system. That’s why I was so glad to see Ontario Extend thoroughly involve learners in the design process. This can be accomplished by completing an empathy map, which is often used by entrepreneurs for new business ventures. I completed one of these in a Creative Entrepreneurship class that I took, but have never thought about their affordances in education before!
An Empathy Map from Solutions IQ that’s a little cuter than the one in the Module (because I’m Type A).
(6) The next step is to define your learner challenge. This can be difficult – it requires admitting you are not a perfect teacher! Get excited about a challenge that most of your students are captivated by. And remember – you can’t please everyone. #OntarioExtend#UWinDig2020pic.twitter.com/pljDY5rZvP
Defining a learner challenge requires educators to admit that there may be better way of doing things. This may be the hardest part for most educators, as many remain stuck in their ways. They also may not see a need to change their format if content is getting covered.
“If it ain’t broke, don’t fix it”
To me, the first indication that change is needed is that students are bored, unmotivated or restless in a class. The students in my first practicum class (Grade 11 Chemistry) seemed disengaged from their learning, but I felt hopeless about how to meaningfully integrate technology. If only I had this module sooner!
(8) We made it to the exciting part – ideating! Get your coloured pencils out for the first time since Grade 6 and begin to imagine your possibilities. Or, if you want to get techy, my personal favourite platform for mind-mapping is Google Coggle. #OntarioExtend#UWinDig2020pic.twitter.com/hpZldHbao9
Ideating using mind maps is important, but (hopefully) most educators have been using this concept for the duration of their career. How else would I get through this multimedia reflection?
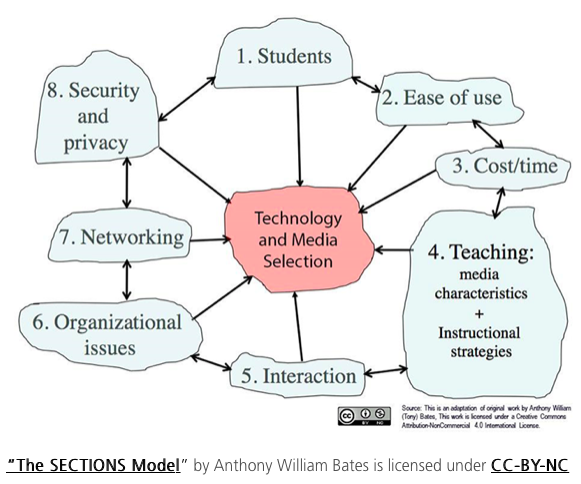
The real task is picking an EdTech tool that works for your learner challenge. In class, we discussed considering the affordances and implications of different platforms. The tool should also be appropriate to the task at hand. Dr. Tony Bates describes criteria to consider in a concise way in his SECTIONS model below.
Next, educators develop a Prototype of their technological offering, and Share it with students. Again, I love that students are centered at every point in the design process since they know best what’s right for them.
(11) If you’re confident, it’s time to Share your prototype with those it was made for. My students can be brutally honest, but this is a positive thing when it comes to prototyping. After receiving feedback, you can integrate it into your creation. #OntarioExtend#UWinDig2020pic.twitter.com/Tyb19dcLjp
The Module ends by directing educators to set a clear path for students to navigate the technological tool, and relating the activity back to the curriculum. At least for me, this part seems the most straightforward, as I’ve frequently practiced giving clear directions and detailing curriculum expectations in my lesson plans.
(14) I hope this thread helped you understand a bit more about Design Thinking and the process of using Technology to reimagine classroom activities in a learner-centered manner. As a community, educators should be constantly striving to learn more. #OntarioExtend#UWinDig2020pic.twitter.com/AN56tO8Ys9
Overall, I definitely learned something about education, but I mainly realized the major links between digital pedagogy and digital entrepreneurship. Creative offerings for businesses require the same basic processes – maybe the Faculty of Education should start teaching business classes!
If you want to see more of my tweets, you can find them here.
Good evening everyone and welcome to my second and final multi-media reflection for #UWINDIG2020. Technology has evolved tremendously over the past 20 years and we can only expect it to grow more and more. From parents to educators, even youth themselves, there is concern that technology may be negatively impacting our students, children, and youth altogether. Though, as educators, we must take it upon ourselves to do what we can to stay on top of how technology is growing and use it to our advantage. Forcing it out of our classrooms is not the way, we must embrace it as it is the 21st century!
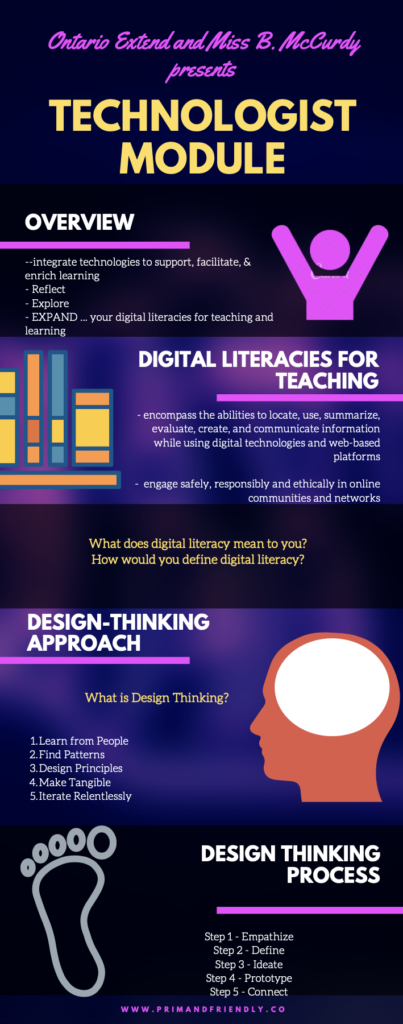
After closely inspecting what the Technologist Module has to offer I began to pick apart the key points, summarize, and incorporate it into an infographic, using the one and only, Canva!
Full Canva – Part 1 Full Canva – Part 2
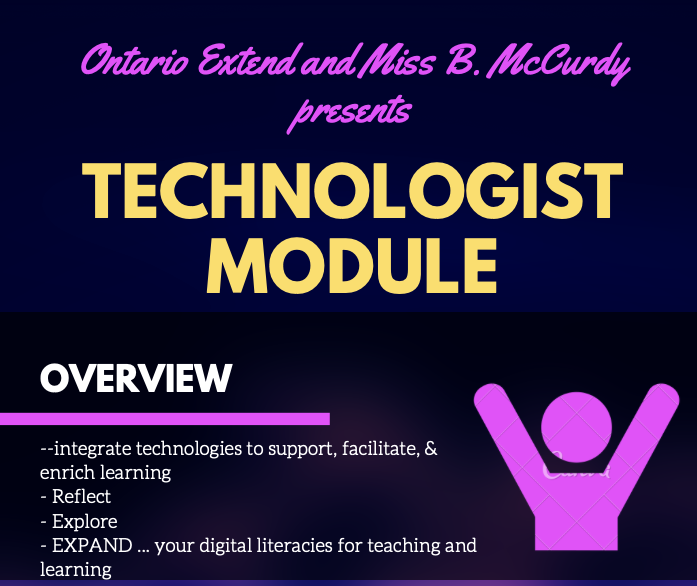
To begin, my infographic provides an overview identifying what the module will provide, touching on how we should be reflecting on our current digital literacies, then exploring how we can use these/new digital literacies to our benefit and our students, more specifically to address learning challenges in particular, then expanding our digital literacies by using the SECTIONS framework, as well as tech-based learning activities for a more “design-thinking approach.”
Overview
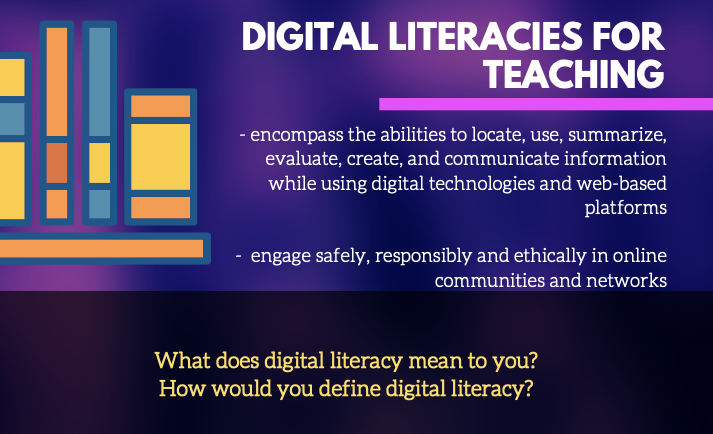
We then move onto the “Digital literacies for teaching” section which considers incorporating technology into our classrooms using multiple digital literacies. As well as touching on how these literacies “encompass the abilities to locate, use, summarize, evaluate, create, and communicate information while using digital technologies and web-based platforms.” As well as providing insight on how “to engage safely, responsibly and ethically in online communities and networks.” This section goes on to provide websites that define digital literacies in more than one light, so we can all reflect, explore, and expand our digital literacies.
Digital Literacies for Teaching
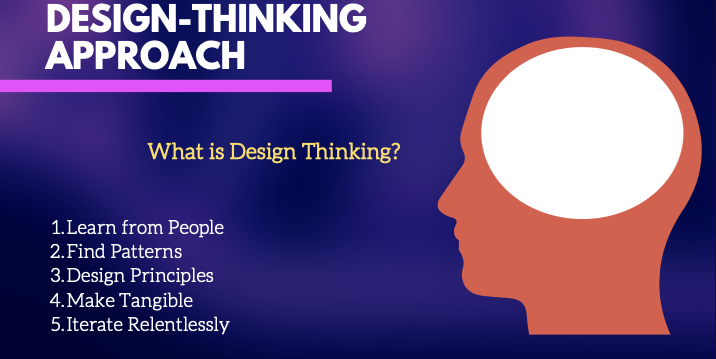
Next, we are introduced to the “Design-Thinking Approach” which outlines the 5 key elements, which I explain using the youtube video “What is Design-Thinking (2015)”.
What is Design Thinking (2015)
Learn from People – talking with students, hear their motivations, habits, their likes, frustrations – research shows that active kids and the sedentary at their extremes are good at giving voice to the problems that those in the middle might feel but experience more difficulty identifying it.
Find Patterns – identifying similar patterns in students learning habits can be beneficial to use to engage students in future learning.
Design Principles – “facilitate social interaction at all times”, “boost rewards early to increase adherence”, “motivate family activity, not just kid activity”, “devote special attention to stay-at-home kids.”
Make tangible – creating an accessible way to apply these design principles to specific ideas
Iterate Relentlessly – create new ways to engage students and youth
“Design thinking is a powerful tool to reveal new ways in thinking and doing”
Design-Thinking Approach
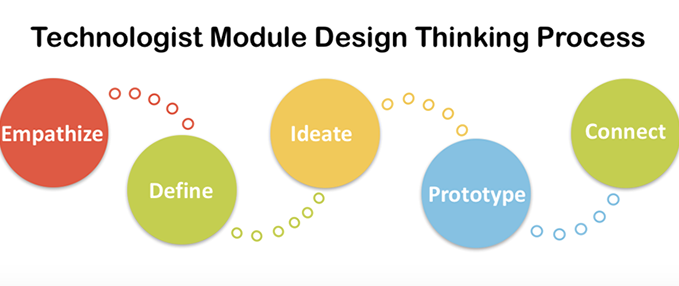
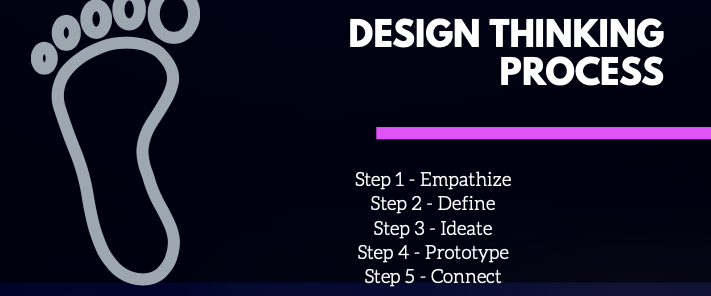
Following the design thinking approach, we are introduced to the “Design-Thinking Process”. Which is identifying in 5 steps: Empathize, Define, Ideate, Prototype, Connect.
Design Thinking Process
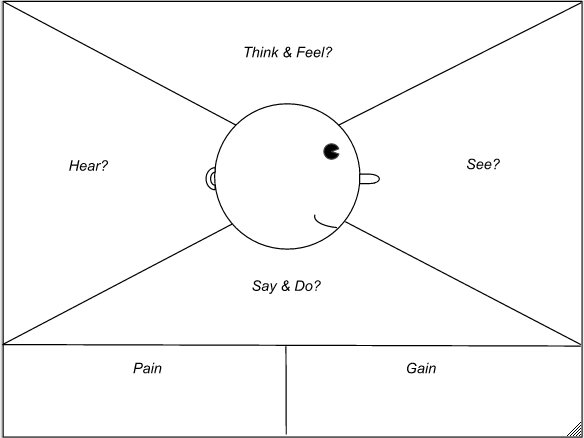
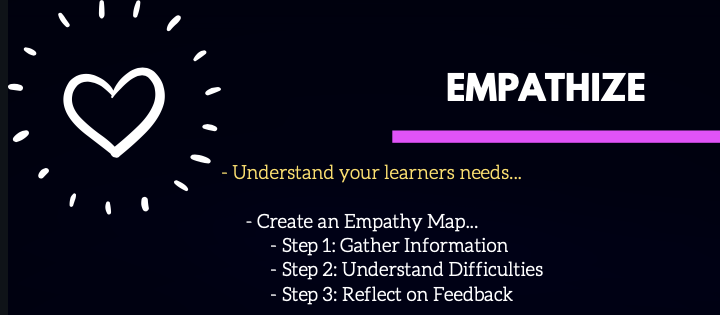
The empathize section of the module identifies how to understand how to effectively design something that will be used by someone else, you must first put aside your own desires and focus on what the other needs. This can be accomplished by introducing the Extend Activity where you can facilitate an Empathy Map using four simple steps…
First, to gather information about your students, this can be done in many ways from evaluations to conversations! Secondly, communicate with your students to understand what they have trouble understanding and/or doing in your class/course. This can be achieved by asking students “what do you think, feel, say, do, see, and/or hear?” The third and final step of the empathy map activity is where you should reflect on the feedback you have gathered and create a physical copy of the map itself for an artifact.
Step 1: Empathize
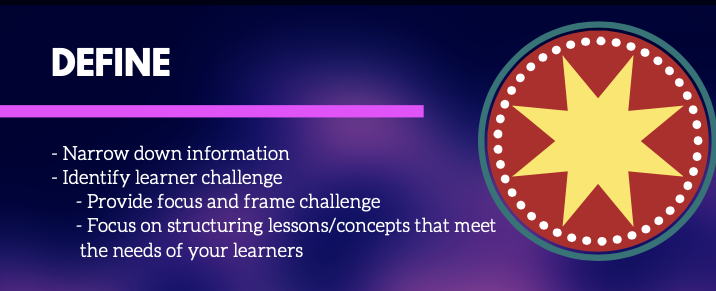
The empathy map activity can be used here to identify patterns in challenges your learners’ experience and common themes for ways to engage them to boost their learning experience as well as refining information they may have struggled with. The next step of the design thinking process (define) is to use the information we have gathered in order to put together and identify a plan for what you can do to support your learners and their specific learning challenge.
Step 2: Define
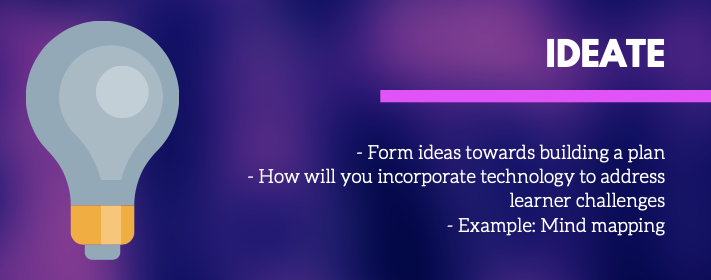
We then move onto the ideate step of the design thinking process where we take everything we have explored, gathered, and identified, and put it towards forming and building a plan where you can incorporate technology to address the learners challenge and how it can be broken down to be better understood.
Step 3: Ideate
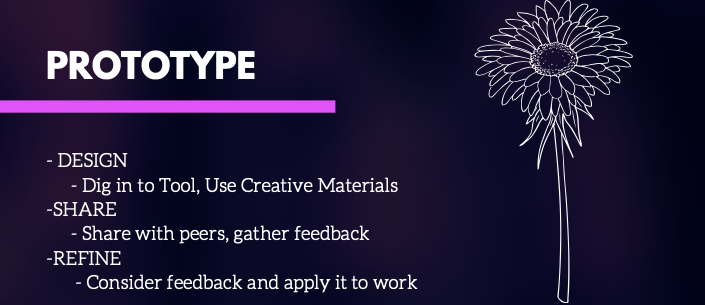
The prototype step is where we take all of the steps from empathizing, defining, and ideating to come up with a final product. This step is important in applying everything we have learned and considered and putting it into effect. There are 3 important steps to developing an effective prototype…
The first being DESIGN, here we must “Dig into the Tool” where we consider how this tech tool can be effective and not effective and where we have room for improvement. The module mentions that it is important to keep in mind that not all tools are going to “solve the learner challenge entirely.”
The second is to SHARE, this is where we take our prototype and share it with others, gather feedback on what did/didn’t work, what questions there may be, or things to consider for your prototype in regards to other learners.
The third is REFINE, this is an important step where you can take a step back to not only view your final product but view it through multiple perspectives thanks to your peers to build a more efficient and effective creation that best suits your learner(s) challenge.
Step 4: Prototype
Now as we come to a close, we mustn’t forget the importance of the curriculum! Isn’t that what we are all here for anyway? Take a step back and look at your tool overall and consider if and how it is relevant to the learning goals you wish to obtain and be sure it connects back to the curriculum. We should also consider all of the parts of our tools, how they fit together and flow in order to be efficient and effective.
Step 5: Connect Module Checklist
Overall, I feel that I enjoyed creating a Canva to educate myself and others on the Technologist Module, it was a creative and effective tool that I can see myself incorporating into lessons in my classroom in the future. As for my first multimedia reflection, I had created a sketch note which was fun, as I had the opportunity at expressing my creativity, though it was more time-consuming. Using Canva I had the opportunity to apply my creativity in a time-efficient manner which I can imagine would be more efficient in the classroom.


