Category Archives: (12) 5332

Use this method to address learner needs!

Technologist Module: Design Thinking

By: Allison White

For this artifact, I decided to try using Canva. I had never used it before and was really impressed with its affordances. It was really user friendly so navigating through the tool wasn’t too difficult.

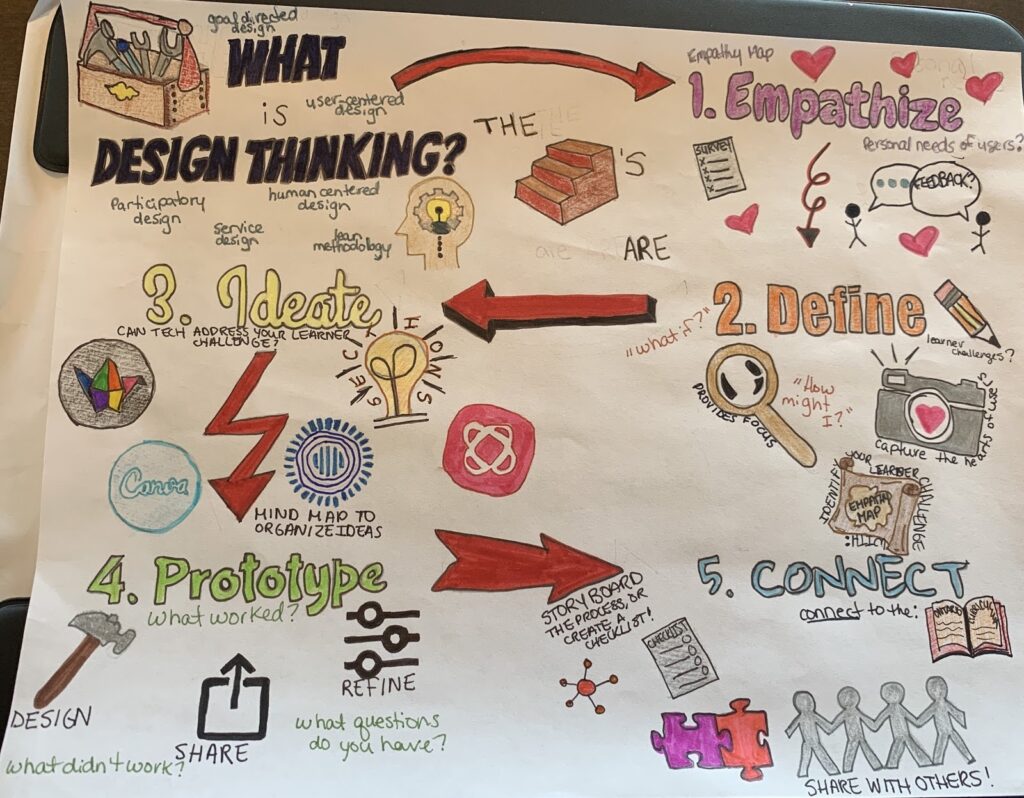
Being able to use Canva to represent the module was really useful. On Canva, I was able to explore templates that I could modify to fit what I needed. The template I chose represented a five-step model, exactly what I was looking for. My end result turned out to look like this:
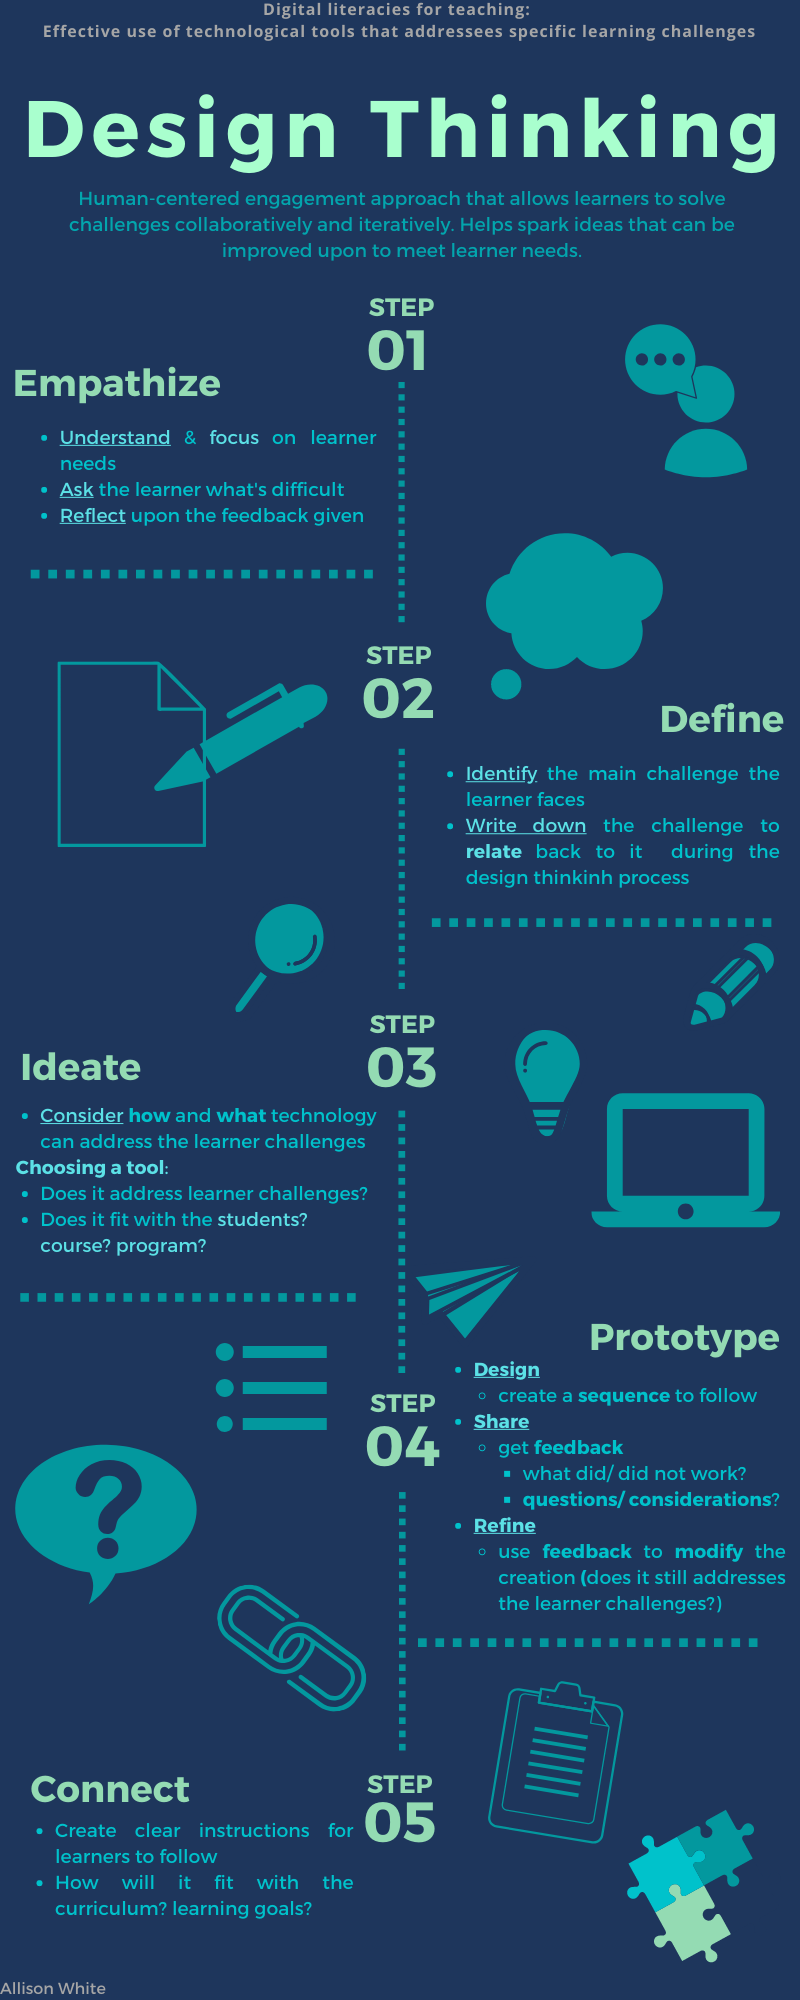
The reason I picked this ‘five-step model’ is because as I was exploring the Technologist Module, I noticed that it was dividing into many different sections. After looking at the sections and doing some of my own exploration, I realized that the first few sections were an introduction that included definitions and overviews to the first few sections; Digital Literacies and Design Thinking.

Here is where I began to understand the main idea of this module: using technology as a way to address learning challenges to support and facilitate student learning. This process seemed very complicated. How does one do that when they don’t have any idea where to start? This is where my step-by-step model reflects the module. The last few sections of the module is the broken down process of implementing this main idea. It’s in the order that one must follow to effectively address learning challenges with the use of technology.

Although the main focus of my Canva was the process required to address learning challenges, I still wanted to incorporate the other ideas of the module as well.
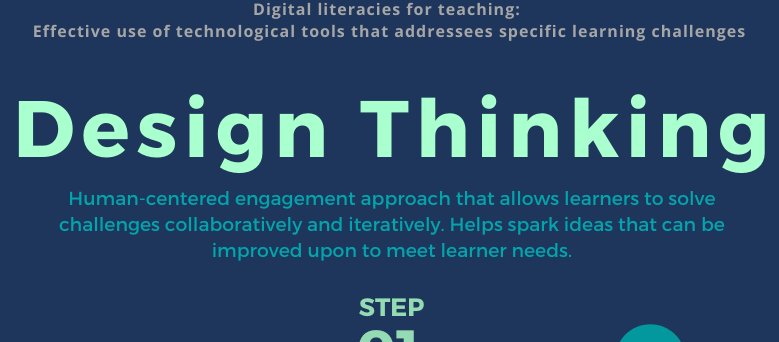
At the very top, almost hidden, I included what digital literacies for teaching are. This is a reflection on the main idea. The section in which this part is found is under the Digital Literacies section, but since this is an educational approach, the teaching definition is the most pertinent. This is purposely placed here because after looking at the infographic as a whole, one shoul notice the title as well as the subtitles first, and be able to figure out what exactly is going on. By looking at the smaller details if whoever is reading is still interested, they will find more information as to what this is about. I also find it important to have the main idea stated somewhere on the module without taking the attention away from the modules explanation of the process.

Underneath the “Design-Thinking” I included its definition. This ensures that the one reading the infographic knows what I’m talking about and what the steps I have included describe. This definition also describes what exactly the user of the infographic is looking to do when creating their project. (It’s almost like a makeshift learning goal that someone can relate back to to make sure that what they are doing is still connected to the main idea).
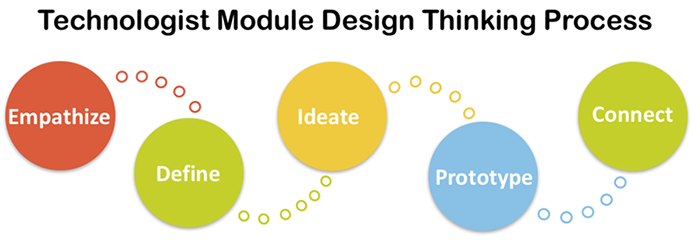
“Technologist Design Thinking Process” by Joanne Kehoe is licensed under CC BY 2.0

I found this step-by-step process to be very interesting during my exploration of the module. Throughout it, there are plenty of opportunities to be creative, but in the “Ideate” section, there is ample resources that can be used to create. This is the main section where technology coincides idea creations. Some of these tools include: mind mapping, Prezi, Padlet, or even a Canva. Tools that are able to be used for multiple disciplines. The possibilites are multitudinous as long as the creator knows what to do. A great example is this Canva that I made. This infographic is an easy to process for teachers to follow a to integrate digital literacies in teaching.

Before choosing the tool, its important to look at different tools and explore them all to see if one fits best to address the learner challenges. For example, when I was deciding on what type of mulitmedia I wanted to use for this assignment, I had to think of what key ideas I wanted to represent; so, I made a mind map. Then I was able to look though the different tools available to best represent the main points of the module.

For teachers looking to integrate technology to reach learner needs, this SECTIONS chart is very useful. It looks at all the aspects that could be deciding factors when choosing and designing for the creation. All of the connect to the big idea by giving one a guide to selecting the most appropriate tool.

Some of theses chart ideas are are self-explanatory or can be inferred upon to reach an understanding of the idea such as: cost/time, ease of use, networking, organizational issues, and security and privacy. A lot of these ideas are broad and need to be narrow down to figure out exactly what each section means. This is a model of the design step, taking a big idea and looking at it from a narrowed down perspective.
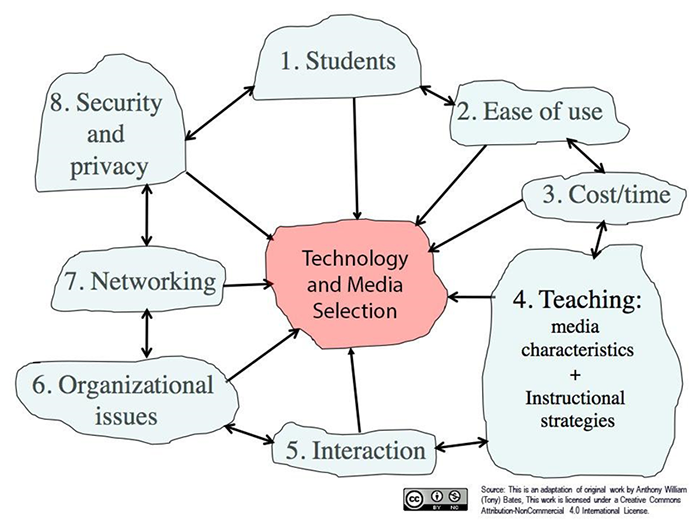
“The SECTIONS Model by Anthony William Bates is licensed under CC-BY-NC

Others may be more difficult to understand like the teaching section. Here we look at the elements of the module that the teacher needs to decide upon and how the elements will be implicated to best facilitate teacher learning. Even looking at the interaction section, educators need to consider how the students will interact with the creation, how the students’ interaction with the teacher will be affected, and how the students’ interactions with each other will be influenced. This relates to the students section which focuses on prior knowledge and student demographics as well as what the needs of the students are. Is this tool going to meet those needs?

One of the things that I found to be very useful while exploring the module is that it is very educational and tests our abilities to understand what is being explained. At the end of each section, there is a task (Extend Activity) that we are supposed to do to give us an interactive way to apply our knowledge. Following the sequence that is designed for us is essential to complete the module as one Extend Activity branches from the previous one. This sequence following idea supports what the model is telling us. Under “Design” in the “Prototype” section, it states that to make and create an effective tool, a sequence is needed for the users to follow and understand what is required of them. Then, after sharing the creation with others such as the students, obtaining feedback is essential to refine the creation to make it as effective as possible
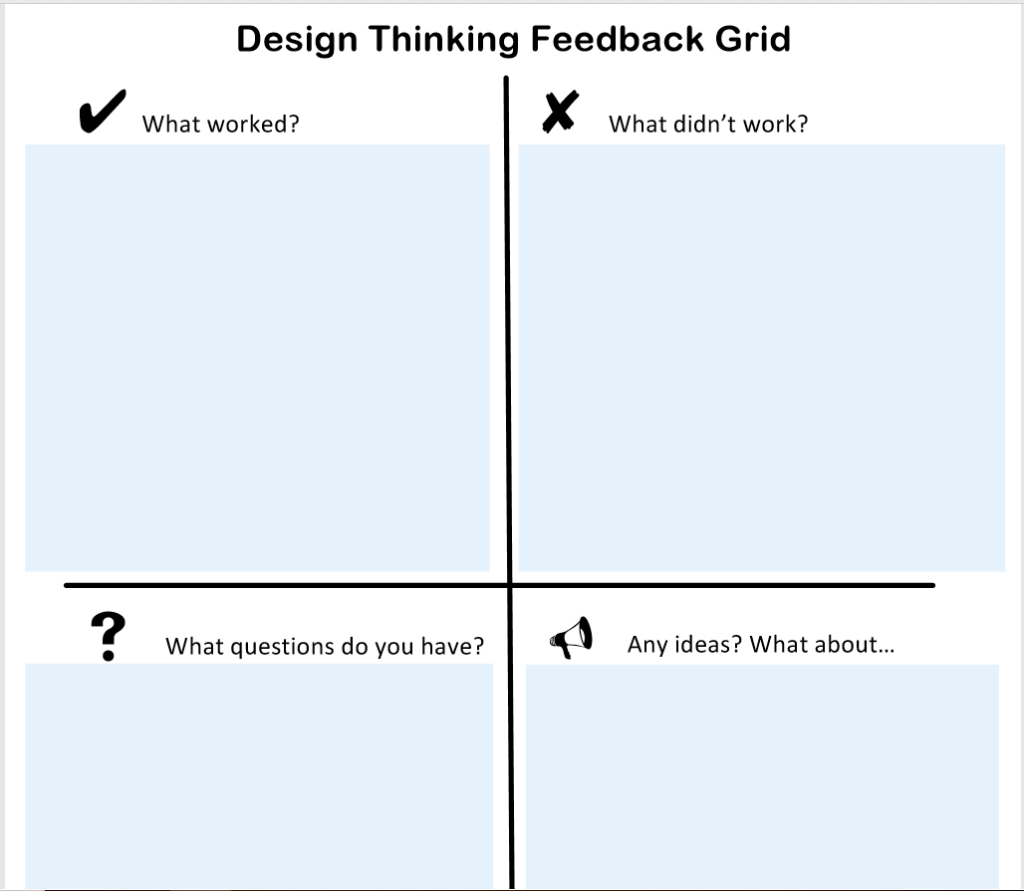
https://drive.google.com/file/d/0BxF8aYjMEXepZlhJYXEtTFgweGc/view

I applied this attained knowledge when creating my Canva. Although it is not necessarily what the module described the final outcome to be, I considered its suggestions and ideas to implement something that I could create. I applied the sections model in my design (specifically the media characteristics) and I continuously refined it until I got a final product that I was proud of.

Making this was a fun new way to express the main idea of something. I added little things in my Canva that may not be noticeable at first, but do help people subconsciously know what I am emphasizing. I bolded and underlined certain elements that I found to be most important and I even slightly changed the colour of some words to make them look slightly brighter. I didn’t want to take about from the flow of my creation, but these little tweaks will stand out more to the reader, even if they do not realize it. I created mini focal points throughout the Canva to reflect on my main focal point: Design Thinking.

I did a lot of thinking about my design. What colour choices should I use? How do they connect together? I always picture technology with neon greens, blues, pinks, and yellows. The colours that coding used to consist of with the dark screen in the back. That was my inspiration in the colour choices, using something that feels familiar to me and will feel familiar to others. A lot of what we create is a reflection of what we know and others appreciate it because of how inviting it is. I used these colours to try and connect with others who are looking to explore and create their own technologies.

I also thought of technology and what makes technology interesting… How else could I reach a bigger audience with this? As time consuming as it was, presentation and representation are really important when trying to connect with a bigger audience.

Being able to connect with others is essential to creating a good technological tool, they need to be able to understand what they are learning and why they are learning it. What it has to do with the curriculum and why it is effective.

Overall, technology is always evolving and as educators, we need to evolve with it. Technology use should not be a seen as a replacement for traditional teaching, but as an innovative expansion on teaching that allows educators to address learning challenges in new ways so that the learners are able to benefit to the best of their abilities.

Change by Design

Technologist Module Design Thinking Process

“We can’t solve problems by using the same kind of thinking we used to create them” – Albert Einstein

Image result for design thinking

My final response is a reflection on  The Design Thinking Process. I chose to go with a mind map as it is short and straight to the point, and serves the broadest range of students with diverse needs.  A mind map is both interacting and engaging and provides multiple means of representation. I thought of the target audience and saw it best to use a simple and straightforward approach that makes the entire idea easy to understand and relate to. 

Mindmiester

I first thought of this idea as I was walking through campus a while back. It is true that a majority of students at any university are average at best, only a few of the students are ever actually brilliant and get all the top grades. The video entitled “The End of Average?! Disrupting the green of education.”   gives an idea of the skewness of the educational system and why so many students are deemed poor and below average. Everyone is different and each of us has a unique learning style. This implies that the learning process should be  personalized to suit individual needs. 

Image result for design thinking

Design thinking is the form of design methodology that is centered on finding solutions to everyday problems. It is specifically useful in solutions to complex and undefined problems that may not have an orthodox solution. This method works by incorporating numerous group brainstorming sessions in an all out, hands on approach geared toward prototype perfection. Understanding the core principles of design thinking could help in complex problem solving in a wide variety of problems and issues. In addition, this process is beneficial to all types of learners.

Empathize is the first step and always entails empathizing with the problem at hand in order to gain a better understanding of the problem. This could be through consulting experts, observation, and engagement to gain a feel of intent and motivation. 

Define stage involves compiling the data from the previous stage. The observations recorded are used to develop a problem statement that defines the core of the problem. 

The brainstorming and ideation stage is vital in the entire process. Here ideas are generated by the collective. At this point, the problem is well defined and the problem statement provides a guideline for idea formulation. These ideas are geared towards solving the problems identified at the earlier stages. This stage is followed by prototyping.  Here, inexpensive and scaled down models of solutions may be developed to test the effectiveness of specific modules. This stage aims at finding the best solution to the problem at hand. 

 The testing phase puts probable solutions in testing and generates working solutions.

Image result for design thinking

I believe that the design thinking process has endless positive gains. It simplifies the learning process making it easier for almost any student to internalize concepts easier and retain them for longer. Instructors using this concept could make their lessons more effective in the long run. 

Four steps to a Personal Learning Network!

Four steps to a lifetime of continuous learning and collaboration!

Many Teachers that have been teaching for a few years have a network that consists of limited professional connections outside of their discipline of teaching. In Ontario Extend the Collaborator module gives four steps that one can follow to create or expand their Personal Learning Network, PLN. 

Working with Powtoon

4 Steps to a Personal Learning Network

I decided to analyze the Collaborator Module of the Ontario Extend in the form of a Powtoon 3 min video. Although I am a visual person and often enjoy presenting information in the form of a presentation, poster or sketch, I was completely out of my comfort zone creating a video to present my ideas. What I found most challenging using the platform was deciding how much time is enough for each element of the video. Even though the Powtoon video is only 3 minutes long, a lot of time went into creating it. I found the platform to be very user friendly. I really enjoyed the process of creating the Powtoon video and found the platform to be a great tool that is creative and interesting. 

Step 1: Explore

In the Explore step of the collaborator module a professional must ask the most important question of all, the “Why?.” Why should anyone go through the trouble of collaborating? Why should you make an active effort to create a personal learning network? Teachers can use their PLN to learn from people that are exploring the teaching profession from a new or experimental perspective. They can get advice and share ideas with one another, and most importantly they can create and collaborate together to build projects that they would not be able to do on their own. The video Where Good Ideas Come From by Steven Johnson explains that networks are needed to develop, spread and explore ideas.

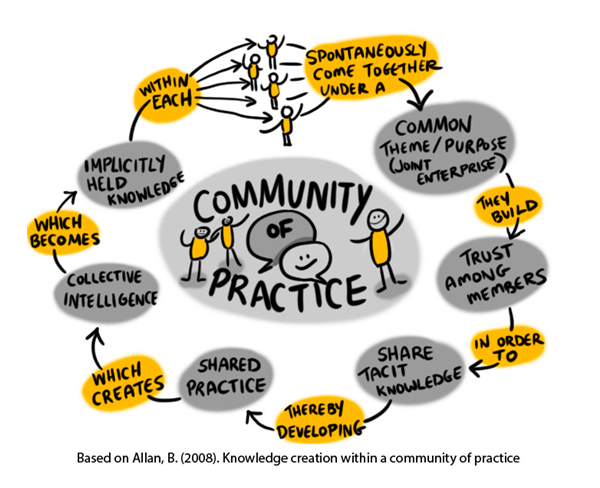
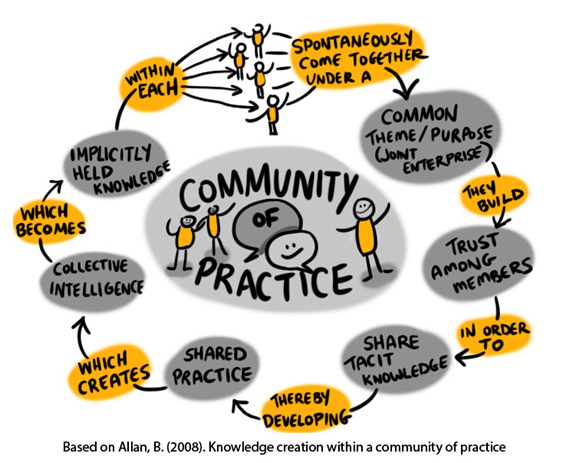
In addition, the idea of communities of practice is also explored in this section. A community within a focused area where individuals learn together while sharing strategies, tools and resources. In my undergraduate years of study learning was a very individualistic endeavour, however this practice of learning is limiting in a real world workplace. In my personal experience, I am always trying to expand and develop my PLN, I think of my PLN has helped me in many areas of my professional life, becoming a teacher, and personal life, becoming a parent. The “Why?” for me is very clear the Extend Ontario module does a good job at answering that question too. 

Step 2: Engage

In Extend Ontario the second step of creating a PLN is to “engage”. Teachers must figure out what their personal interest are, who is an expert in that particular field and must connect and engage with these individuals. The PLN is firmly based and organized around personal or professional learning interests, that are unique to the particular person. The teacher must determine the direction of their own learning and mindfully build the PLN that is most useful to them for personal and professional growth and understanding in an area that interests them. Here the theory of connectivism is also explored. Connectivism states that learning can be a socially connected process where you connect different ideas online, build upon them and add your own perspective while improving and deepening your understanding through the PLN. In my personal experience, I do this all the time through multiple social network platforms like Facebook, Instagram and Twitter. At the beginning of this year I was completely unaware of many resources that are available to teachers. Through my PLN I have discovered and used many wonderful resources that will improve my teaching and help me throughout my career. 

Step 3: Extend

Extending and cultivating your PLN should be an ongoing process. In this section of the module there are two concepts that are explored, one is the importance of connecting with your network in the common gathering place for your discipline and joining conversations there through contributing ideas, engaging with others’ work and giving and receiving feedback.

Filter Bubbels

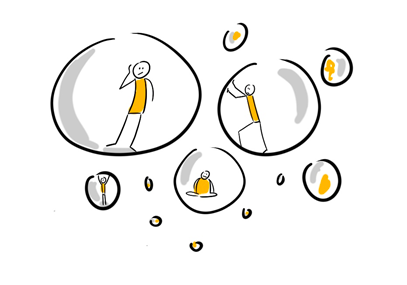
In addition, this part of the module also explores “filter bubbles” and the importance of connecting with people that are influential but might have an opposite view from yours. It is important to make these connections so that your PLN is diverse, and you encounter ideas that will challenge your thinking. I have experienced the “filter bubble’ before, especially around social issues. I tend to follow very liberal thinkers and I have been often shocked to find out how much support many conservative ideas have around my community. I now consciously make an effort to burst my own filter bubble so I can have a more balanced view of many issues. 

Step 4 Empower

Map your PLN!

Empower yourself by creating a map of your PLN. Creating a map of your PLN will give you a fresh view of your connections and will help set goals regarding the direction you would like to extend your PLN.  Although I have never set down and drawn a map of my PLN, I am constantly seeking and exploring networks based on my professional and personal learning interests. I find many of the questions I have on a topic have been already explored in online communities build around those topics, and my learning exponentially grows once I join a community focused on a topic of interest. 

Tagged ,

What Will You Share Next?


Join the conversation by using the colloborator module

As educators were constantly on the rise of exploring new things not only to better our knowledge but to extend and grasp the knowledge of our students. We all have different skills to offer and different literacies that were going to learn. From a pedagogical point of view, it’s very important to have that open education for everyone. With the collaborator module we can do just that. This module gives not only educators but individuals with the same interest the chance to join this sort of network and collaborate on new information. Having this technology and social media platforms give the creation of PLN’s.

I created this Powtoon to give a brief explination of what this module actually is and how we incorportate these PLN’shttps://youtu.be/_azHqgT7IxQ

A PLN stands for Personal Learning Network. A network is based on different sorts of resources all coming from one center we can call it and they telecommunicate between each other to collaborate. There’s this really good book written by David Weinbergur called “Too Big to Know: Rethinking Knowledge Now That the Facts Aren’t the Facts, Experts Are Everywhere, and the Smartest Person in the Room Is the Room” and in his book he explains that as our society is changing were moving away from just getting these answers from books but more towards using these platforms and connecting with educators to get answers. David adds that now on these platforms we now have no limits to search.

As we examine this topic of collaborating on information there are two different ways to do so; as someone who is looking to join the conversation on a specific topic that’s called being a participate but we learned from our Powtoon that we can also build our own PLN to create a new conversation on something we feel everyone should know about.

According to the Online Learning and Distance Education Resources; Wenger explains three concepts when talking about PLN’s “Domain: a common interest that connects and holds together the community. Community: a community is bound by the shared activities they pursue (for example; meetings and discussions) around their common domain and thirdly Practice: members of a community of practice are practitioners; what they do informs their participation  in the community; and what they learn from the community affects what they do”

A common platform that is on the rise for educational purposes is Twitter, this platform is the fast and efficient social media to update on our personal life. On Twitter, we are able to follow other accounts, like, retweet, tweet, and quote a tweet that we need on our timeline. By using any kind of hashtag, we are about to classify different types of conversations that millions of people are talking about around the world. For educators this platform is perfect because we are able to connect on different topics and with the video by Alec Couros “Using Twitter Effectively in Education” were able to learn more about this.  

Technology in the Classroom allows for Greater Learning Possibilities

Integrating technology in lessons as a teacher, is becoming a must. Technology is consuming itself into most aspects of our lives and the lives of our students. The Technologist Module gives teachers a step by step process on not only how to bring technology into the classroom, but also make it effective to our students learning. This module gives you an in-depth look into the process of making great technological additions to your lesson, that are based on the needs of your students. This module uses the Design-Thinking Approach. My infographic goes through each part of that approach. Using Canva to create my infographic gave me an example of what it would be like for me to test technologies to see if they would be good to integrate into my lessons. This was my first time using Canva. It turns out to be a very user friendly program, that lets you be very creative. An infographic was out of my comfort zone, but Canva made it really fun and painless.

Infographic on the Technologist Module

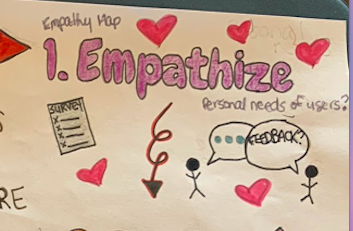
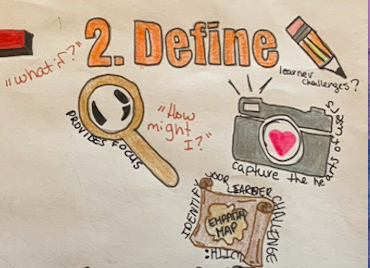
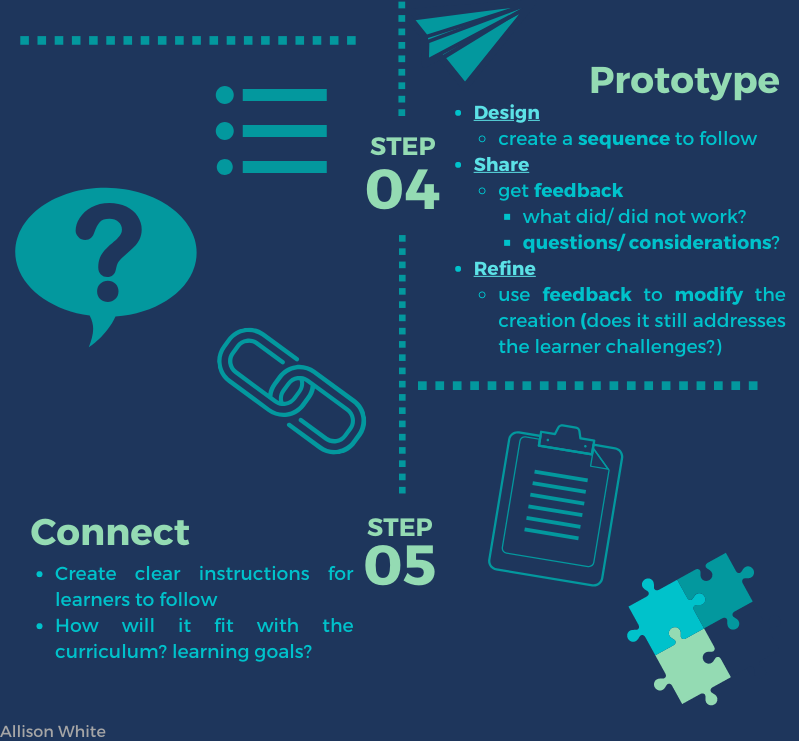
My infographic summarizes the 5 steps involved in the Design-Thinking Approach. First there is emphasize, where you look at the learners needs and what the tech could add that could would not be there without it. I used this when I was looking at many students in my classes IEP’s during my placement. I looked at technology as a way to allow those students something that was missing from a normal lesson. The next step is define, this is where you define who your learner is and what you can do with technology to help. I learned that after a few weeks, you really get to know your students needs and are able to base your lessons around their needs.

Emphasize and Define Panels of the Infographic

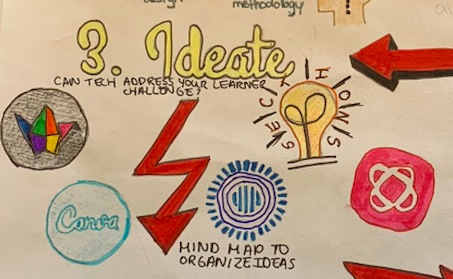
The next step is ideate, which is centred around the planning of the integrating of technology. This is where you take a look at the challenges that some of your students face and make sure you found a technology suited for that. Sometimes it is hard for teachers to help all of their students who have many different kinds of challenges. If you use technology, something that a lot of students are accustomed to, then it will be more effective to them overcoming challenges in their learning. The step after that is the prototype, which involves designing your prototype, sharing it with others and redefining it from the feedback you receive. This is essential in teaching. Trying ideas out, getting feedback, and making it better from the feedback is essential in improving your technological pedagogy.

Ideate and Prototype Panels from Infographic

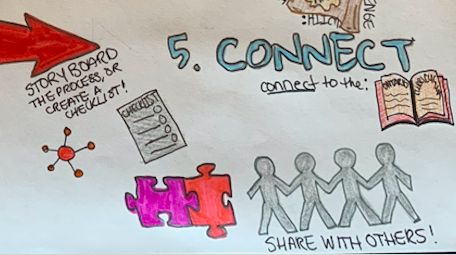
The last step is to connect, this is the implementation of the technology that you have created for your classroom. This is where you bring it to your lessons and see how students react. This is always the scary part for teachers. Wondering if something that you have worked on is going to be good for your students. It is also a struggle for teachers to figure out how to instruct students to use this technology. If this technology works out, then let other teachers know and spread the word through your Personal Learning Network.

Connect Panel of the Infographic

Collaboration: “Alone we can do so little; together we can do so much” ― Helen Keller

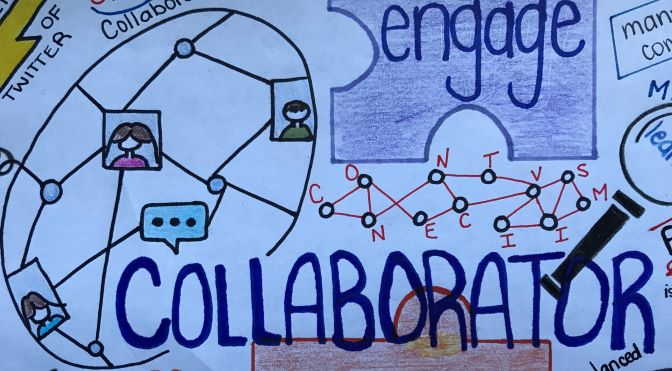
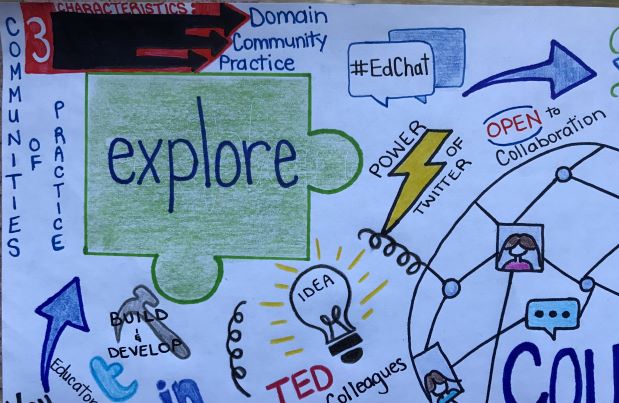
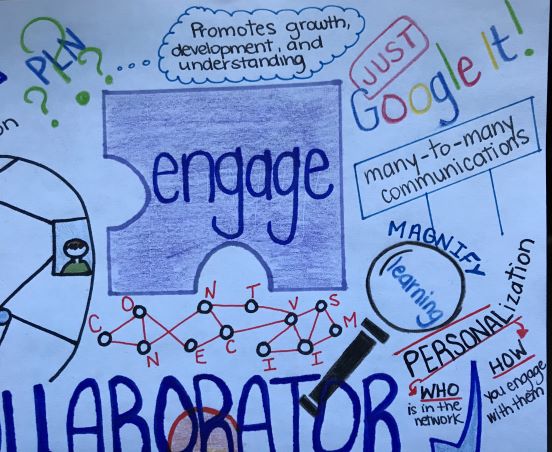
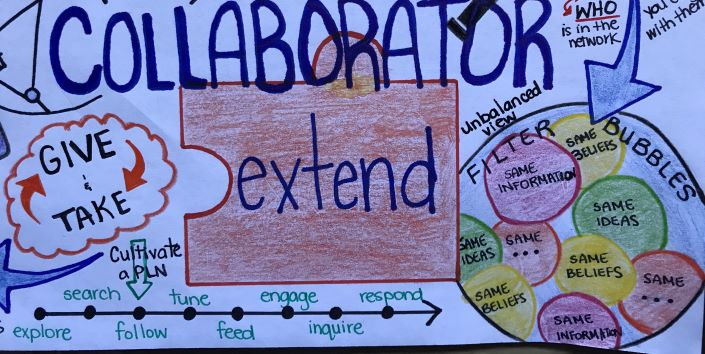
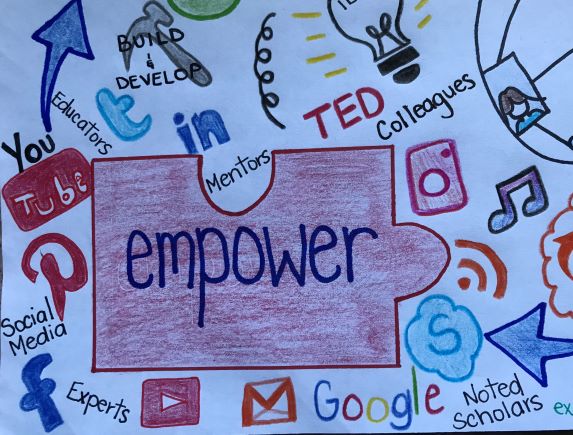
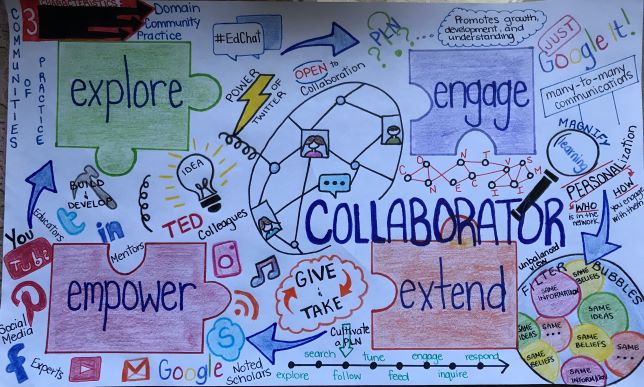
For my final artifact, I chose to make a sketch note to reflect on the eCampus Collaborator Module. This was my first time making a sketch note, but I think that it was a useful tool to communicate some key points regarding the Collaborator Module.

Collaborator Module

The “Explore” section of the module explains the purpose of collaboration. Steven Johnson’s video, “Where Good Ideas Comes From”, explains how networks are helpful to the idea forming process. It is not something that comes to be overnight, but rather something that develops over time, and with the influence of a network of people. In addition, Dr. Tony Bates explains that a community of practice has a domain, a focused are of knowledge, a community of individuals learning together, and a practice where resources and examples are shared and exchanged. This community of practice is individually built and can occur through online discussion groups or by using social networking tool like Twitter. Alex Couros explains in his video that Twitter can be very resourceful. A single hashtag can open the door to an enormous amount of knowledge. However, users should take time to explore this tool to ensure it is used effectively and that they get the most out of it.

explore

Next is the “Engage” section, where the focus is on understanding what a PLN is and how it can be used to engage in learning. Each PLN is unique and personalized to the individual themselves. It promotes personal growth, development, and understanding in a focused area of study. This section of the module discusses the theory of connectivism through George Siemens’ video, “Overview of Connectivism”, which emphasizes that we should be learning within a community of individuals through social and collaborative activities. By encouraging many-to-many communications, individuals have access to a wealth of information.

Engage

Thirdly, the module focuses on how we can “Extend” our learning through collaboration. As a member of a PLN, we can take information from others, but we should also practice giving back in some ways as well, while working towards creating a two-way street. However, Eli Pariser cautions in his TED Talk about the dangers of “filter bubbles”. When searches are personalized based on an individual’s history, it can exclude a whole wealth of information. When considering new knowledge, individuals should look at the whole picture, including opposing views, and avoid making a snap judgement based on a biased library of information.

Lastly, the “Empower” section, which encourages reflection. It suggests looking deeper within the network to consider who makes up your PLN and the relationships that exists between the nodes. A PLN can be made up of educators, mentors, colleagues, note scholars and any other individuals who feel they have valuable knowledge to share. As time goes on, individuals should be thinking about how they can develop their PLN to support their teaching.

This Collaborator module highlighted the importance of reaching out to others to gain knowledge, without having to be an expert on everything. As a future teacher, something that worries me is not having an immediate answer to a student’s question. By participating in a PLN, and by encouraging students to do so as well, it can alleviate some of that stress. Creating this artifact took some brainstorming and planning. I would not consider myself an artist by any means, but I am proud of the end product. I would consider having students use sketch notes to demonstrate their understanding in the future. I think that it is a good way to organize and share information that is not just a pencil and paper regurgitation.
Sketch Note on the eCampus Collaborator Module by Kristie Hedge

Everything you need to know about design thinking!

By: Samantha Godden

The technologist module focuses on the idea that technology tools can be used to address specific learning challenges, and that digital literacies can be used to engage and enhance student experiences. The design thinking approach is the starting point for a technologist point of view, as is a human-centered thinking approach that allows the educator to think of how the technology can benefit the student and situation. There are various methodologies and approaches to design-thinking, as it can be used in many other contexts rather than just the classroom. The module begins by explaining the approach of empathize, define, ideate, prototype and connect.

Design thinking always begins with empathy. It is important for the teacher to put themselves in the mindframe of the student. When creating activities, especially when they concern technologies, it is important to consider how everything will work towards benefitting the people involved. For an educator, it is important to empathize with the learners involved to identify a challenge that could be solved through the use of technology. If the educator is struggling with the identification of student problems, they can always ask for student feedback or create a survey. 

The second step of design thinking is define. This step focuses on identifying  and defining a problem or challenge facing learners. A useful tactic for this section is to create an empathy map. This allows the educator to ask themselves questions such as “what if?” or “how might I?”. When creating a good learner challenge, it is important to consider if the challenge provides focus, if it captures the heart of the learner, if it informs how subsequent ideas will be evaluated and if the concepts and plans meet the needs of the students. Once this section is completed and the learner challenge is defined, the educator is able to move onto the next section of the design thinking process. 

When it comes to ideate, it is important to form and build the ideal features and characteristics of how technology could address your learner challenge. Mind Mapping is a very useful tool when organizing this information and can be done on a variety of platforms. I tried to outline the various websites in my sketchnote, such as Padlet, Canva, Prezi and Mindmeister. After the mind mapping is complete, the next step is to choose a technology tool to help address your challenge. Using the SECTIONS model might be useful in this section, as it allows the educator to ensure the technology model is the right fit for the students. 

After the ideate section, the user should have chosen their respective technology. They can then move to the prototype section, where they can see if their technology would be successful for their intended audience and receive feedback from users. The steps of the prototype section are: design, share and refine. The design section involves playing around with the chosen technology and seeing if it would work as successfully as previously thought. The second section is share, which involves sharing your ideas with peers and learners in order to receive feedback and see what worked and what could be improved. Finally, once feedback is received, we move to the refine section, where the educator can take the necessary steps in order to improve their ideas and designs. 

Finally, the last section of this module focuses on connection. It is important to connect the lesson and technology to the ontario curriculum, as well as your intended learning outcomes. This will ensure that students can see how technology integration is important to their learning and can be useful for their futures. 

The Key to a Lifetime of Learning

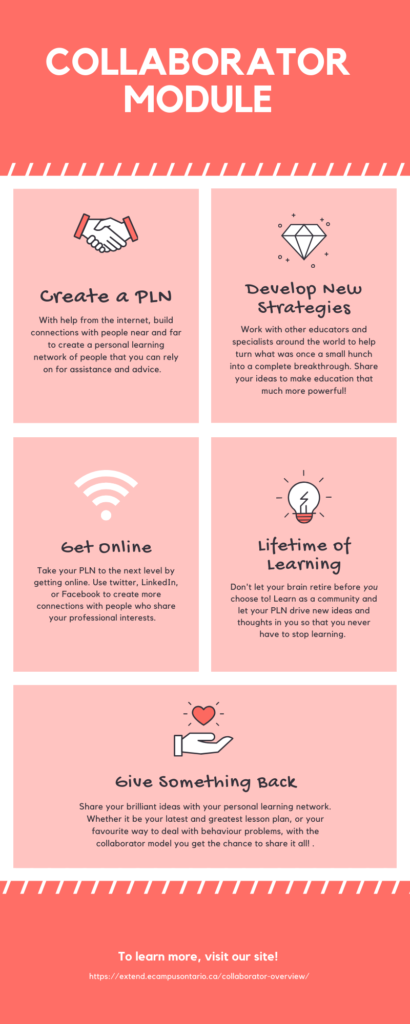
Creating my artifact on Canva was a very enjoyable experience. Before making my infographic online, I had a pretty good idea of what I wanted it to look like. With Canva, I was able to seamlessly turn my vision into the actual artifact. It was very user-friendly and offered meaningful templates if you didn’t know where to start. As this was my first time using Canva, I spent time looking at other designs and templates they offer, and I know I will be using it in the future. 

I built my artifact on Canva, based on the collaborator module on e-campus Ontario.
 

The collaborator module is a method of teaching and learning that is based upon working with others in a personal learning network. In my infographic, I chose to highlight the reasons why someone would choose to use the collaborator module, and how they should go about doing that. 

Creating a PLN is all about building relationships with people who have professional lifestyles you admire. For teachers, this could include: someone who is very knowledgeable in your teachable subject, someone who offers behavior management strategies, someone who demonstrates good pedagogy, someone who practices UDL, etc. This personal learning network is a group of “go-to” people when you need some help in the classroom, are looking to spice up your lessons, or just want to learn more about your profession. 

For me, developing new strategies is always easier when I have the help of others. Being the person I am, I tend to find a method that works for me, and use that method until it is beyond worn out. The collaborator module forces you out of that comfort zone and pushes you to try new ways of teaching.

There are no limits when it comes to creating your own PLN. With the help of the internet, your network of people can come from any part of the world. Using websites such as twitter, LinkedIn, etc. you can connect with people who are truly the best of the best in your area of interest. 

The best way to commit to a lifetime of learning is to surround yourself with people who are dedicated to doing the same thing. When you go browse on twitter and all you can find are ways to strengthen your pedagogy, better your lesson plans, and be a more inclusive teacher, it will be nearly impossible to stop growing. 

As someone who always hated group work, I thought I would not connect with the collaborator module, as it would not line up with my teaching style. As I continued to read through different links and watch different videos, I concluded that this is a brilliant way to stay connected as an educator. It exposes you to so many different, yet meaningful sources that can really push me to be the best teacher I can be (as cliché as that sounds). I am super excited to start building my PLN in teachers’ college so I have resources ready for me as soon as I enter the workplace.  

Ghost Blaster

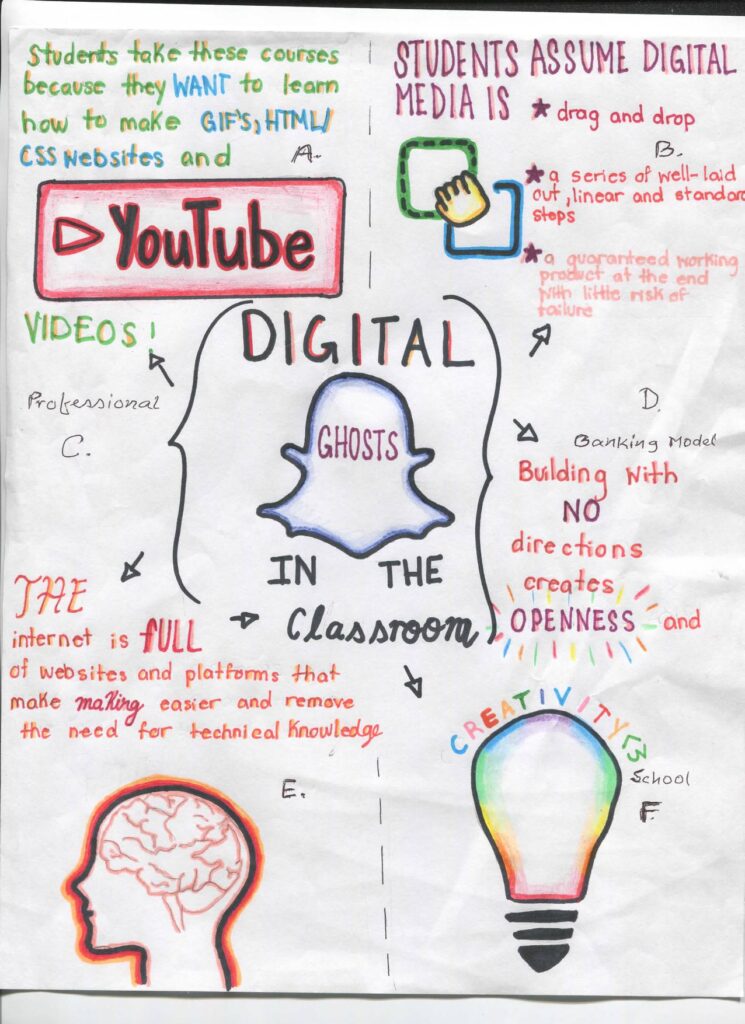
I would like to inform you that I did study the article “Digital Ghosts in the class room” by Ashley Hinck. I made a sketch note with key points.

This article describes on the lack of creativity coming from students when it comes to Digital Pedagogy due to how they are taught in the school system. It talks about the fact that students are so afraid of failure, that they will not try something new or more challenging. For this assignment, I planned to carry out a sketch note. I would like to challenge myself. I usually stay away from anything pertaining to art, but I wanted to try something new. I carried out this assignment on banking concept for financial information, knowledge of technology as a platform to update for internet and relative websites information. Creative school and traditional cultures had significant impact on digital ghost ideas.

GIF found on GIPHY

The first topic I would like to add was the activities of GIF, HTMW and the process of using CSS websites, videos etc. The Article explains how students always think to do the assignment that will be less creative, but will give the teacher what they want. Students are taught throughout their education that doing simple drag and drop tasks will get you the top marks. I updated the logos of YouTube and Canva. Ashley Hinck goes into detail about how Canva, YouTube and Facebook work together to bring the users a easy drag and drop experience. This helps people put aside their creative side and take part in a simple user experience that these platforms use.

Image from PIXABAY from user SZC356

The next topics I visited were the degree of digital media applications, the idea of books and electronics as Hinck calls it, and the importance of trial and error. The concepts that people have so much potential when they use more complex applications, instead of drag and drop apps that they usually use. “The New Worksheet” idea looks at how the basic digital projects that students know well, is like giving out an old fashion worksheet. Like a worksheet, there is no creativity in a linear digital project. I put trial and error because the article expresses the important process of trying, failing and getting it just right. We can not trial and error as world having a lot of different applications.

Image from PIXABAY from user jerrykimbrell10

The professional ideas and banking model topics I tackled on my sketch note were the examples of the lego, the linear and ethical thinking of digital projects in education, and the idea that we are all makers, creators, and speakers. The article uses the example of a lego to explain what kind of digital projects we should be doing in the classroom. Building legos with no instructions allows us to be open, creative and have agency. The article says these things should be in all digital projects throughout our schooling. The author feels that digital projects in traditional school culture only provide a linear approach to thinking, instead of being open, creative, and having agency. The article also tells that teachers should be giving students the tools to be makers, creators, technologist and speakers. Instead of linear projects, there should be more complex projects that allow students to reach their potential.

Thinking a sketch note helped me to put the information from this article into action. I carried out of my comfort zone and tried something I was not comfortable with. It allowed me to try some trial and error creating this artifact. It did not turn out exactly how I wanted it, but I will keep trying to perfect it throughout time. This article provided me with a lot of information that I will take with me into my classroom. I will add some creative digital projects that will allow my students to use their creativity. I will try to give my students the tools they need to become makers, creators, and speakers. I will also help to increase my Digital Pedagogy. Multi-media had a series of product based influences for personal risk and that market was natural. YouTube, Videos, GIF, HTMW, CSS were the updated applications to get information as social media. Finally, professional knowledge could incorporate all of those ideas in practical aspects of school creativity.

GIF from user Jay Sprogell on GIPHY

What is Critical Pedagogy?

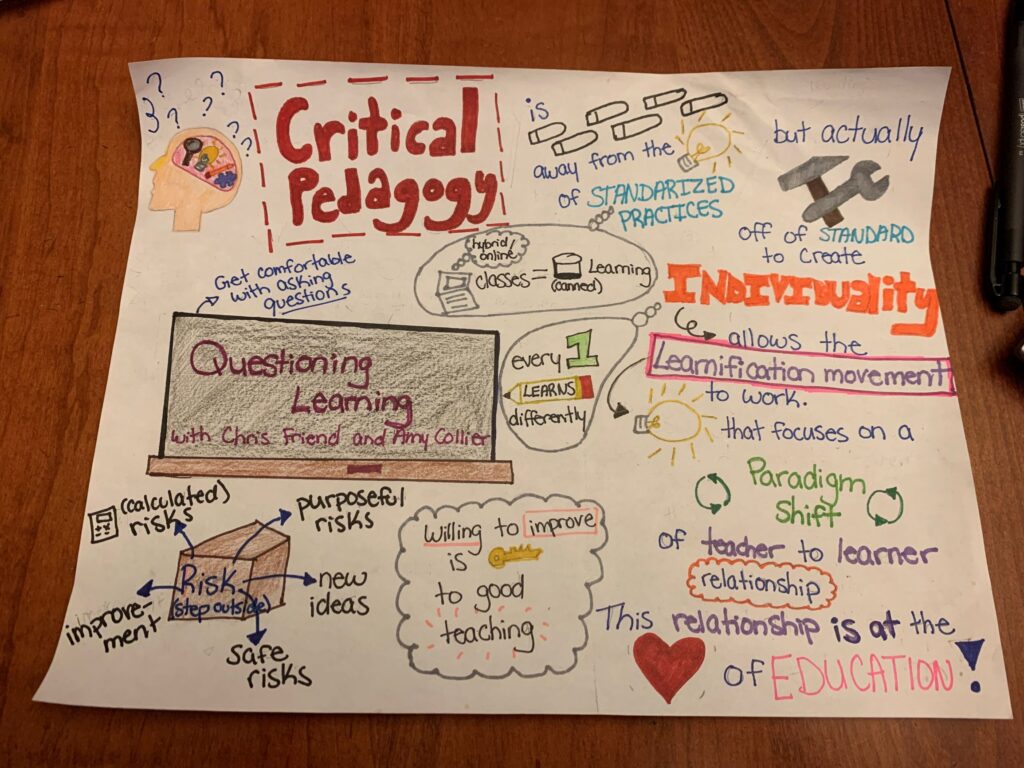
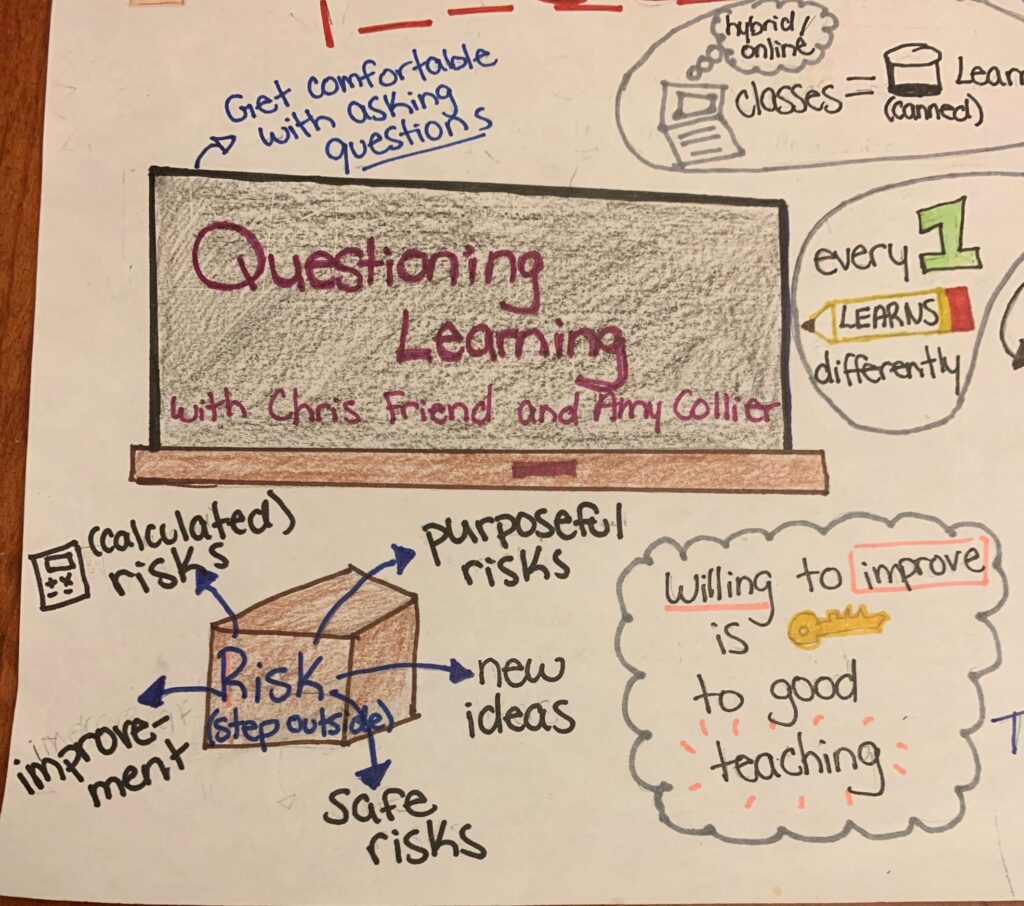
I decide to do a sketch-note on the podcast “Questioning Leaning” with Chris Friend and Amy Collier.

Here is a summarized sketch-note of the podcast by Jaclyn Simard

The podcast had many great ideas about critical pedagogy which made it difficult to sketch. So, let me walk you through my thought process while creating this sketch-note.

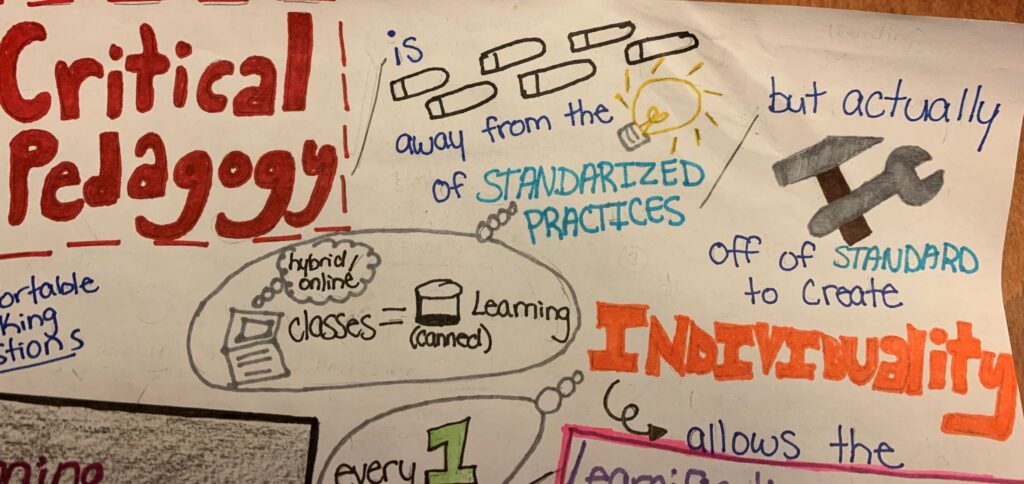
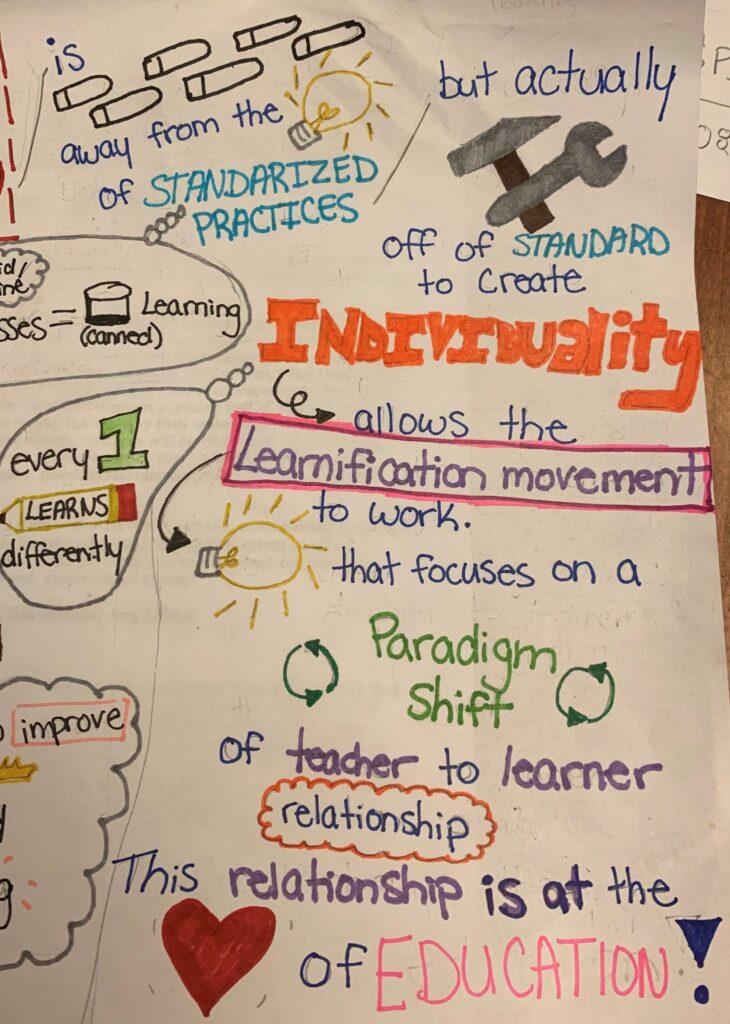
I started off at the top with Critical Pedagogy explaining the idea from the podcast that “best practices” is being too standardized causing us to strip away from individuality, which is the reason we want to learn. So from my understanding we need to be stepping away from the idea of standardized practices to be able to build and grow into individuals. If we constantly stayed with the the same constraints we as individuals simply would not grow or progress. Each student is different therefore we need to apply the proper teaching practices in order to achieve optimal results.

This follows into the learnification movement which is essentially doing just that by developing the classroom into individualized learners instead of a community of learning. When you focus solely on learning you eliminate the relationship of student and teacher which is defined by the paradigm shift in my illustration. Amy stated in the podcasts Questioning learning that this “relationship is at the heart of education or the heart of learning”.

In the podcasts Chris and Amy explain pedagogy as being a method of teaching that is essential for our education system and shape the youth of tomorrow. In the podcasts the Chris and Amy define critical pedagogy as being an ideal learning practice. Chris and Amy use online classes as an example to reinforce this point by stating that online classes are equal to canned learning. As they dive into it we begin to understand more and more the detriment to our kids learning when everyone is expected to learn exactly the same.

Lastly, the bottom illustrations were just to capture other key ideas of critical pedagogy. Amy talked a lot about how we all need to get comfortable with asking questions to avoid making assumptions. She also mentioned how as teachers we should be always willing to improve and stepping out of the box to take risks. She highlights that risks are good, but it’s important to take calculated, safe and purposeful risk because it is still your career and the education of students at hand.