Category Archives: (10) 5332

Don’t Just Be A Teacher, Be A Technologist

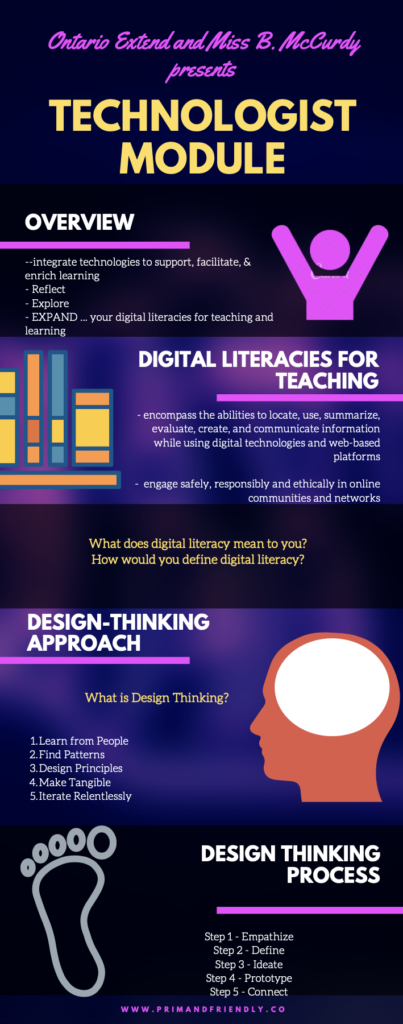
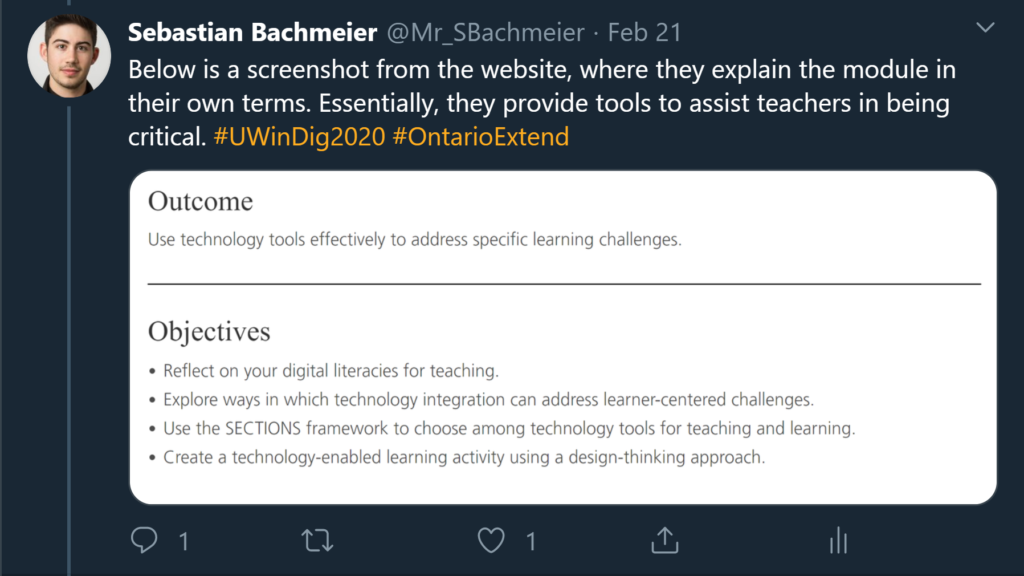
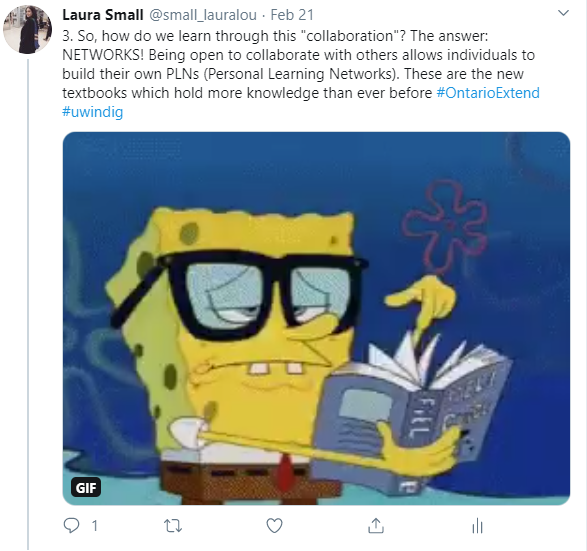
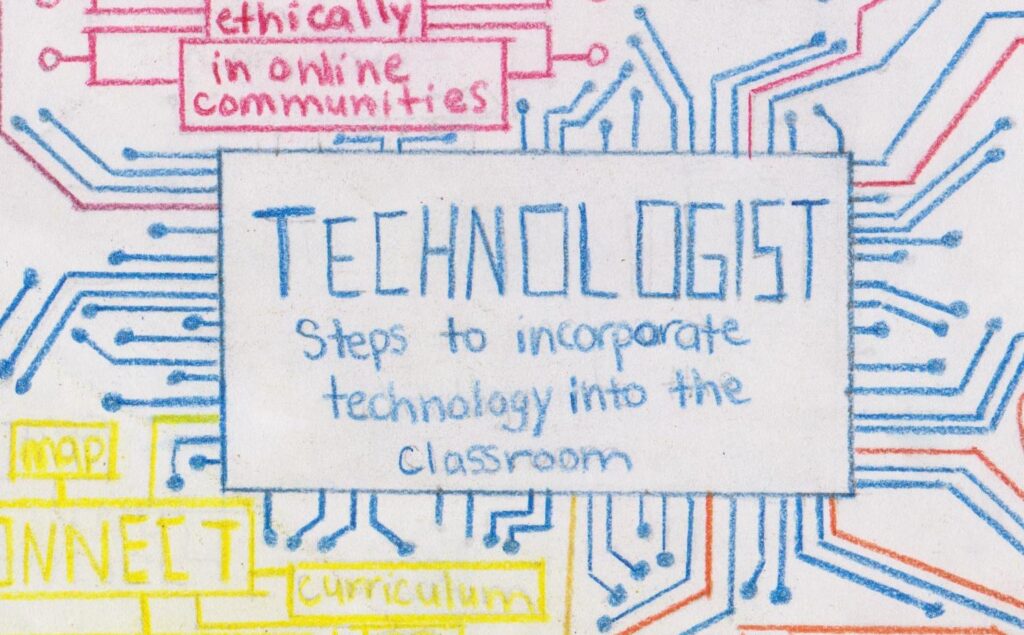
For this multimedia reflection I went in the opposite direction of a sketchnote and wrote a twitter essay explaining the Technologist Module on the Ontario Extend website. Though I am familiar with twitter in a personal sense, presenting myself in a professional setting on the platform was a bit challenging. I felt very aware of the presence I had online and how my words may be perceived. This was not a challenge I had when doing the sketchnote, but in a twitter essay you are broadcasting information that has the ability and potential to reach a huge amount of people which can be daunting. I found it challenging to get my voice through and showcase my personality, but I feel more equipped to start building my own PLN after sharing my thoughts and findings on the topic of being a Technologist.

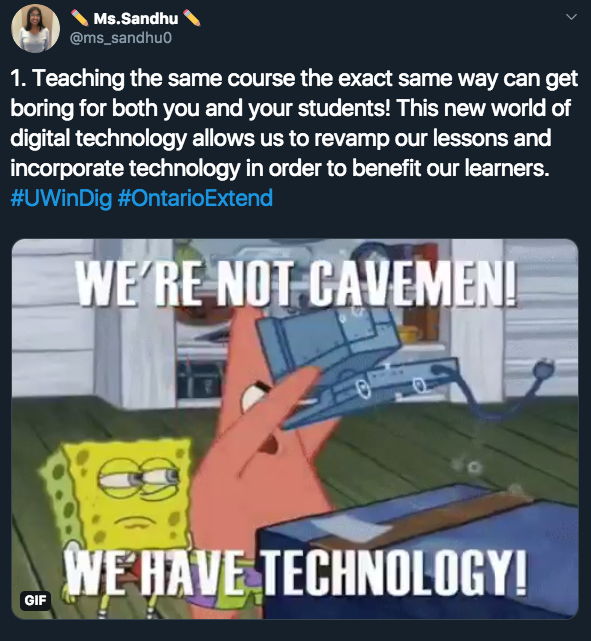
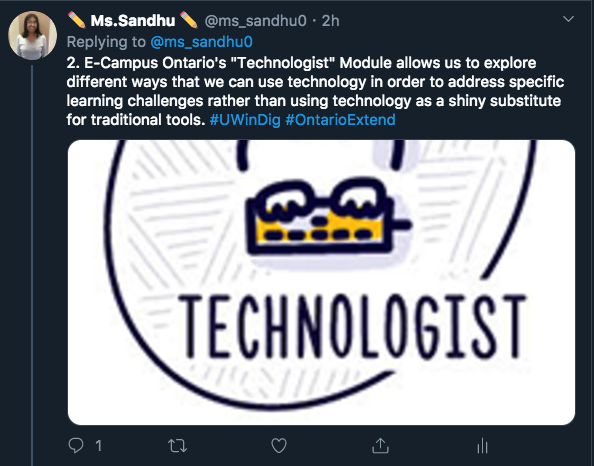
The module itself was incredibly beneficial in allowing teachers to recognize the importance of using technology in order to benefit learning and broke it down in ways that were easy to understand. Right off the bat I was able to see how SAMR could be applied in the module, though they did not touch on the exact terms of SAMR, it was evident that Ontario Extend wants teachers to get past using technology as a Substitution and instead work towards something that is Redefining the way we do things and working towards solving problems with technology. This is something that we have already been working towards in our DigTech class so the concepts were not foreign to me, instead I was able to easily follow along and think back to my own teaching and learning. In my own learning, most instructors have used technology as a Substitution for traditional tools, other than being a shiny tech tool, those substitutions did not in any way aide my education or help my learning.

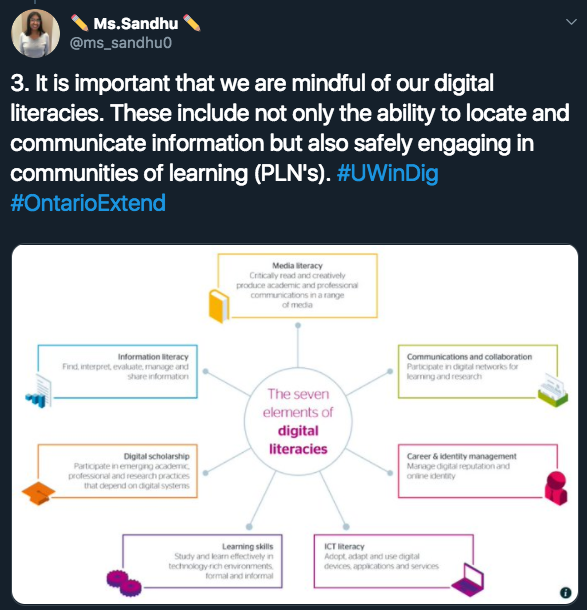
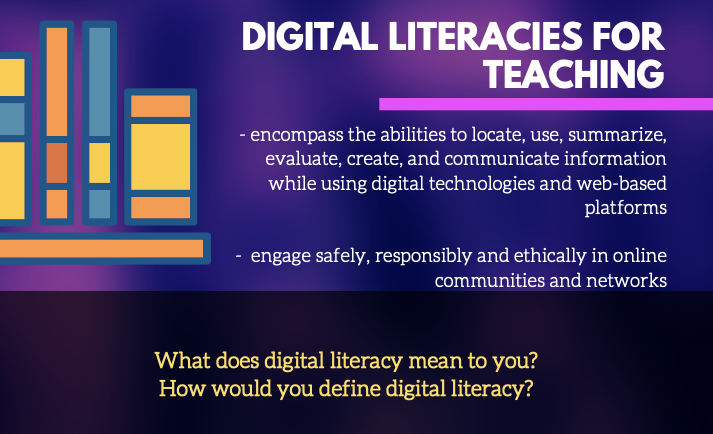
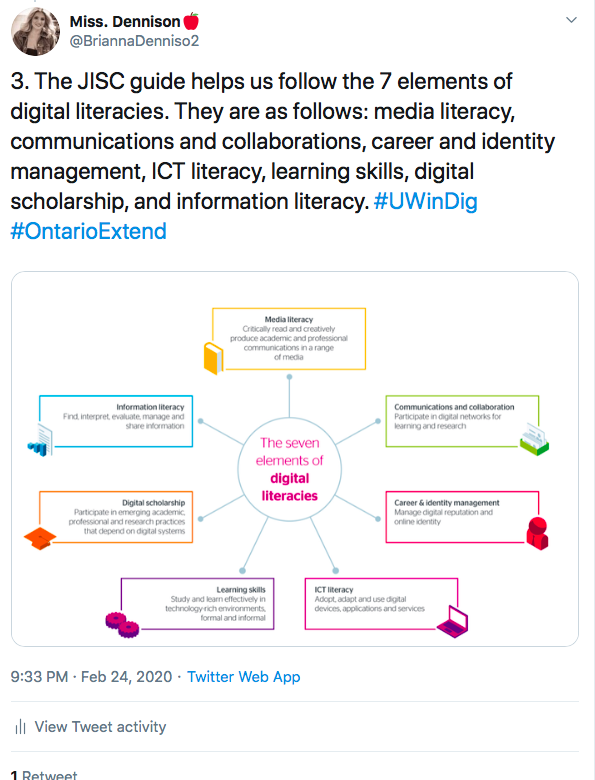
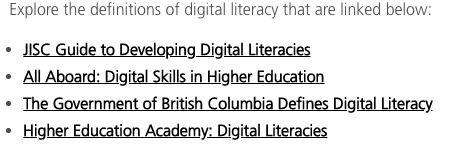
One of the most interesting components of this Multimedia Reflection was being able to directly relate what I had read about Digital Literacies to the assignment itself. The module mentioned that it is important for educators to come up with their own umbrella of digital literacies and constantly evaluate and expand on them. When drafting my Twitter essay I recognized the digital literacies that I had to keep in mind, especially my audience, online presence, and communicating my ideas safely in a shared space. It made me aware that I am constantly using my Digital Literacies when sharing on any social media platform but especially when working towards creating my own Personal Learning Network.

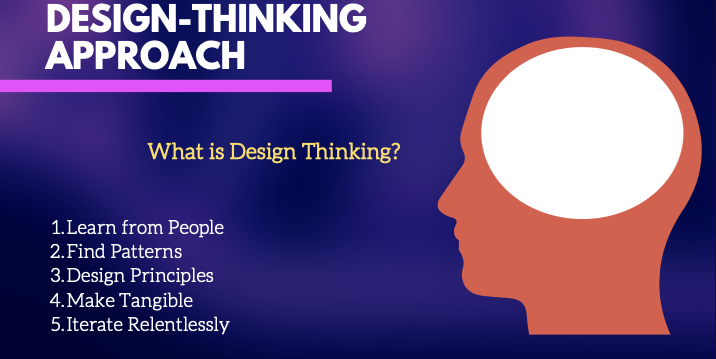
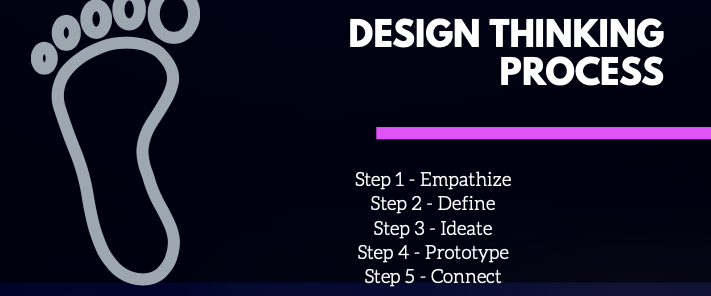
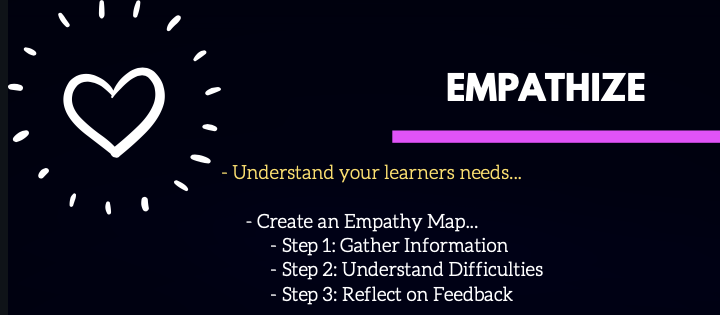
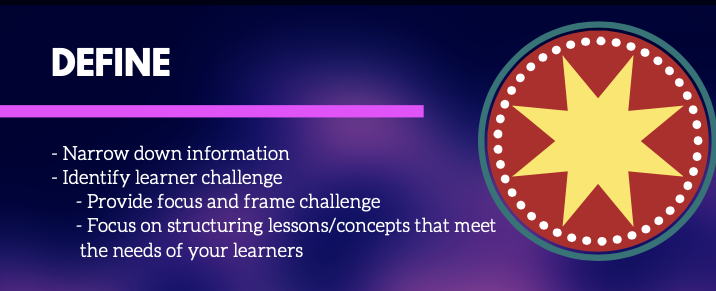
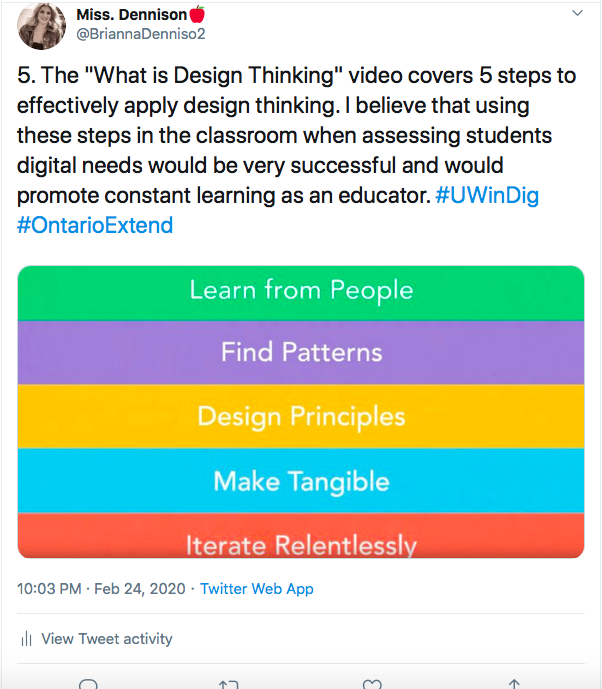
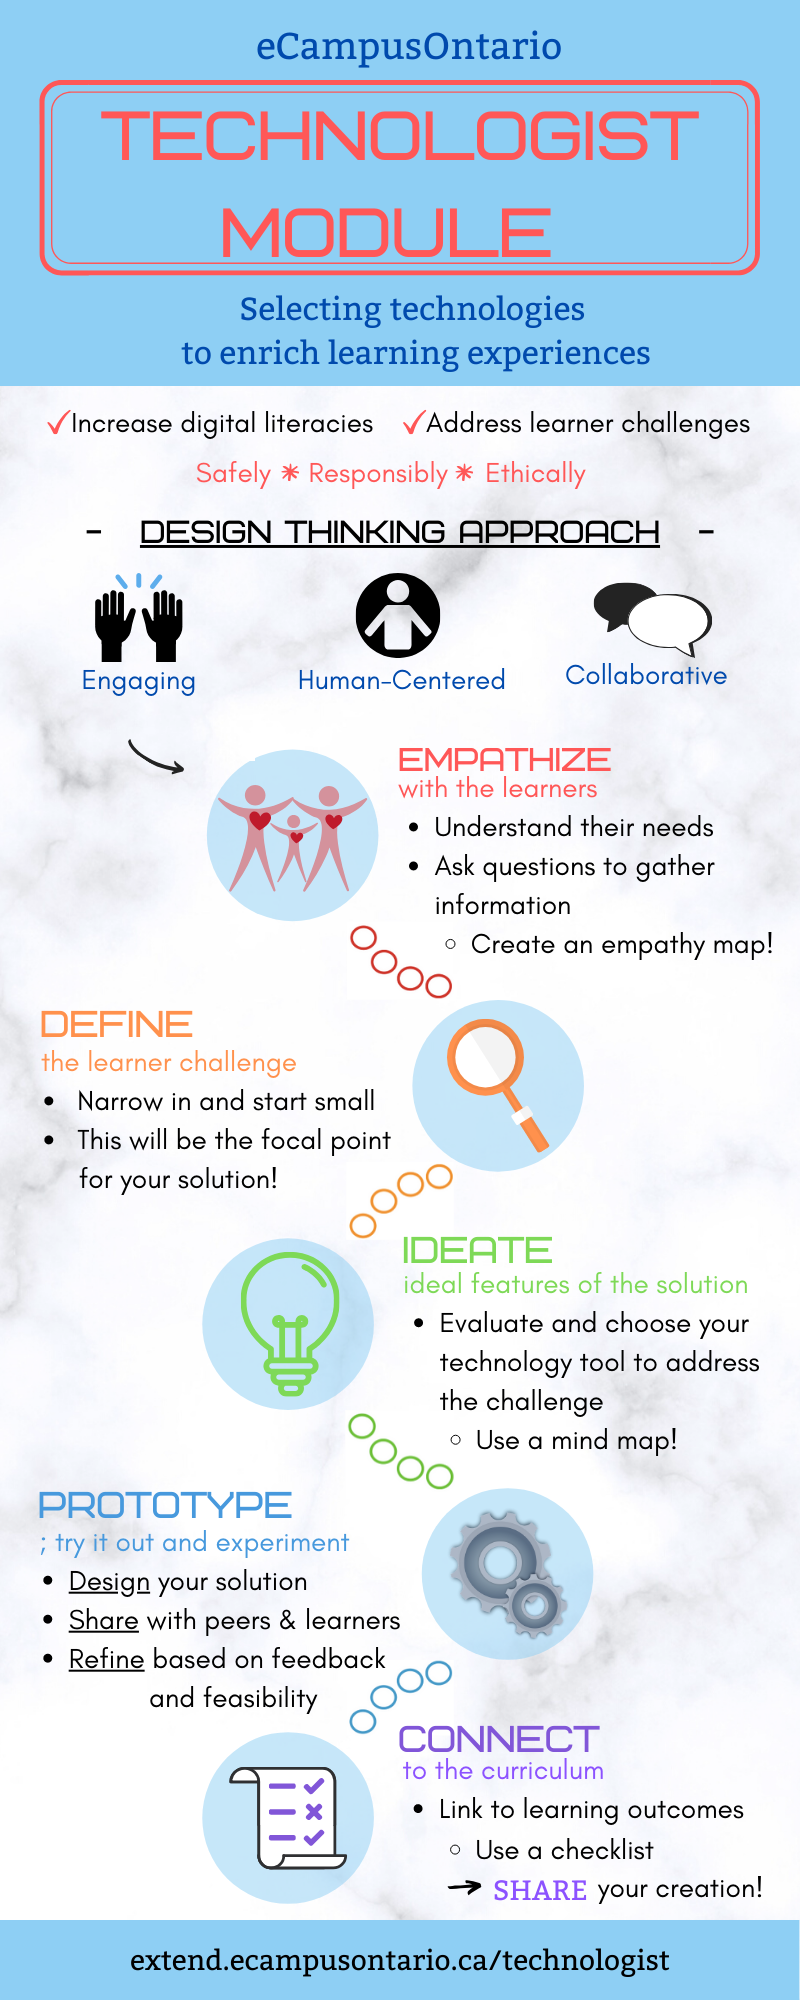
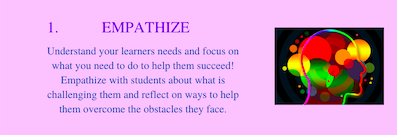
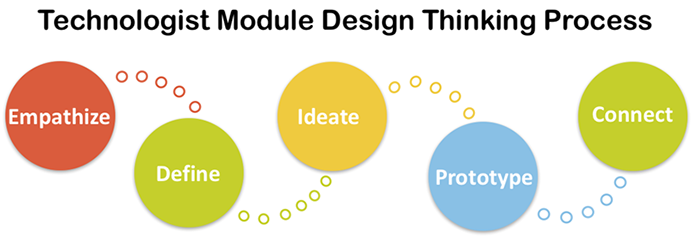
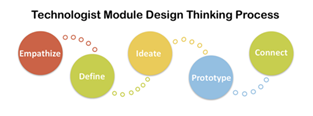
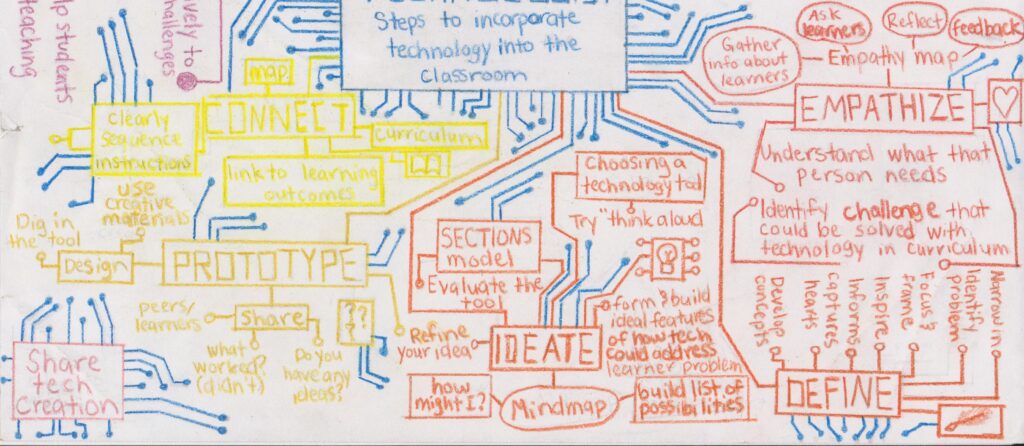
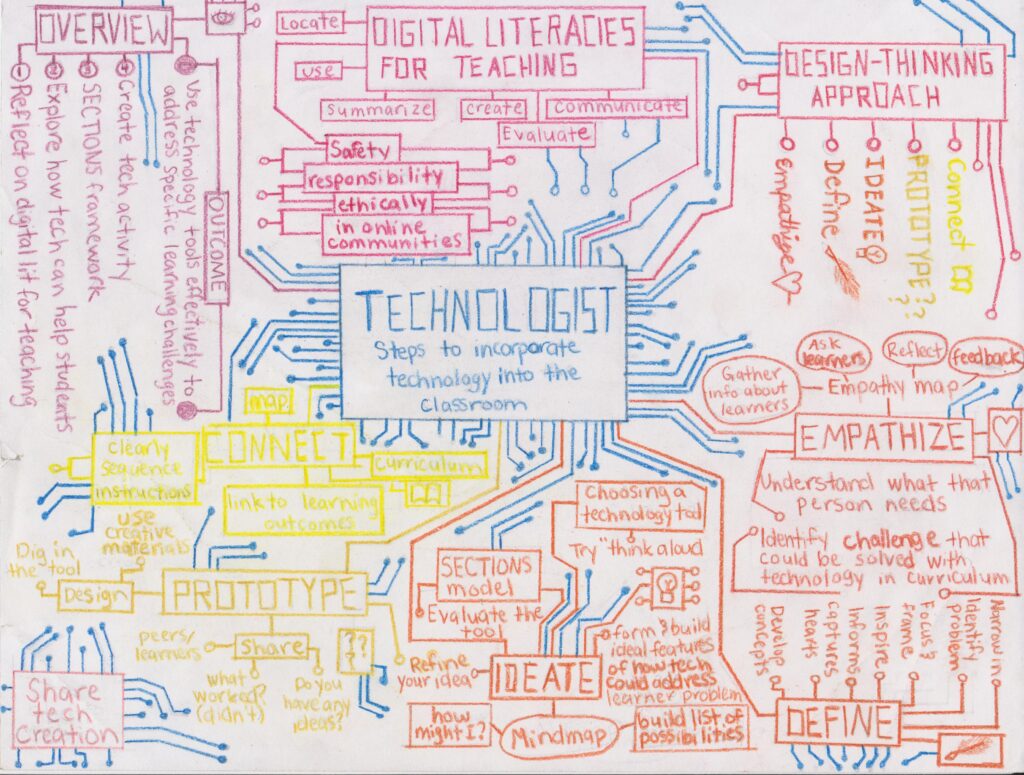
The “Design-Thinking Approach” of the module explained in depth the process that one should take when trying to discover a solution using technology to a problem in the classroom. The five steps broke down approach and each section went into depth on how it is beneficial to the process itself. I believe that Empathy is one that many teachers may be challenged with for a variety of reasons. Some teachers may get comfortable in their own style of teaching and learning and not look past that, this can cause for certain students’ needs to not be met and the teacher to not grow in their own teaching. Others may forget what it is like to be a student and expect their students to simply understand the work they are being taught. When you empathize with students you try to not only see obstacles from their perspective but find solutions for those challenges in order to better their learning. This leads into the next step, which is to define problems or challenges that your students may be facing and work towards a solution. Arguably one of the most important steps, it is impossible to find a solution to a problem you don’t know exists, that is why we must empathize with our students; in order to see the problems that are there and work towards eliminating them.

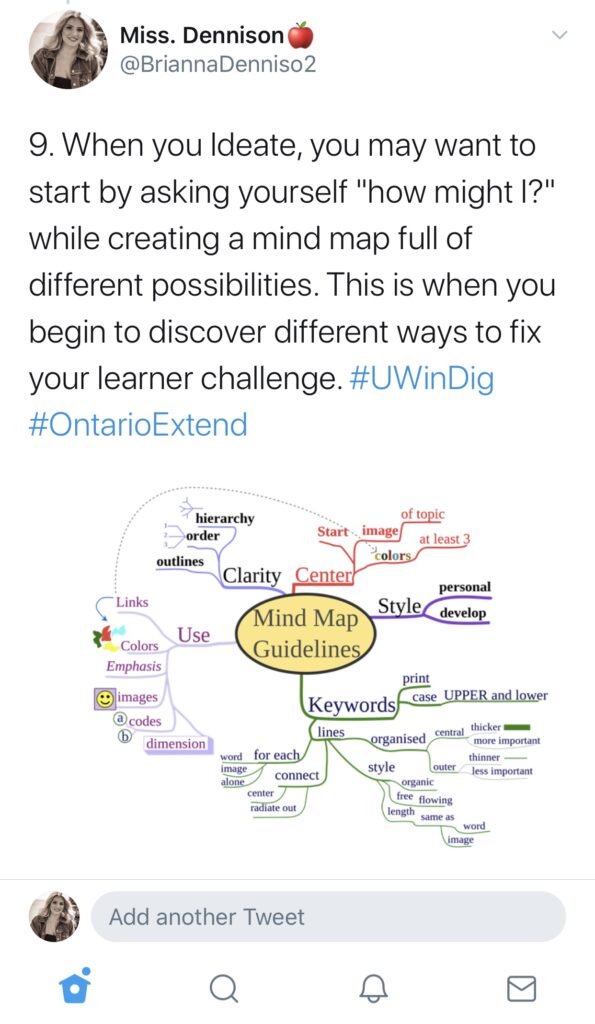
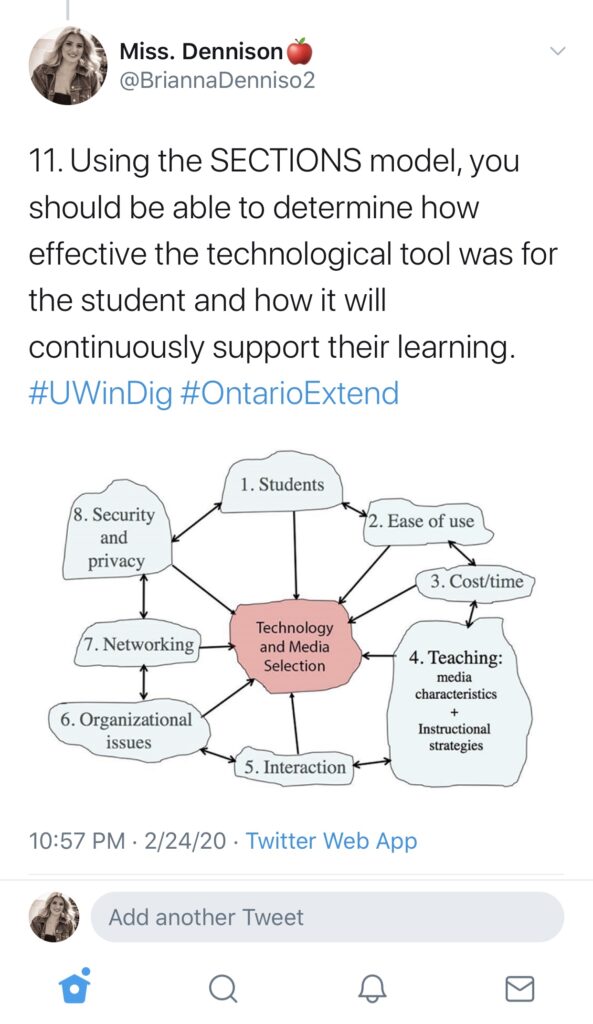
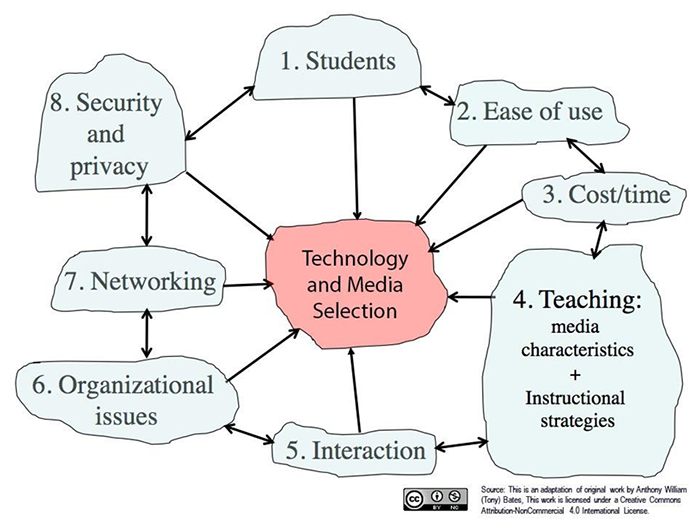
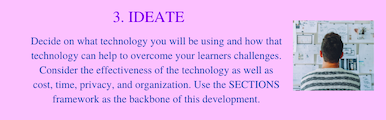
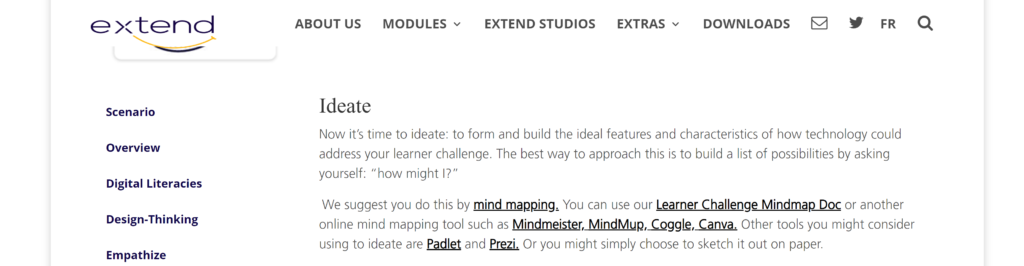
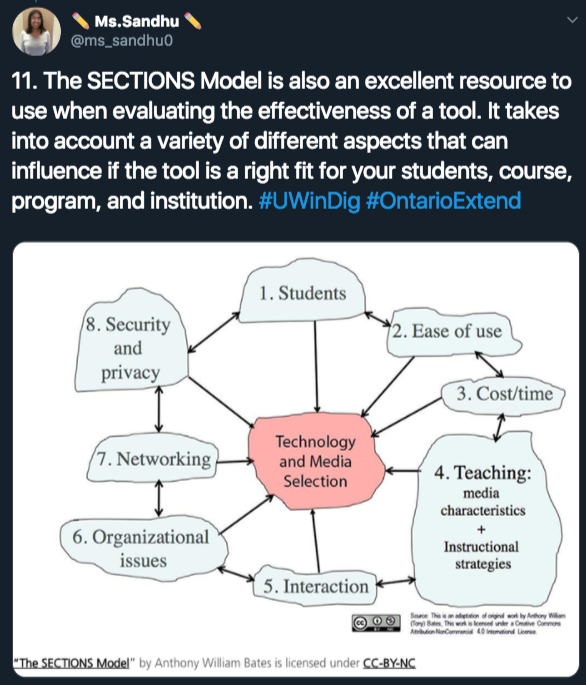
Under the “Ideate” section of the module it discusses the importance of taking into account the technology you wish to use and all its features. It provides mind-mapping as a approach in order to help you come up with features you need and to see if the problem you are trying to solve is being solved through the use of this technology. I found that The SECTIONS Model by Anthony William Bates to be an excellent resource when assessing the functionality and purpose of an online tool and something I could see myself referencing within my own teaching. It allows you to take into consideration multiple elements that make up an effective tool and if it is the right fit for you and your classes, this way educators are able to think critically about why they are using the tool rather than as a substitution.

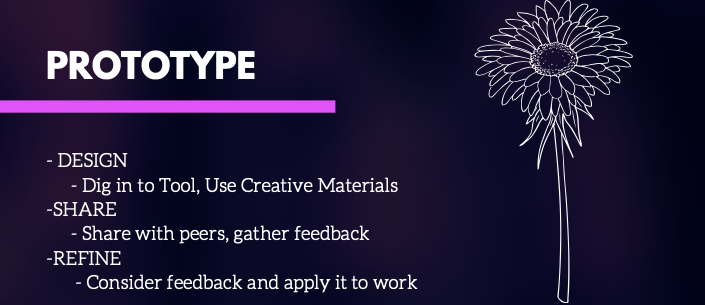
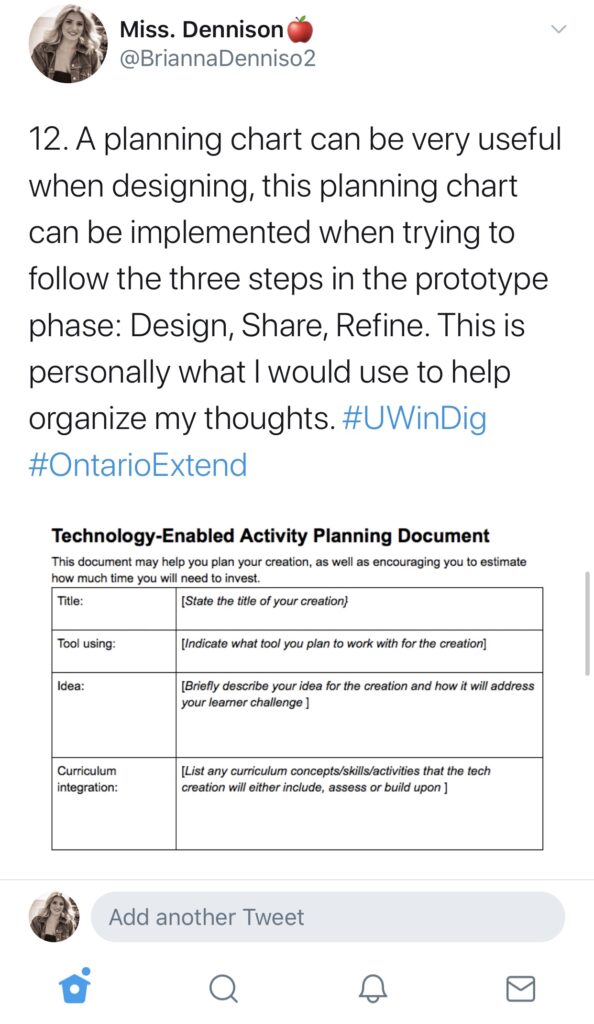
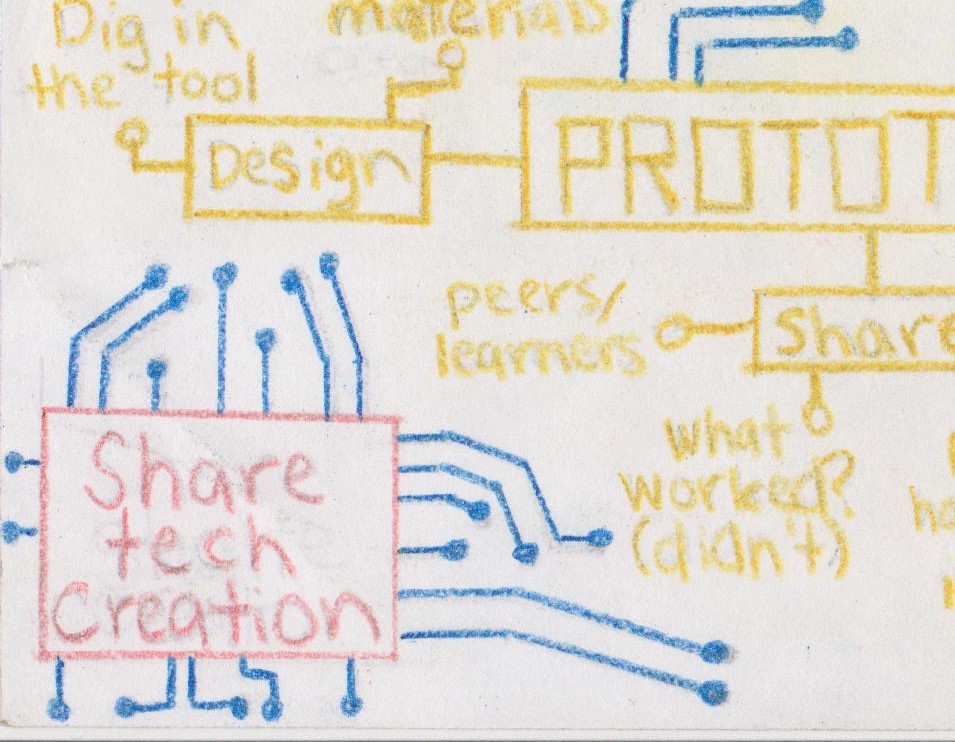
Once you have done your research and chosen your tool it is important that you create a prototype for your students. Though this may seem scary, it is essentially creating an example for them using the platform you have chosen. You must familiarize yourself with the platform by designing an artifact, then share it in order to gather critical feedback, and finally refine the work you have done in order to provide students with a concrete example. This is often a step that teachers tend to ignore or look past, in order for your students to understand your expectations, it is important that you also provide them with examples of work they can look to. This can be especially important when you want students to use one tool in particular and they themselves may not be familiar with it.

The last step of the Design-Thinking approach calls for you to make connections to the curriculum. It is important that the work your students are doing is done with a purpose in mind and relates back to the learning outcomes that have been set. If you find that what you are doing cannot be related back to the curriculum then students may question the validity of the content they are creating and why they are being asked to do it. At the end of the day, it is the curriculum guidelines that teachers need to follow in order to make sure students are learning all the necessary content for them to succeed.

Overall, this module was incredibly beneficial in terms of understanding technology and how to really be a technologist in your classroom. Especially as a new generation of teachers, teaching a new generation of students, it is vital that we constantly try to discover new ways to solve problems in our classrooms. Technology allows us many affordances that traditional teaching cannot and it is up to us to discover the best ways we can utilize it. #UWinDig2020

Treasuring the Technologist

Technologist Icon from Ontario Extend

Good evening everyone and welcome to my second and final multi-media reflection for #UWINDIG2020. Technology has evolved tremendously over the past 20 years and we can only expect it to grow more and more. From parents to educators, even youth themselves, there is concern that technology may be negatively impacting our students, children, and youth altogether. Though, as educators, we must take it upon ourselves to do what we can to stay on top of how technology is growing and use it to our advantage. Forcing it out of our classrooms is not the way, we must embrace it as it is the 21st century!

After closely inspecting what the Technologist Module has to offer I began to pick apart the key points, summarize, and incorporate it into an infographic, using the one and only, Canva!

Full Canva – Part 1
Full Canva – Part 2

To begin, my infographic provides an overview identifying what the module will provide, touching on how we should be reflecting on our current digital literacies, then exploring how we can use these/new digital literacies to our benefit and our students, more specifically to address learning challenges in particular, then expanding our digital literacies by using the SECTIONS framework, as well as tech-based learning activities for a more “design-thinking approach.”

Overview

We then move onto the “Digital literacies for teaching” section which considers incorporating technology into our classrooms using multiple digital literacies. As well as touching on how these literacies “encompass the abilities to locate, use, summarize, evaluate, create, and communicate information while using digital technologies and web-based platforms.” As well as providing insight on how “to engage safely, responsibly and ethically in online communities and networks.” This section goes on to provide websites that define digital literacies in more than one light, so we can all reflect, explore, and expand our digital literacies. 

Digital Literacies for Teaching

Next, we are introduced to the  “Design-Thinking Approach” which outlines the 5 key elements, which I explain using the youtube video “What is Design-Thinking (2015)”.

What is Design Thinking (2015)
  1. Learn from People – talking with students, hear their motivations, habits, their likes, frustrations – research shows that active kids and the sedentary at their extremes are good at giving voice to the problems that those in the middle might feel but experience more difficulty identifying it.
  2. Find Patterns – identifying similar patterns in students learning habits can be beneficial to use to engage students in future learning.
  3. Design Principles – “facilitate social interaction at all times”, “boost rewards early to increase adherence”, “motivate family activity, not just kid activity”, “devote special attention to stay-at-home kids.”
  4. Make tangible – creating an accessible way to apply these design principles to specific ideas
  5. Iterate Relentlessly – create new ways to engage students and youth

“Design thinking is a powerful tool to reveal new ways in thinking and doing”

Design-Thinking Approach

Following the design thinking approach, we are introduced to the “Design-Thinking Process”. Which is identifying in 5 steps: Empathize, Define, Ideate, Prototype, Connect.

Design Thinking Process

The empathize section of the module identifies how to understand how to effectively design something that will be used by someone else, you must first put aside your own desires and focus on what the other needs. This can be accomplished by introducing the Extend Activity where you can facilitate an Empathy Map using four simple steps…

First, to gather information about your students, this can be done in many ways from evaluations to conversations! Secondly, communicate with your students to understand what they have trouble understanding and/or doing in your class/course. This can be achieved by asking students “what do you think, feel, say, do, see, and/or hear?” The third and final step of the empathy map activity is where you should reflect on the feedback you have gathered and create a physical copy of the map itself for an artifact. 

Step 1: Empathize

The empathy map activity can be used here to identify patterns in challenges your learners’ experience and common themes for ways to engage them to boost their learning experience as well as refining information they may have struggled with. The next step of the design thinking process (define) is to use the information we have gathered in order to put together and identify a plan for what you can do to support your learners and their specific learning challenge.

Step 2: Define

We then move onto the ideate step of the design thinking process where we take everything we have explored, gathered, and identified, and put it towards forming and building a plan where you can incorporate technology to address the learners challenge and how it can be broken down to be better understood.

Step 3: Ideate

The prototype step is where we take all of the steps from empathizing, defining, and ideating to come up with a final product. This step is important in applying everything we have learned and considered and putting it into effect. There are 3 important steps to developing an effective prototype…

The first being DESIGN, here we must “Dig into the Tool” where we consider how this tech tool can be effective and not effective and where we have room for improvement. The module mentions that it is important to keep in mind that not all tools are going to “solve the learner challenge entirely.” 

The second is to SHARE, this is where we take our prototype and share it with others, gather feedback on what did/didn’t work, what questions there may be, or things to consider for your prototype in regards to other learners.

The third is REFINE, this is an important step where you can take a step back to not only view your final product but view it through multiple perspectives thanks to your peers to build a more efficient and effective creation that best suits your learner(s) challenge.

Step 4: Prototype

Now as we come to a close, we mustn’t forget the importance of the curriculum! Isn’t that what we are all here for anyway? Take a step back and look at your tool overall and consider if and how it is relevant to the learning goals you wish to obtain and be sure it connects back to the curriculum. We should also consider all of the parts of our tools, how they fit together and flow in order to be efficient and effective. 

Step 5: Connect
Module Checklist

Overall, I feel that I enjoyed creating a Canva to educate myself and others on the Technologist Module, it was a creative and effective tool that I can see myself incorporating into lessons in my classroom in the future. As for my first multimedia reflection, I had created a sketch note which was fun, as I had the opportunity at expressing my creativity, though it was more time-consuming. Using Canva I had the opportunity to apply my creativity in a time-efficient manner which I can imagine would be more efficient in the classroom.

Resources:

Technologist: Overview

Tagged , ,

The Technologist Takeover

For my final Multimedia Reflection, I chose to explore the Technologist Module using twitter. I am someone who is pretty active on twitter. For an assignment that incorporated a lot of summarizing, I found twitter to be the perfect technological tool. Although it did have it’s challenges only using 300 characters per tweet, I enjoyed that I was able to add photos and gifs to bring my essay alive.

This particular module caught my eye because I found the visuals and diagrams to be very clear. As a learner, having visuals is extremely helpful for me. I found it to be very organized as well which was something I enjoyed. After scanning the through the module a few times my mind seemed to have been already made up, this module definitely sparked my interest immediately which made is so much easier to learn.

Something I enjoyed was that everything throughout the module was done in steps. This made the module easier to follow and gave the reader exact directions in terms of how we should apply each method. It almost put me at ease that I was able to go step by step and made the module a lot less overwhelming. This is something I will remember when I have my own classroom. I will present the students with one step at a time so they do not end up feeling overwhelmed or anxious by what is in front of them.

In conclusion, I found the technologist module to be very educational and it taught me a lot. I think it is very important to centre our teaching around our students, which is what this module all about. As teachers we need to adjust our teaching to fit our students learning, even when using technological tools. There are so many incredible tools that can be used to help students who are struggling with learning, it is our responsibility to explore and do our research. Technology integration can reinvent an entire classroom, which is why I found this Module to be super helpful with easy to follow steps. The technologist module shows a healthy balance that can be beneficial for both the student and the educator. It can be seen as reciprocal learning, which is a huge part of my teaching philosophy. I am looking forward to incorporating some of these tools in the near future.

Don’t stick to the status quo – explore technology!

For this multimedia assignment, I explored the Technologist Module from eCampusOntario. I enjoyed going through the module, and found it relevant to this course, and to teaching in general. The module serves to improve digital literacies, as it guides educators through selecting technologies to address learner-centred challenges, and to enrich learning experiences. The module encourages educators to find what digital literacy means to them, then provides a step by step guide following the design thinking approach. 

In relation to my teaching experience, I can appreciate the ideas that this module presents. As a teacher, I was always trying to think about what the students would enjoy, and what they may need to be successful. The empathize section of the module was useful in this regard, as it suggested the use of a mind map. I had not thought about using a mind map for this purpose before, so it was very eye opening.

As a learner, I can understand the relevance of this module. I can recall experiences when technology has been both beneficial, and not so beneficial, within the classroom. The Technologist Module guides educators through defining learner challenges, and finding a solution that is evidence based rather than just a trendy idea. One aspect of the module that I found useful, but did not include in my artifact, was the SECTIONS framework within the ideate section. The SECTIONS framework serves as a guide for educators as they assess their chosen tools, and ensure that they are a good fit. The Technologist Module also provides significant ideas for creating a Prototype, as well as methods to Connect and share your creation.

The SECTIONS framework by Anthony William Bates

After completing a twitter essay for the first assignment, I decided to create an infographic this time around. I used Canva because I have had some experience with it in the past. It has some great affordances as it provides free photos and clipart within the website, as well as templates for infographics. Ultimately, I decided not to use a template, but rather create my own design inspired by the “Technologist Design Thinking Process” visual by Joanne Kehoe, found within the module and pictured below.

While I was comfortable with using Canva, creating an infographic proved to be more challenging than I expected. It required finding a balance between words and images that was visually appealing. I also had to decide how much text to include, and what information from the module was the most relevant. I certainly came out of this experience with new perspectives that will benefit my creative approach in the future.

My approach when creating this artifact was to summarize the key points of the module for the purpose of giving viewers a quick glimpse into what the module entails. I went through the design thinking approach because this is the most practical part of the module that educators would participate in. I also thought it was important to start by outlining some of the overall goals of the module. However, the module itself provides many additional resources to explore digital literacy

Overall, I feel that creating this infographic was a beneficial learning experience. It is definitely something that I would consider having my students do as a future teacher!

Technologist Model: The 5 Steps to Design Thinking

For my second Multimedia reflection, I chose to explore the Technologist Module by Ontario Extend, and specifically take a look at the Design Thinking process. For this process, I chose to create an infographic using the website Canva. I was initially worried at first for this project because after the Twitter essay that I created last semester, I was unknowledgeable with any of the other technological options that were available to me. However, Canva won me over by being easy-to-use, and also by providing templates I could use to modify my infographic into exactly what I need.

.

In terms of discovering moments of technological integration in the classroom, I looked at Design Thinking as a possible option to do so. It consists of 5 steps: empathize, define, ideate, prototype, and connect. Firstly, teachers must empathize with their students learning process and focus on student needs. When structuring a lesson for students it’s important to consider what the student will need in order to achieve the expectations the teacher places on them. By putting the students and their need first you can help to discover the obstacles that students may face.

For the second step, “Define”, teachers have to identify what kinds of learners they are working with and figure what best suits their needs for learning. By finding this out teachers can uncover the specific learner challenge of students and choose a technology that can better aid their learners. The teacher can also ask themselves how their chosen technology will help to inspire their student’s further to embrace the lesson being taught to them.

Next, the teacher must create approaches for their technology and how it could address the learner challenges of their students. Will the technology help to elevate the learning experience, and it will be a good fit for the students? The “Ideate” step also makes use of the SECTIONS framework that allows for multiple ideas to help choose a technology for a lesson.

“The SECTIONS Model” by Anthony William Bates is licensed under CC-BY-NC

It provides specific considerations to determine what learners need in order to strengthen their digital literacies such as ease of use, networking, privacy, etc. It helps to provide a roadmap into selecting the most appropriate tool to use for the learners who will be using it. Many of these suggestions are broad and would have to be narrowed down, but it still provides an excellent basis to start out on.

The “Prototype” section allows for the observation of the chosen technology and if it can be successful for the intended learners. Feedback can also be received to better manage the technology and improve upon it over time. Using everything learned in the prior steps the teacher can design an activity for their learners, share it with them, and make improvements based on how they interact with the given lesson and technology.

Finally, connecting the technology with the curriculum will help to link the activity with your learning outcomes. Create clear instructions for learners to follow and make connections between the curriculum and technology that helps to benefit all learners. Ask questions on how the chosen technology improves your learning experience, and if the technology even needed to be introduced in the first place.

There are a number of choices that have to be made when implementing technology into a classroom. Take caution in making sure the technology you introduce is not only effective, but also having the ability to elevate the work of the students by designing it around their learning needs.

Tweeting for Tech

For the second multimedia reflection I responded to the Technologist Module of Ontario Extend’s website using the format of a Twitter essay. I am not a frequent Twitter user so this format was somewhat new to me outside of the limited experience I had during class. On the whole I found the experience to be fairly painless — despite the spotty Internet connection I experienced throughout creating the thread — and I enjoyed the fact that I could dig fairly deeply into the module itself.

One of the key points from my Twitter essay

Ontario Extend lists their outcome and objectives at the beginning of the module as a guide to keep in mind as one reads through the various sections. This I found to be a helpful lens through which to view the content, and having these outcomes in the back of my mind as I digested the material helped me synthesize the main ideas of the module as a whole. The entire idea is to provide resources for teachers to help them use technology more meaningfully in the classroom, as well as a system that can be used to help even the most technologically-inexperienced educator find ways in which tech can solve problems for learners in there classroom.

The system which the Technologist module uses is the Design Thinking Process. It has several stages which are easy to remember and flow extremely logically from one to the next. It is an excellent way to assess what the true challenges are in the classroom, and takes a very student-centered approach to finding or creating technology which addresses these challenges.

The 5 stages of the Design Thinking Process

The biggest strength for Ontario Extend’s module is that they link to a number of valuable and concise resources to help teachers follow the Design Thinking Process. For example, in the “empathize” section, the site provides a handy Empathy Map for teachers to print and use (as well as an example of a completed version). Throughout the other sections they also give suggestions for various tech tools one might use to help them along the process, as shown below from the “ideate” section. These links and downloadable documents ensure that there are no barriers to the successful application of their module.

A screenshot from Ontario Extend’s website showing their abundance of suggestions for tech tools

All in all, I think that the Technologist module is an extremely valuable resource for all educators in the 21st Century. Technology is an inescapable part of modern life, and it is our responsibility as educators to incorporate it into the lessons we teach in truly meaningful ways. It is very easy to use tools on a surface level, but few have unlocked the true potential that technology has in the modern classroom. This module is the perfect starting place to begin the journey of meaningfully integrating technology in lessons, and is a very clear step-by-step guide to achieve that end by asking the right questions and always keeping the students in mind.

Tagged

Innovate your Teaching Using Technology

For our second multimedia reflection I decided to look at the Technologist Module and create an Infographic (attached here). At first glance the module seems straight forward with little information, but multiple hyperlinks embedded in the module lead to an abundance of information to be discovered. After sifting through all the information, the main take away was how to properly incorporate technology into your classroom by using a design thinking approach

The design thinking approach encourages the educator to first see through their student’s eyes to identify where they are having problems. From this understanding it is a step by step approach allowing the educator to modify and incorporate technology into their lesson which addresses their students needs. It is important to approach every lesson with this open minded approach as it allows for differentiation in an educators teaching, which is a key part of my pedagogy. Once the students are known you are able to make specific adjustments based on their needs. Having particular needs should not penalize a student but as teachers we should embrace their unique perspectives and attempt to nurture them.

Differentiation looks at the variety of differences and allows for adaptability where it is necessary. In theory this sounds relatively easy, but it is much more difficult to execute properly in practice. Looking back at my first practicum I realize that using design thinking for differentiation is something that I did not achieve. Incorporating technology into my lessons was something I found hard to do as my extent to this was PowerPoint slides. My main goal during my first placement was to ensure I am relaying information to my students. This was defiantly a more teacher centered approach, not fully out of chose but simply because of the novelty of my teaching experience. As I mature in my career my goal is to adapt a more human centered approach using design thinking and technology to present information to my students in ways that will reach all of them.

When it came to technology I never pictured it being a core appendix to my teaching. I believe this is due to many of my own high school teachers, who in SAMR terms used technology as a substitute. I saw no functional purpose for technology when it was used this way and because of that I never imaged myself using much technology in my own teaching. The more time I’ve spent in the Digital Technology class and exploring the technologist module, I’ve realized that if it is used correctly technology can greatly enhance lessons.

Each day technology becomes more core to our everyday life, as educators we are given the opportunity to create lessons that were not even imaginable fifteen years ago.

Building an online ladder of small hunches

I chose to read through the Collaborator Module by Ontario Extend. The module is divided into four (4) main components: EXPLORE, ENGAGE, EXPAND, EMPOWER. Each of these sections delve into the importance of creating and strengthening connections with like-minded individuals in order to create your own personalized learning network. These networks allow an individual to stretch out their ideas and thoughts into an open space where others can view and engage with them, even possibly adding or altering to those ideas. Alternatively, individuals can join these spaces to gain knowledge on an interest through discussions and collaborating with other individuals in a similar field. To summarize this module, I chose to create a twitter essay. You can view it here.

EXPLORE

The explore tab focused heavily on explaining why someone might want to collaborate with others through a PLN and the many benefits that come along with it! In a technologically dense society, it’s only natural that the sources of knowledge have shifted and evolved. In this, David Weinberger proposes that knowledge has shifted from traditional methods (i.e.: textbooks) to online networks. In the internet age, knowledge and the ability to communicate with multiple perspectives knows no boundaries. I connected immensely with this as a student, but also a teacher candidate and future educator. As a student, there have been countless instances where I’ve checked Google and discussed concepts with my colleagues using media platforms before or after consulting a textbook or article.

As a future educator, I have collected many resources from other educators online for inspiration on lesson plans and ways to present material to students that are engaging and effective. Steven Johnson contributes to this discussion in his video ‘Where Good Ideas Come From.’ In this, Johnson attributes networks to creative spaces that allow for the best ideas. Networks allow individuals with an idea (or a slow hunch) to be shared with a wide audience. This idea can be liked, commented on or shared until it is transformed into something bigger than it would have been on its own. Two hunches put together create one great idea, and that’s what collaboration within a network promotes. I’ve always found that my best lesson plans and activities were the ones created as a group with my colleagues, or an idea that I bounced off of a classmate. They provide another perspective to an idea that I had not thought of and help me sort through what is really important for my students.

The Explore component makes it a point to discuss the growth of online communities, with networks evolving from The WELL (Whole Earth ‘Lectronic Link’ in 1985 to the various social platforms we may choose from today. I had never heard of The WELL and found this article interesting as it was the first collaborative online space for people of various interests and backgrounds to join and share their knowledge with each other. What shocked me was that members payed a monthly fee, and some loyal members still continue to do so. I attributed this to Blackboard in that students are not provided this information for free, or even digital texts that are blocked behind a paywall. While information shared and learned through traditional institutions is valuable, there is also value in Open Educational Resources (OER).

Networks allow open and self-directed learning by hosting what Wenger terms ‘Communities of Practice’. In order to strengthen these communities of like-minded individuals, choosing the appropriate platform to host these networks are essential! For example, Twitter hashtags might be the perfect tool to gather dialogue from individuals both in and outside of your community network. This could be perfect for teachers looking to connect with others who may teach similar subjects (i.e.: #geography). #OntarioExtend has already connected my own twitter response of the collaborator module with a community of other twitter users- and some that might just be lurking.

ENGAGE

Marc-Andre Lalande’s video ‘What is a PLN’ separates a PLN into three: personal in that you choose your connections and your engagement level, learning in that you are gaining and sharing knowledge through discussions, and network in that these collaborations are hosted through technology. PLN’s emerged from the theory of Connectivism (Dr. George Siemens), the idea that your networks do not automatically provide you with what you need to learn. You decide the context of your own learning, while networks use that context to create a social learning environment. Saul McLeod makes a connection to connectivism with Vygotsky’s social development theory in that people tend to learn better through social interactions, especially with those at a slightly higher knowledge level than us (i.e.: tutors or mentors). The idea surrounding the zone of proximal development closely resonates with my own learning experiences.

EXTEND

Extend is focused on helping individuals build their learning networks through Howard Rheingold’s eight (8) elements, as well as encouraging PLN creators to make connections outside of their usual circle. I’ve always held onto the belief that growth is not possible unless you step outside of your comfort zone. Personally, I have always had a difficult time presenting or speaking in front of an audience, it is one of my weaknesses that irritates me the most. However, it is a skill that must be learned and cultivated for my career choice as an educator. I will not grow as an individual until I step outside of my comfort zone. This program forces me to do that, especially this course! These multimedia assignments have forced me to make connections with others and use digital tools and technology that I am unfamiliar with. However, I find myself using these tools more often in my profession.

Another reason one may want to reach outside of their comfort level is the danger of filter bubbles! Eli Parser warns against algorithms and the risk of being shown one-sided or biased information, rather than diverse perspectives.

EMPOWER

We’ve made it to the last component, and I apologize for this lengthy reflection. When I chose this module, I thought it was going to be self explanatory and that choosing a twitter essay would be easy (as I have my own personal twitter that I use regularly). It was a lot more work than I originally thought, and trying to summarize my thoughts into less than 140 characters (due to the two hashtags) was immensely frustrating at times. However, when I was able to condense my thoughts it was incredibly rewarding, and the gifs helped make it fun.

This component encourages PLN creators to be reflective of their networks and to map out their PLN in order to visually see the areas and potential for growth. PLN’s and the digital tools used to build these networks are made to promote professional growth. I decided to create my own PLN using a word cloud!

Having gone through this module, I am definitely more aware of my connections with others and the networks that are possible to strengthen and enhance my learning!

Becoming One with Technology: The Technologist Module

The Technologist module is broken up into different sections that explain how to formulate ideas and connections in order to add technology into the classroom while also listening to the needs of the students, and making sure that it fits properly into the curriculum. The model itself focuses on the “Design-Thinking” model which is a breakdown of how to accomplish the integration of technology into the classroom. While looking at the module I was struck with how many times they wanted the teacher to do a mind map in order to brainstorm their new technology integration idea. They do an “empathy map” to identify a “learner challenge” within the classroom, and then another mind map to brainstorm what technology would benefit their students. It made me wonder if there were other ways that they could go about brainstorming without having to make a mind map each time.

Image of mind map

I chose to do a sketch note to summarize the module. My inspiration for it came from the title, as well as the image above. I was struck by how it looked like a circuit board. I thought that this module was much like a circuit board, as it flows fluidly around ideas and thoughts of how to improve the classroom. This was my approach for the sketch note.

I first started with the idea of how we read left to right. I wanted to draw the eye to the top portion of the design first, so I chose darker colours because they stand out much more. I wasn’t originally going to include the “Overview” portion, but I thought it was very important to understand the rest of the module. I wanted to display how the creation of new ideas flow, so I used the bright colours that fade into each other, but all connect back to the main idea of the technology integration. As you can see in the top right, I wanted to connect the Design-Thinking approaches with their colours, so that the sketchnote was even easier to view and comprehend. As a student, I like some of the ideas that it brings to identifying and working through problems. The idea of mind mapping so much is not really of interest to me, but the rest of the process would be helpful for me when creating lessons.

Image of the top portion of my sketchnote
“Design-Thinking Approach” section of my sketchnote.

I wanted my sketchnote to seem very structured, but also a bit like a giant mind map, as this really stuck with me, as I mentioned before. I wanted there to be more images and examples within the actual module, so I added some photos to help connect the ideas to images. For example, I put a feather pen next to define because it reminded me of the dictionary and writing out fancy definitions. Prototype is a collection of question marks because there is still many questions that come with this phase in the process.

Bottom portion of my sketchnote

As I was about to finish, I checked the “Module Checklist” tab and noticed that it mentioned “Share tech creation”, so I wanted this to stand out as a final thought at the very end of the process, and the sketchnote. This is the portion of the module I feel like I would struggle with most. After all the entire process and finally releasing it to the world, I worry that people won’t like it. Much like this post. Whenever you put something out there that you have worked so hard on you always hope that people will also appreciate it. This is why I wanted this section seperate from the rest. It is the portion that has such a different mindset from the rest of the process, and this is why it is disconnected.

“Share tech creation” picture from my sketchnote

I hope you will be able to read my sketch note, and all the colours came up clear within the scanned image.

Image of Sketchnote about Technologist Module

As a teacher, I like the idea of the module and what it is trying to do, but I struggled with having to use it in a classroom. I know that it is to help incorporate more technology into the classroom, but it is lacking examples. I know that within the “scenario” tab it has a video about “Terry” and how he has become stagnant in his creativity with his course. It explains how he went through the technologist model to accomplish a new tech integration into his classroom. However, the module does not touch on some other opportunities that the teacher could take. I like that this could work for some classes and with some teachers. The idea of working through problems using this method is very helpful, but I just need some more examples of what the overall process looks like for some teachers. Maybe some testimonials and real life situations would help me connect to the module more. Overall, I think that this module would work in some classrooms, but not every class or educator would benefit from it.

I Get By With a Little Help From my Friends

The collaborator module is a great showcase of what a personal learning network (PLN) can do for an individual. This module is broken down into 4 sections; Explore, Engage, Extend and Empower, and I go further to outline these sections with my infographic. Since working with this module, I realized I have been utilizing my peers and relatives as a PLN to help my learning and improve my teaching philosophies. Now, because of the collaborator module I have the subject and content knowledge to express myself as to why my PLN helps me learn and teach.  

A personal learning network is a way of describing a group you connect with to learn, by sharing ideas back and forth, to posing questions, and learning from the experiences of others. Face-to-Face connections are great in any network, but the collaboration module specifically focuses on the use social media such as Twitter, Facebook, Youtube, The Educator’s PLN, and so on. These types of online collaboration tools are great sources of information since they are always online and available. As highlighted in the Explore section of the Collaborator module found on https://extend.ecampusontario.ca/collaborator-explore-collaborate/, collaboration is key in the spread of ideas. Furthermore, I have found that I have had success in my academic career and in my short experience as a teacher, by using my PLN of former teachers, peers, and social media as a great source of input, ideas and references.

The Second aspect of the Collaboration module covers Engagement ( https://extend.ecampusontario.ca/collaborator-engage-personal-learning-networks/ ) The major themes of this section involve the proper use of a PLN, as it requires input in order for others to want to collaborate with you. There is a give and take to making social interactions work, and it is no different with a PLN. Making an effective PLN includes: ownership, independence and user self-determination Learning networks should also include trust, openness and integrity. What if you don’t have a PLN? Where should you start: find a professional group that aligns with your interests or profession like ETFO or OSSTF. Use your peer groups, who better to ask a teaching related questions than a fellow teacher! Find others on social media. Strengthen those connections by contributing, either by commenting, sharing or posting to these groups. As a new teacher, I lack a stockpile of lesson plans and ideas. In an attempt to circumvent this problem I have organized with a small peer group who will share lesson plan ideas back and forth, as well as sharing templates over the internet. This module helped me understand the importance of collaboration when working with a group of peers. This example constant engagement in the PLN shows how making strong connections and makes others more inclined to share their ideas, while also benefiting everyone in terms of new resources and classroom tools.

The Extend Module found here: https://extend.ecampusontario.ca/collaborator-extend/, stresses the point that maintaining a a personal learning network takes effort. They require input, and constant adjustment to align with your profession, it is also crucial to involve a wide variety of individuals in order to reduce personal bias. Following only like-minded individuals will narrow someone’s point of view. Without introducing other points of view that challenge and change our thoughts, it is possible to fall into an “incubation chamber of ideas” or filter bubble; where by only following people with like minded views, the views of the individual becomes more biased. Introducing others whose’ beliefs don’t line up %100 with yours is good. Their points of view can lead to new thoughts or ideas, and their methods of learning could be shared, and ultimately your ways of viewing the world could be changed for the better. Collaboration between PLN’s and more specifically teachers is a great way of bettering the classroom and enhancing the lessons we give to our students.

light bulb mind map
retrieved from: https://cdn.pixabay.com/photo/2017/03/07/13/03/mindmap-2123973_960_720.jpg

Empower is the last portion of the Collaboration module, it can be found here : https://extend.ecampusontario.ca/collaborator-empower/. This final module asks the individual who should represent their PLN. For me, My PLN is relativity small and mostly face-to-face. My mother was a teacher for 33 years, so I am using a lot of teaching styles and classroom practice ideas that she has taught me. I even found my self using some of her methods of classroom management during my teaching placement, Furthermore, I also had a great group of peers to ask for ideas and offer mine as well, we shared lessons gave each other feedback on our work, I found it to be very beneficial, as it let me know what is working in my class and what is not. After learning various aspects of digital pedagogy, and the importance of of an online presence in a PLN I will be better suited to grow my PLN in the online community by reaching out and offering my thoughts and ideas to others of search of a collaborative member of a learning network.