Monthly Archives: February 2020

Collaboration: More Brain’s Makes Less Work

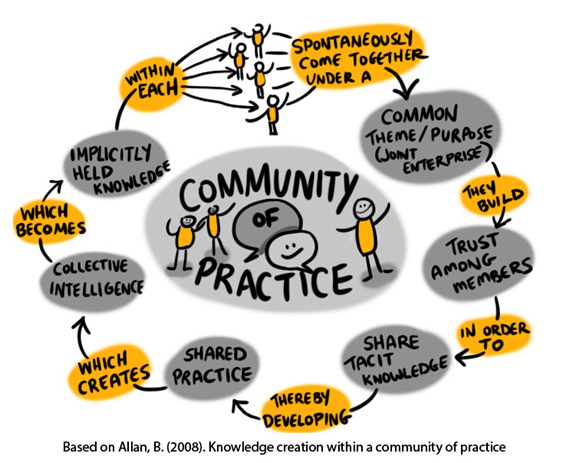
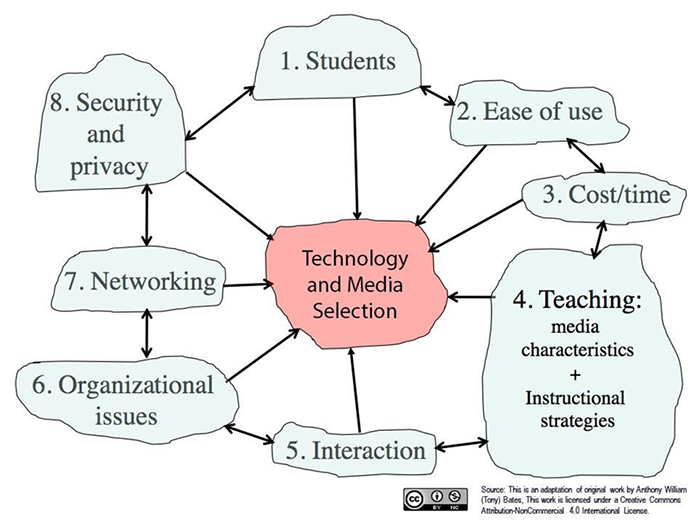
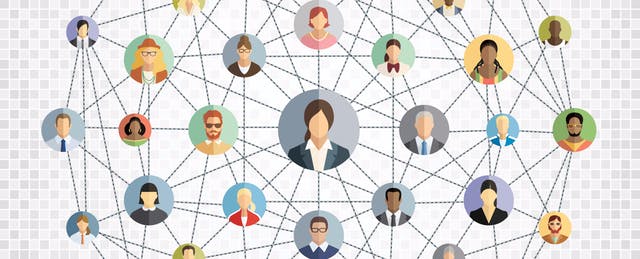
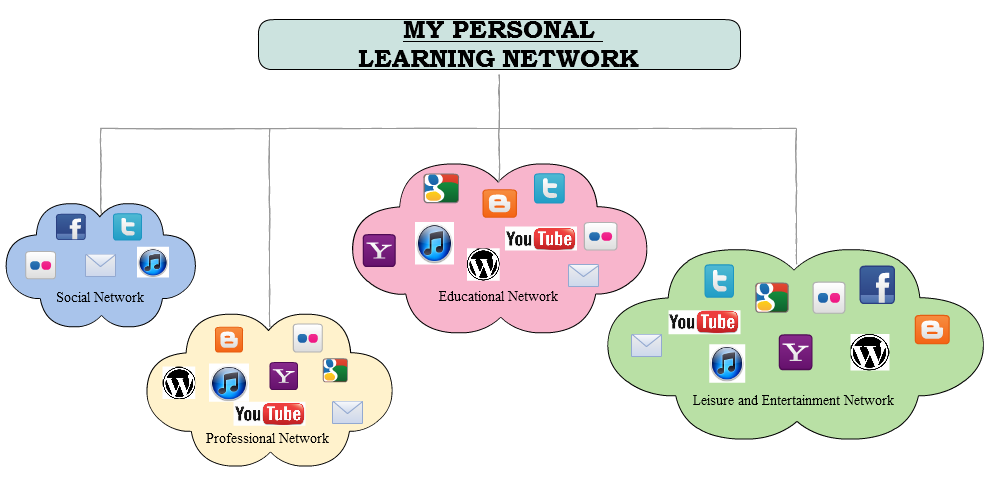
Ever wonder how some people are able to come up with great ideas? Or have you ever said to yourself “jeez I wish I would have thought of that”. Or maybe it was even “hey I’ve thought of that idea before. Chances are you’ve been in one of these situations, and you’ve come to the right place if you would like to learn more about how you too can generate great ideas. As future teachers a lot of us want to be up to date with the latest technology for the classroom. We want the best for our students and to be able to provide them with as much opportunities for learning as we can. But are you stuck on how to do this or even where to begin? You might be saying to yourself what’s a PLN (personal learning network) and how do I create one? Well in order to build a PLN you need to collaborate and share knowledge with others from within, across and between disciplines. We want to use technology to enhance and build international connections with others by posing and solving problems together. Ultimately to strengthen the way you teach and how your students learn in the classroom.

Sketchnote of Collaborator Module by Ontario Extend

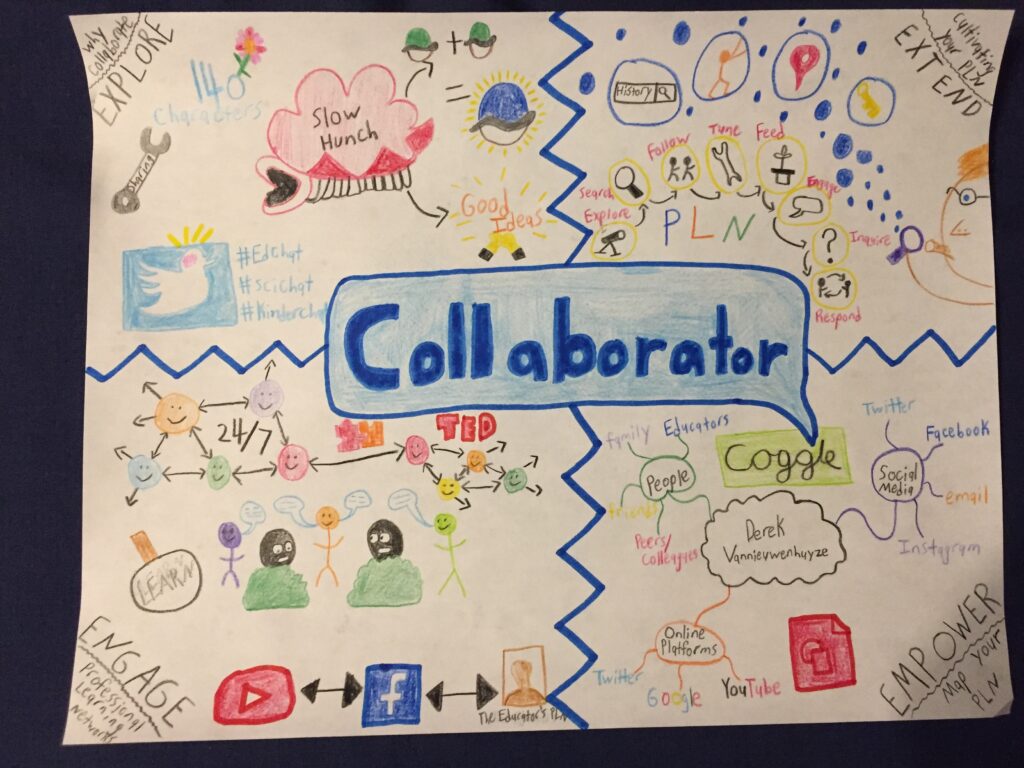
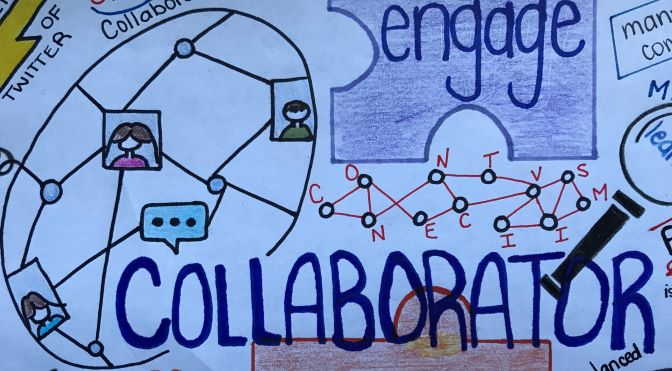
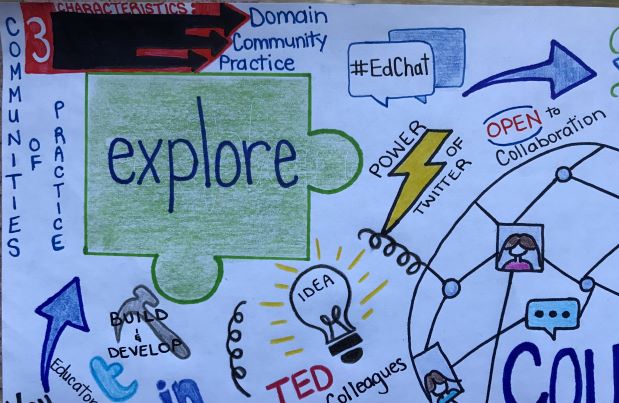
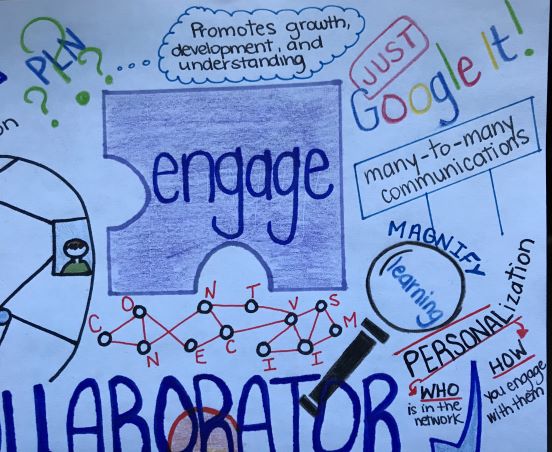
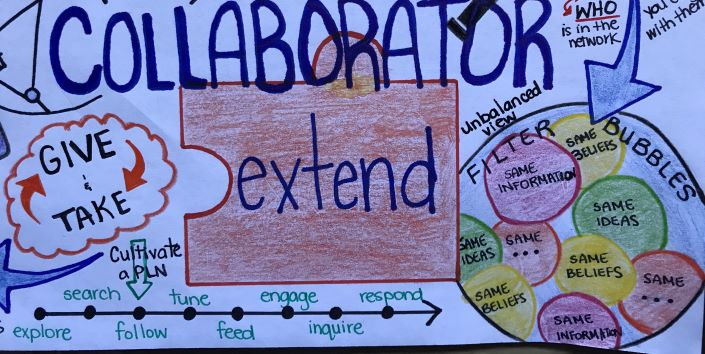
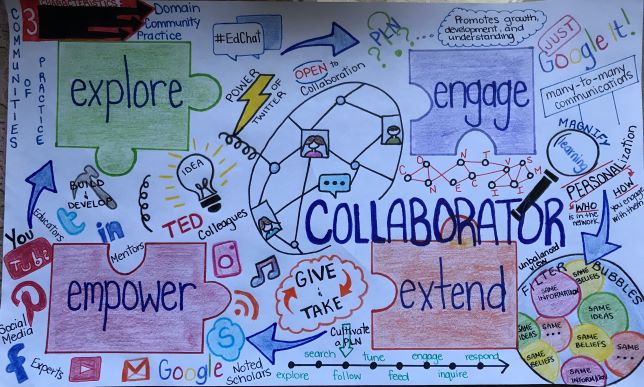
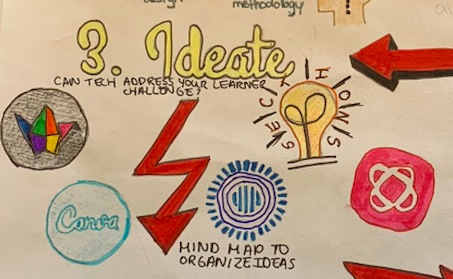
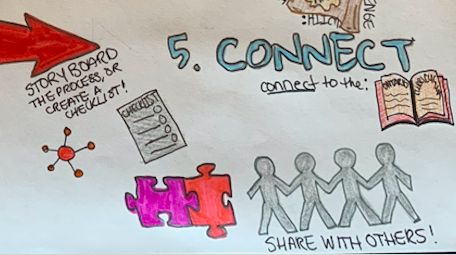
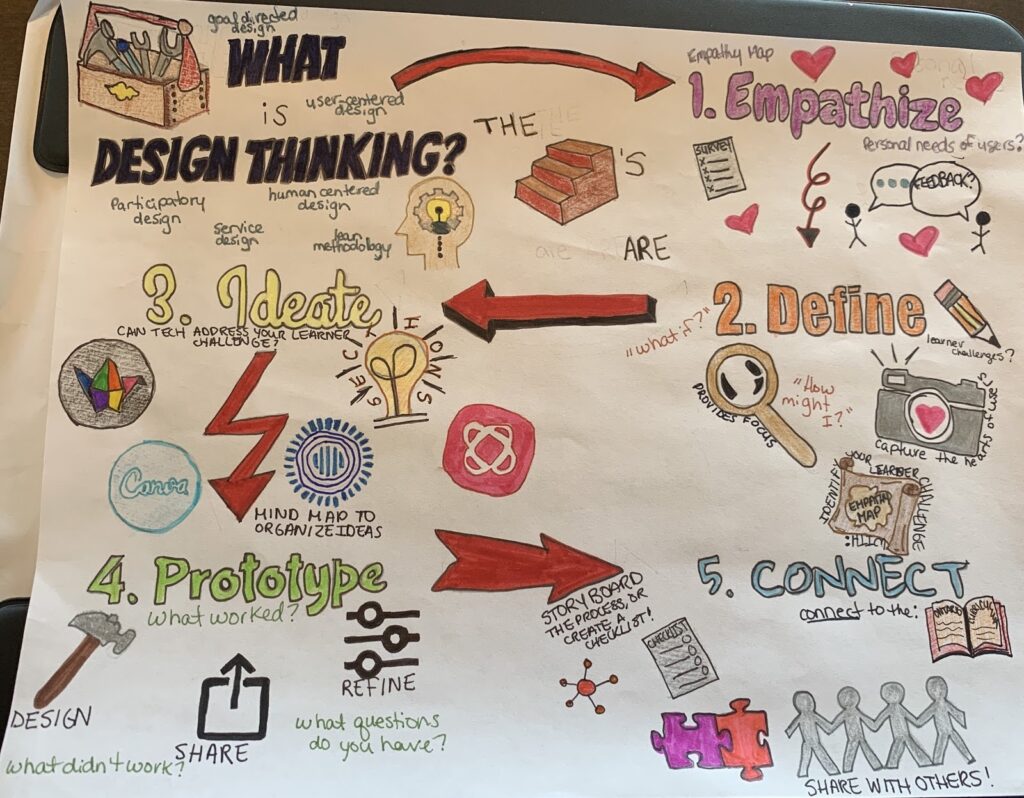
For my artifact I chose to try a sketchnote. I’m not going to lie this took me forever to do. Being a perfectionists and drawing do not mix well. Needless to say my fingers were blistering by the end with the amount of time i’ve erased things. So unless you like to draw and you find it therapeutic then doing a sketchnote is for you! Anyways there are four main points to hit when creating your PLN which are; EXPLORE, ENGAGE, EXTEND and EMPOWER. Let’s dive in and take a deeper look into this module.

EXPLORE

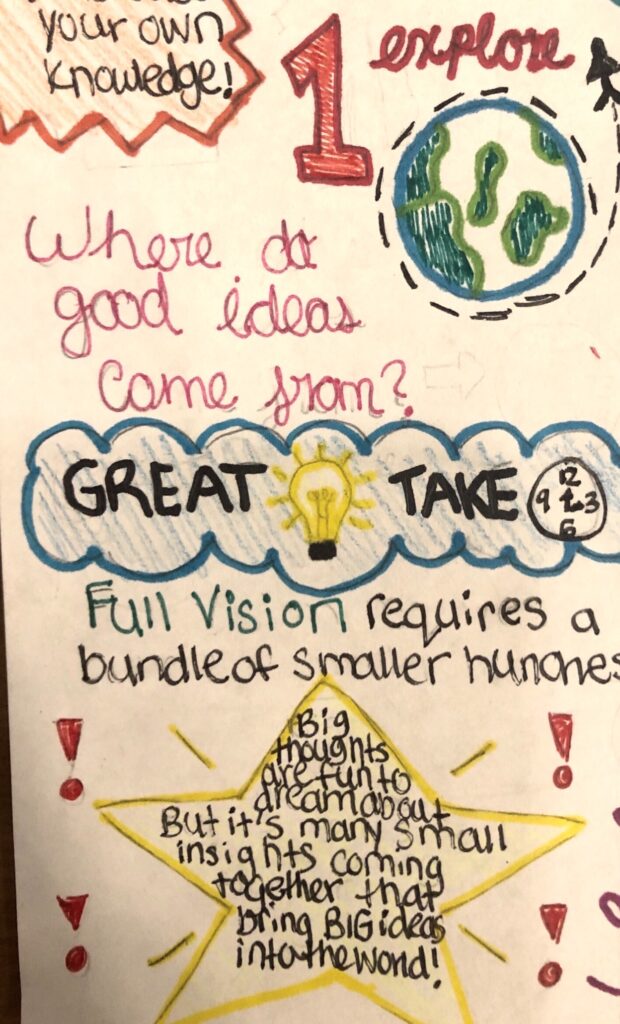
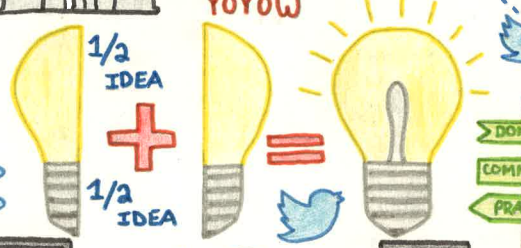
In the EXPLORE section Steven Johnson created a video on the idea of ‘Where Good Ideas Come From’. The main takeaway is that great ideas take time they don’t just happen overnight. It requires multiple ideas (small hunches) to come together to form one great idea. As we come across new ideas and information from other people this helps our own knowledge grow and guide our brains to new ideas.

ENGAGE

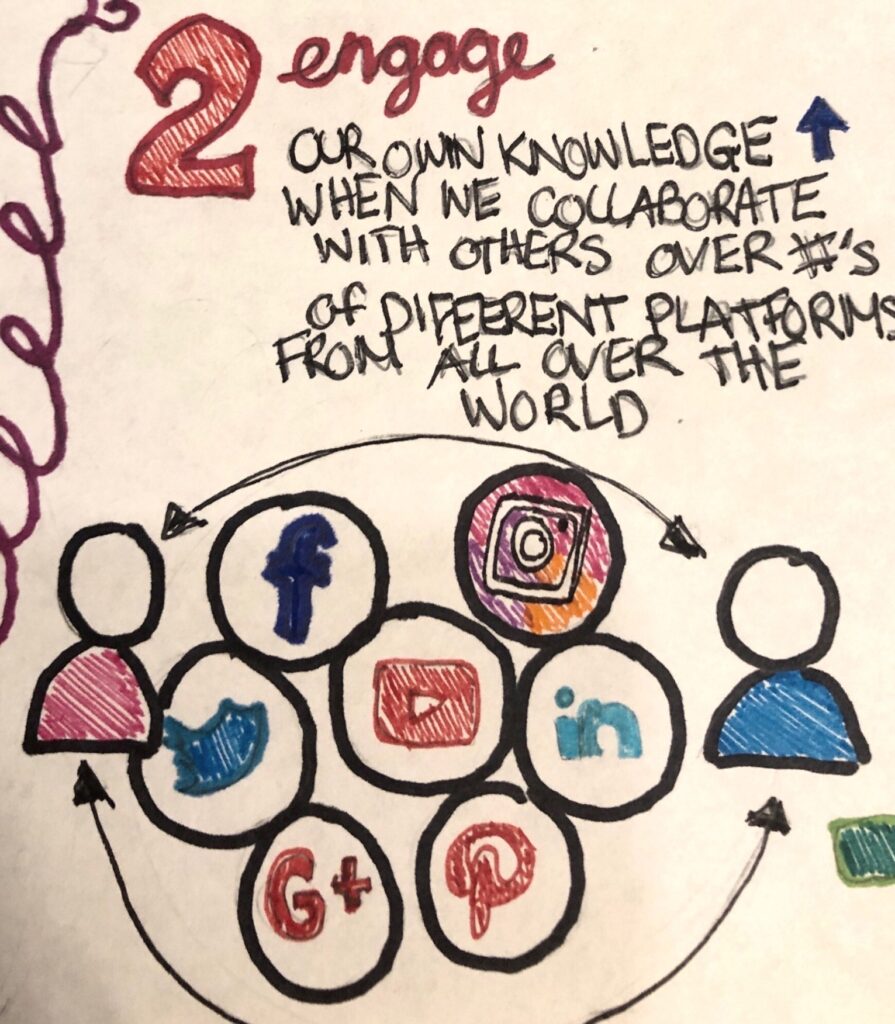
Next comes ENGAGE, this section highlighted a YouTube video called ‘Overview of Connectivism’ where Dr. George Siemens came up with this term to introduce people to the concept that ideas are related to learning and networks. This section stresses the importance of collaborating with others through different social media platforms. By collaborating with people all over the world online we are able to share experiences, learn from others and build our own knowledge.

EXTEND

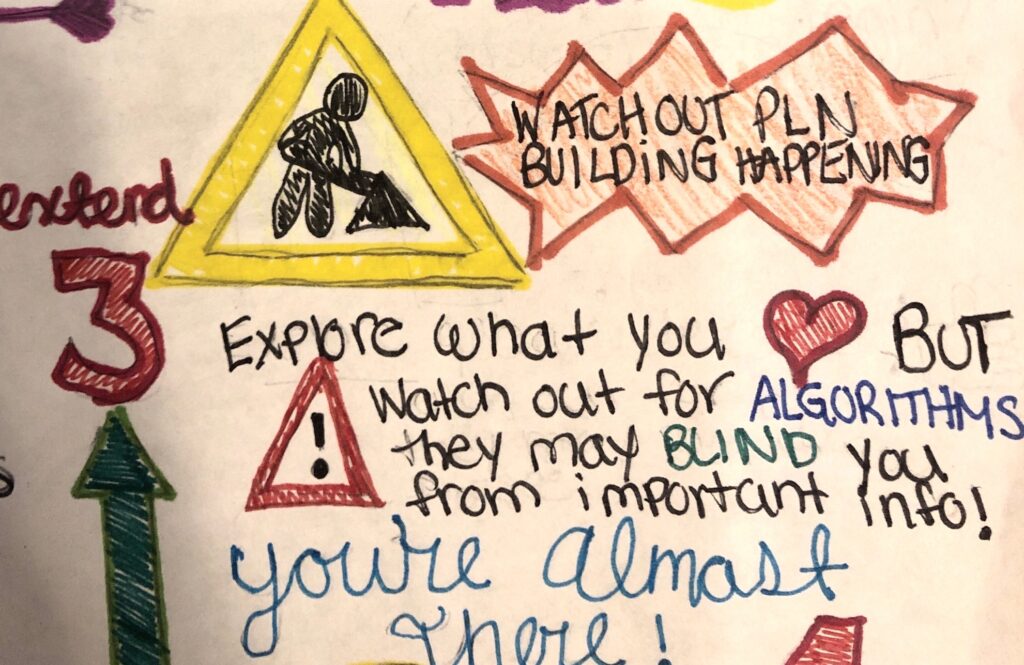
Then it is EXTEND, now that you’ve gathered some information from others and their opinions, it’s time to explore your own interests. But beware of filter bubbles. These filter bubbles are like algorithms. In a TED Talk by Eli Parser he explains how these filter bubbles effect how we view the world. All social media platforms use them so beware of biases and try to extend your knowledge from all points of view before making a decision. I think we can all recall an experience where we were looking up something on the internet and the next day an ad pops up for it. These are the algorithms and they like to show you only your interest so biases can develop because of it.

EMPOWER

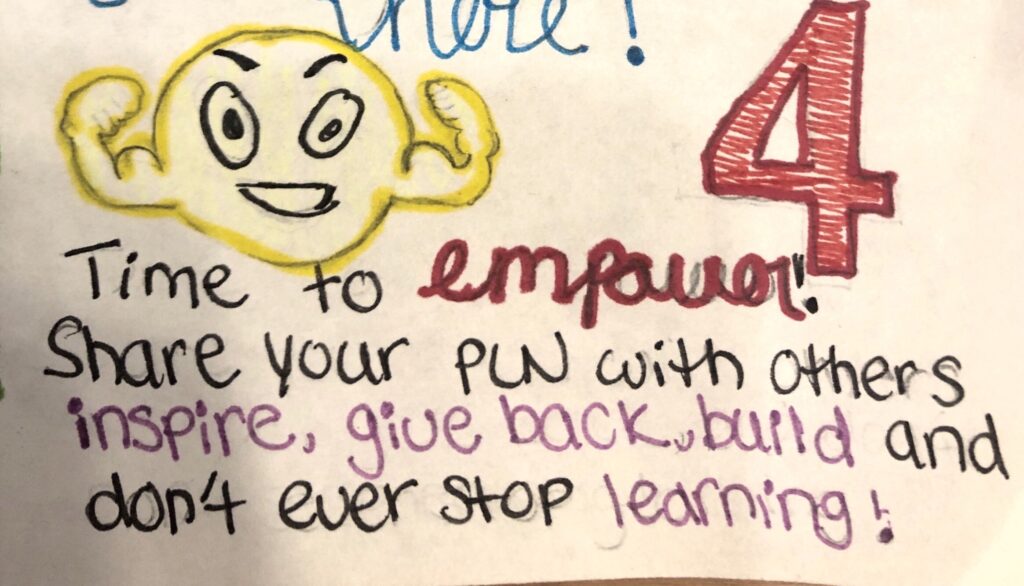
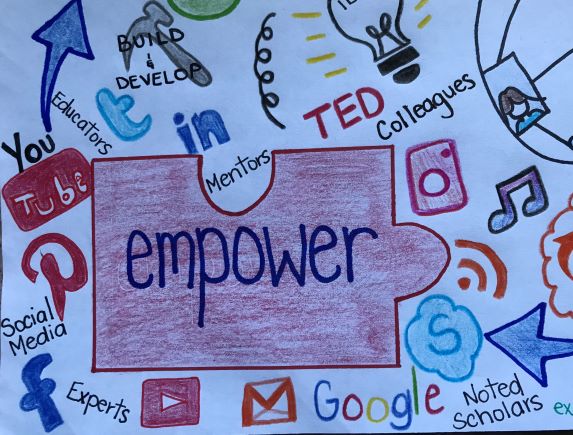
Finally, EMPOWER! This is all about personalizing your PLN. As you continue to use your PLN and explore in greater depth. You will then begin to think about how you can take what you learned and apply it to the classroom. Try to inspire others, give back and most importantly never stop learning! In conclusion I’m a very introverted individual. I struggle with doing group work and completing assignments with other people because I have the mentality of wanting to do it all myself. If there is anything teacher’s college has taught me, it’s to learn how to work with others and their opinions. I’ve learned by working with others your own knowledge and opinions grow. You move away from your own biases and learn to see things from another perspective. The collaborator module helps you learn the skills you need to apply them to the classroom as a teacher and hopefully to get your students to start thinking and learning the same way.

Teamwork makes the dreamwork Squad roll out!!

Tech Integration 101

Ontario Extend’s Technologist Module is a helpful tool for educators that aspire to integrate technology into the classroom. It works on the premise that one’s students have problems that can be effectively solved using different digital tools or software. This time around, I used a twitter essay to outline what it means to be and think like a technologist:

I will first talk about my experiences with using a twitter thread for the first time. My initial reaction came in response to the limited character count. As an English major, I am accustomed to writing out my thoughts in much larger structures. However, a common practice within my subject is to write for conciseness, so this was not new to me. The formatting played off of my skill set, in that, I am used to the requirement of exact speech to get a point across. Twitter encourages summarizing content into bits of digestible knowledge, which is very user-friendly both for the poster and viewer of the tweet.

Season 9 Gary Chalmers GIF - Find & Share on GIPHY

Next, I was lucky enough to find that the tweet function is extremely straightforward, making its use functionally simple and less confusing than something like canva or a mind map, which has a variety of different approaches to the same goal. I enjoyed the ease of getting a thought out without having to worry too much about extreme visual components such as user-friendly graphics and appealing aesthetics. The free range of images or gifs to choose from may seem contradictory, but due to the accompanying information in the essay, finding a copyright free visual that related to the topic was no hassle.

Make Up Wow GIF by Molang - Find & Share on GIPHY
Iphone Anxiety GIF - Find & Share on GIPHY

As for the module itself, my experience with tech in the classroom has been entirely limited to slideshows, movies, and displaying google docs for essay editing techniques. These uses are by no means revolutionary, and I hadn’t considered what I could do differently with tech to improve my lessons during practicum (I was just worried about not screwing up the basics). However, reflecting back to how my associate used tech, there were a few instances that stood out to me. First, was the use of QR-codes to bring students directly to websites, saving time, rather than typing out links or googling in hopes of finding what the teacher intended. Another notable use was an IEP student accommodation for in-class essay, which utilized a laptop for task completion. Necessity of accommodation aside, I believe all students would benefit from typed essays and tests, as a common problem among students in English seems to be a lack of time to complete evaluations. Incorporating chromebooks or laptops into evaluations with internet restrictions could work toward solving the ever-growing problem of test anxiety. Tech can be used for efficiency, assuming that it isn’t difficult to set up.

Rupauls Drag Race GIF - Find & Share on GIPHY

Although my experience with tech is extremely limited, I find that the most critical part of the design-thinking process is ideation. By extension, the SECTIONS Model is of critical importance for the selection of pedagogical tools to be used appropriately in the classroom. At the very least, it gets the user to think. One must consider whether the benefits outweigh the hassle of implementation, considering how easily a technology-driven lesson or assignment can spiral into the realm of overcomplexity. Although one could consider it overkill and convoluted, as each subsection of the model links to another set of several questions, the point is to get the educator to consider these factors. The model does not provide answers; it helps you provide them for yourself. It requires you to work for the answer to critically important factors in your decision-making process. 

Learn Dan James GIF by Much - Find & Share on GIPHY

Technologists have the power to revolutionize teaching or convolute it. Every implementation needs purpose and needs to address problems in the classroom. Teaching that doesn’t grow alongside the world’s ever-growing resource of pedagogical tools is teaching that becomes stagnant, uninteresting, and outdated. We should make it our goal as educators to make learning as easy and accessible as possible to our students, so that they can be inspired to do great things. You don’t need to be a technological genius right off of the bat– you just need to experiment and figure it out over time.

The Technologist Ideologist

by Tom Garrick

I chose to explore the Technologist module, found at: https://extend.ecampusontario.ca/technologist-scenario/

https://extend.ecampusontario.ca/technologist-scenario/

The Technologist module is fairly detailed and definitely gives a wealth of resources to teachers in this scenario who want to use technology but are maybe unsure of how to use it. The resources, mindset, and ideas are great here, especially for teachers who may be new to integrating technology. However, given that these are teachers who are looking for tools to integrate, I don’t think the prototype section of this module should be taken literally to make brand new technology… this would likely result in each person designing a new tool that is essentially a bad game of telephone with the tools they used to experiment… I think the design thinking is more about the lesson and curriculum integration in terms of TPACK and SAMR. By experimenting with and creating new ways of using technology to teach material, we can address the challenges we’ve found and create meaningful experiences that connect to the curriculum.

from: https://search.creativecommons.org/photos/add32652-5693-4ef3-ad52-8e37ce61a551

My experience with exploring the Technologist and designing an artifact was similar to the scenario in the module. I began crowd-sourcing information on BlackBoard, reading through the module myself, then sifting information and finding what was meaningful to cover. Next I had to find a tool to use – Prezi? Powerpoint? I had worked with both before, but wasn’t too sure how I would make them engaging and how I might go about exporting them into a video… Powtoon was recommended to me and I noticed it had a freemium model. It was relatively easy to use, and I appreciated the option of editing a template or starting from scratch (I chose to edit a template to save myself some headaches). Openness in education means being able to access things conveniently, and the freemium model does provide this access. However, in the moment, I felt very rushed as I only had 4 days to access all the features for free.

The countdown was on!
from: https://www.powtoon.com/new-dashboard/#/home

I’d like to dig in to the ideate section of the module a little bit more here, as I think it has the most opportunity to cover multiple areas of the module. A simple tool like Prezi allows the teacher to use technology for the ideation process and to build their digital literacies with this tool. It also gives them the opportunity to go paperless and come back to edit the mind map as they’re reflecting and revising later on. Next up in terms of design thinking, specifically for education, is the SECTIONS framework for how we decide to use everyday tools in the classroom.

from: https://prezi.com/lvu-jn5qxneg/mind-map-prezi-template/

Some of the tools on these lists are already fairly engrained in our society as citizens and learners (example, YouTube, google search, etc.). In these cases, the building of digital literacies would be how to take a tool that is already popularly used for (insert common use here), and apply it to education? Students likely have access to these platforms already, but what are the implications for using them for education? What are the privacy and security features, if any? What are some concerns with this platform? Is it open and accessible to all? These are all questions to consider.

from: https://search.creativecommons.org/photos/878ca135-45c0-4570-9b7e-cd80e828eab4

The same questions need to be applied to the less common tools (that are more suited towards educational-specific uses – such as kahoot, mentimeter, knowledgehook, etc); as well as the digital literacies required to learn a new tool, and ultimately the teacher needs to decide whether or not it adequately addresses the needs of the learners in their classroom to overcome the challenges they’ve identified. It’s much like finding a nice outfit when shopping… what purpose will this serve? What does it cost? Do I really need something new, or is there something I already have that can serve this purpose? What are the motivations behind using this? Is this something I can use in multiple scenarios, or is it more of a specific thing?

from: https://search.creativecommons.org/photos/863ad56f-7729-4f31-beb4-f8d79eb3c616

Overall, I enjoyed exploring the Technologist module and working with the PowToon software. One thing I didn’t like about the PowToon was that it had a strict time limit of 3 minutes, so even with lots of audio editing using Audacity to cut down space in between my words, as well as cutting out some sections that weren’t as important I still barely had enough space to accurately summarize the module, so the video kind of just starts out of nowhere. The PowToon template had a really nice intro and outro but unfortunately with the time limits I couldn’t use these. However, I’m quite happy with the ease of use and the professional finished product the software affords.

A Summary of the Technologist Module. Captions available.

What Will You Share Next?


Join the conversation by using the colloborator module

As educators were constantly on the rise of exploring new things not only to better our knowledge but to extend and grasp the knowledge of our students. We all have different skills to offer and different literacies that were going to learn. From a pedagogical point of view, it’s very important to have that open education for everyone. With the collaborator module we can do just that. This module gives not only educators but individuals with the same interest the chance to join this sort of network and collaborate on new information. Having this technology and social media platforms give the creation of PLN’s.

I created this Powtoon to give a brief explination of what this module actually is and how we incorportate these PLN’shttps://youtu.be/_azHqgT7IxQ

A PLN stands for Personal Learning Network. A network is based on different sorts of resources all coming from one center we can call it and they telecommunicate between each other to collaborate. There’s this really good book written by David Weinbergur called “Too Big to Know: Rethinking Knowledge Now That the Facts Aren’t the Facts, Experts Are Everywhere, and the Smartest Person in the Room Is the Room” and in his book he explains that as our society is changing were moving away from just getting these answers from books but more towards using these platforms and connecting with educators to get answers. David adds that now on these platforms we now have no limits to search.

As we examine this topic of collaborating on information there are two different ways to do so; as someone who is looking to join the conversation on a specific topic that’s called being a participate but we learned from our Powtoon that we can also build our own PLN to create a new conversation on something we feel everyone should know about.

According to the Online Learning and Distance Education Resources; Wenger explains three concepts when talking about PLN’s “Domain: a common interest that connects and holds together the community. Community: a community is bound by the shared activities they pursue (for example; meetings and discussions) around their common domain and thirdly Practice: members of a community of practice are practitioners; what they do informs their participation  in the community; and what they learn from the community affects what they do”

A common platform that is on the rise for educational purposes is Twitter, this platform is the fast and efficient social media to update on our personal life. On Twitter, we are able to follow other accounts, like, retweet, tweet, and quote a tweet that we need on our timeline. By using any kind of hashtag, we are about to classify different types of conversations that millions of people are talking about around the world. For educators this platform is perfect because we are able to connect on different topics and with the video by Alec Couros “Using Twitter Effectively in Education” were able to learn more about this.  

Technology in the Classroom allows for Greater Learning Possibilities

Integrating technology in lessons as a teacher, is becoming a must. Technology is consuming itself into most aspects of our lives and the lives of our students. The Technologist Module gives teachers a step by step process on not only how to bring technology into the classroom, but also make it effective to our students learning. This module gives you an in-depth look into the process of making great technological additions to your lesson, that are based on the needs of your students. This module uses the Design-Thinking Approach. My infographic goes through each part of that approach. Using Canva to create my infographic gave me an example of what it would be like for me to test technologies to see if they would be good to integrate into my lessons. This was my first time using Canva. It turns out to be a very user friendly program, that lets you be very creative. An infographic was out of my comfort zone, but Canva made it really fun and painless.

Infographic on the Technologist Module

My infographic summarizes the 5 steps involved in the Design-Thinking Approach. First there is emphasize, where you look at the learners needs and what the tech could add that could would not be there without it. I used this when I was looking at many students in my classes IEP’s during my placement. I looked at technology as a way to allow those students something that was missing from a normal lesson. The next step is define, this is where you define who your learner is and what you can do with technology to help. I learned that after a few weeks, you really get to know your students needs and are able to base your lessons around their needs.

Emphasize and Define Panels of the Infographic

The next step is ideate, which is centred around the planning of the integrating of technology. This is where you take a look at the challenges that some of your students face and make sure you found a technology suited for that. Sometimes it is hard for teachers to help all of their students who have many different kinds of challenges. If you use technology, something that a lot of students are accustomed to, then it will be more effective to them overcoming challenges in their learning. The step after that is the prototype, which involves designing your prototype, sharing it with others and redefining it from the feedback you receive. This is essential in teaching. Trying ideas out, getting feedback, and making it better from the feedback is essential in improving your technological pedagogy.

Ideate and Prototype Panels from Infographic

The last step is to connect, this is the implementation of the technology that you have created for your classroom. This is where you bring it to your lessons and see how students react. This is always the scary part for teachers. Wondering if something that you have worked on is going to be good for your students. It is also a struggle for teachers to figure out how to instruct students to use this technology. If this technology works out, then let other teachers know and spread the word through your Personal Learning Network.

Connect Panel of the Infographic

Finding What Works Through Design Thinking

Integrating technologies into lessons is always tempting, however as teachers we must really consider the true benefits this integration has on students. The Technologist Module outlines the steps that need to be taken when consider the effectiveness of your choice of technology integration. Unlike the various apps that are often being marketed for the classroom, this module is not trying to sell you anything, but rather provide a systematic way of thinking to avoid using technology for the sake of technology. As outlined in my infographic, integrating technology is not a static process, nor one with a simple cause and effect relationship. Rather, as an instructor, you must constantly be questioning why you are making the choices you are, and how it directly benefits your students. I appreciate how the model made me consider my integrations as creations. This made forming lesson planning seem active in a way that I had not thought of before. Kind of similar to creating this infographic – I am teaching someone about something through a medium that helps both me and them understand.

Infographic Summarizing the Technologist Module by Breanna Rowley.

Within the “Ideate” step of this model of thinking, the SECTIONS framework allows you to consider multiple things that may help you when determining if a technology is right for your lesson. This framework also encapsulates a lot of the determinants that have been outlined in this model including empathy and connection. The SECTIONS model however does provide more specific considerations that are determined by what your learners need to strengthen their digital literacies such as ease of use and networking.

Anthony William Bates’ SECTIONS Model.

My experience in practicum also involved me completely avoiding technology. I attempted to completely eliminate the use of any Chrome Book or IPad in the classroom, because every time they were utilized I would constantly be telling students to get off their BMX game, and get back on task. I understand that this avoidance is not at all a solution as students are not able to exercise their digital literacies, and there are students who legitimately need these technologies. I do believe that if we are going to rely on technology in the classroom there needs to be a better system in place to eliminate these distracting games and inappropriate sources, however this also could act as a motivator as we should only integrate technology when it is most effective. This could even deter students from navigating away from the task, as the initial technology is more interesting and useful to them.

Giph found on Giphy.

Overall, I think all of us can fall victim to the use of technology for the sake of technology. Technology is being integrated in many aspects of our lives, so integrating it into the classroom may seem like the wise choice as you feel you are preparing students for their future. However, the reality may be you are removing or even avoiding valuable steps to the learning process such as collaboration, creation, and engagement.

Collaboration is Key

The act of reaching out, and connecting with others in order to create something is a way to define the term collaboration which is the Ontario Extend Collaborator Module that I chose to summarize. There are four main sections to this module, EXPLORE (why collaborate), ENGAGE (Personal Learning Networks), EXTEND (Cultivating your PLN), and EMPOWER (Map your PLN), each focusing on a different aspect of collaboration.

Image result for connecting puzzle pieces
Missing piece being added to complete the puzzle.

Why Collaborate? Well there is a great video by Steven Johnson in the first section of this module, called Where Good Ideas Come From. In this video he speaks about this concept of an idea taking time to mature, and that one individual may only have half of an idea created in their mind. It isn’t until this idea is combined with another half idea to create one big idea, almost like that missing piece of the puzzle. It is here where Steven introduces this idea of borrowing and lending others hunches or ideas and combining them with our own to create bigger, better and newer innovations.

Image result for growth from twitter
The Twitter logo being shown by a man who is acting and dressed professionally.

The second half of this section stems from a video where Alex Couros speaks about how to properly utilize twitter in Education and the appropriate use of a hashtag. I know myself I was able to learn a lot about the capabilities Twitter has and actually thought of a few different ways to implement this in my future teaching career.

The second section of the module mentions this idea of a PLN or professional learning network. It breaks it down into three components. First it’s personal, as you choose who to connect with people and wherever and whenever you feel you’d like. Sometimes this is in the form of lurking, where you just drop in and take information, other times you only input information.

Image result for PLN
Visual representation of a PLN and how one individual, indicated as the black ME dot in the bottom left hand corner has so many connections to those also interested in the same content.

Secondly it is a network, as those individuals that you originally connect to, also have connections to others with similar interests, creating this web of connections. Thirdly, the network all revolves around learning. Every individual in that network has a common goal to learn or gain some sort of information.

The third section of the module is about how to grow you PLN. I found this to be the section I enjoyed the most as I was able to gather information and ideas on exploring, searching, following, tuning, feeding, engaging, inquiring and responding, and how these are the eight tips from Howard Rheingold about cultivating your PLN. It also mentions the idea of filter bubbles, and how they restrict what we find, unless we truly search all relevant information, regardless of our personal opinion.

The fourth and final section of the module focused on an activity where you would actually map out your own personal PLN. I briefly mapped out my PLN in the bottom right corner (or Empower section) of my sketchnote.

The sketchnote I created for this multimedia reflection that summarizes the Ontario extend collaborator module.

I chose to create a sketchnote for this assignment because I felt that it was a great way to summarize all the information I retained from the module and still express it in a colourful way. I’m not a very artistically inclined individual, however it was a simple way to step out of my comfort zone, but still remain confident in my abilities. I was also able to reach out to a few peers that have created a sketchnote before and connect with them by asking them for their tips or ideas in order to make it effective.    

Collaboration: “Alone we can do so little; together we can do so much” ― Helen Keller

For my final artifact, I chose to make a sketch note to reflect on the eCampus Collaborator Module. This was my first time making a sketch note, but I think that it was a useful tool to communicate some key points regarding the Collaborator Module.

Collaborator Module

The “Explore” section of the module explains the purpose of collaboration. Steven Johnson’s video, “Where Good Ideas Comes From”, explains how networks are helpful to the idea forming process. It is not something that comes to be overnight, but rather something that develops over time, and with the influence of a network of people. In addition, Dr. Tony Bates explains that a community of practice has a domain, a focused are of knowledge, a community of individuals learning together, and a practice where resources and examples are shared and exchanged. This community of practice is individually built and can occur through online discussion groups or by using social networking tool like Twitter. Alex Couros explains in his video that Twitter can be very resourceful. A single hashtag can open the door to an enormous amount of knowledge. However, users should take time to explore this tool to ensure it is used effectively and that they get the most out of it.

explore

Next is the “Engage” section, where the focus is on understanding what a PLN is and how it can be used to engage in learning. Each PLN is unique and personalized to the individual themselves. It promotes personal growth, development, and understanding in a focused area of study. This section of the module discusses the theory of connectivism through George Siemens’ video, “Overview of Connectivism”, which emphasizes that we should be learning within a community of individuals through social and collaborative activities. By encouraging many-to-many communications, individuals have access to a wealth of information.

Engage

Thirdly, the module focuses on how we can “Extend” our learning through collaboration. As a member of a PLN, we can take information from others, but we should also practice giving back in some ways as well, while working towards creating a two-way street. However, Eli Pariser cautions in his TED Talk about the dangers of “filter bubbles”. When searches are personalized based on an individual’s history, it can exclude a whole wealth of information. When considering new knowledge, individuals should look at the whole picture, including opposing views, and avoid making a snap judgement based on a biased library of information.

Lastly, the “Empower” section, which encourages reflection. It suggests looking deeper within the network to consider who makes up your PLN and the relationships that exists between the nodes. A PLN can be made up of educators, mentors, colleagues, note scholars and any other individuals who feel they have valuable knowledge to share. As time goes on, individuals should be thinking about how they can develop their PLN to support their teaching.


This Collaborator module highlighted the importance of reaching out to others to gain knowledge, without having to be an expert on everything. As a future teacher, something that worries me is not having an immediate answer to a student’s question. By participating in a PLN, and by encouraging students to do so as well, it can alleviate some of that stress. Creating this artifact took some brainstorming and planning. I would not consider myself an artist by any means, but I am proud of the end product. I would consider having students use sketch notes to demonstrate their understanding in the future. I think that it is a good way to organize and share information that is not just a pencil and paper regurgitation.

Sketch Note on the eCampus Collaborator Module by Kristie Hedge

Everything you need to know about design thinking!

By: Samantha Godden

The technologist module focuses on the idea that technology tools can be used to address specific learning challenges, and that digital literacies can be used to engage and enhance student experiences. The design thinking approach is the starting point for a technologist point of view, as is a human-centered thinking approach that allows the educator to think of how the technology can benefit the student and situation. There are various methodologies and approaches to design-thinking, as it can be used in many other contexts rather than just the classroom. The module begins by explaining the approach of empathize, define, ideate, prototype and connect.

Design thinking always begins with empathy. It is important for the teacher to put themselves in the mindframe of the student. When creating activities, especially when they concern technologies, it is important to consider how everything will work towards benefitting the people involved. For an educator, it is important to empathize with the learners involved to identify a challenge that could be solved through the use of technology. If the educator is struggling with the identification of student problems, they can always ask for student feedback or create a survey. 

The second step of design thinking is define. This step focuses on identifying  and defining a problem or challenge facing learners. A useful tactic for this section is to create an empathy map. This allows the educator to ask themselves questions such as “what if?” or “how might I?”. When creating a good learner challenge, it is important to consider if the challenge provides focus, if it captures the heart of the learner, if it informs how subsequent ideas will be evaluated and if the concepts and plans meet the needs of the students. Once this section is completed and the learner challenge is defined, the educator is able to move onto the next section of the design thinking process. 

When it comes to ideate, it is important to form and build the ideal features and characteristics of how technology could address your learner challenge. Mind Mapping is a very useful tool when organizing this information and can be done on a variety of platforms. I tried to outline the various websites in my sketchnote, such as Padlet, Canva, Prezi and Mindmeister. After the mind mapping is complete, the next step is to choose a technology tool to help address your challenge. Using the SECTIONS model might be useful in this section, as it allows the educator to ensure the technology model is the right fit for the students. 

After the ideate section, the user should have chosen their respective technology. They can then move to the prototype section, where they can see if their technology would be successful for their intended audience and receive feedback from users. The steps of the prototype section are: design, share and refine. The design section involves playing around with the chosen technology and seeing if it would work as successfully as previously thought. The second section is share, which involves sharing your ideas with peers and learners in order to receive feedback and see what worked and what could be improved. Finally, once feedback is received, we move to the refine section, where the educator can take the necessary steps in order to improve their ideas and designs. 

Finally, the last section of this module focuses on connection. It is important to connect the lesson and technology to the ontario curriculum, as well as your intended learning outcomes. This will ensure that students can see how technology integration is important to their learning and can be useful for their futures. 

We’re All in This Together!

For the second multimedia assignment, I chose to explore the Collaborator Module produced by Extend Ontario. In my opinion, the module is a must read for educators looking to develop connections and build their capacity for teaching and learning. The module focuses on creating and expanding personal learning networks (PLNs) through collaborations with others. Extend Ontario divides the module into four main sections that are important to consider when creating your PLN.

Image depicting a personal learning network with multiple nodes/connections.

First, the explore section discusses the importance of collaboration and identifies ways to collaborate. In a video titled “Where Good Ideas Come From” Steven Johnson argues that most good ideas come from the collision of smaller hunches. I agree with Johnson in that good ideas are often the product of collaboration. Some of my best ideas started out as half ideas and weren’t fully realized until they were combined with ideas generated by others. In order for ideas to collide, we need to develop opportunities for individuals to collaborate. In today’s society, collaboration occurs primarily online where individuals have the ability to broaden their PLN by exploring cross-disciplinary skills and insights. Personally, I have expanded my PLN almost exclusively through social media platforms such as Twitter, Facebook, and Instagram.

Image showing how two “half ideas” can combine to form a new idea.

Second, the engage section introduces the theory of connectivism. The foundational concept of connectivism is that your PLN provides the context for your learning, not necessarily the content. It recognizes that learners determine the direction of their own learning, but at the same time emphasizes that learning is not an individualistic pursuit, and that we learn as part of a community. The theory of connectivism aligns with my personal experience quite well. I am always in control of my learning when building my PLN. My PLN allows me to learn about topics that interest me as part of a larger community of learners.

Image depicting the theory of connectivism.

Third, the extend section discusses filter bubbles and how to build your PLN. Filter bubbles separate you from information that disagrees with your viewpoints, effectively isolating you in your own ideological bubble. Filter bubbles are something that I can personally relate to. I am a country music fan who often buys concert tickets online. When I’m online, the only advertisements I see are ones related to country music. I have essentially been isolated from all other genres of music. With respect to building your PLN, Twitter appears to be most effective. Twitter allows you to quickly and easily connect with other educators who share similar interests. Personally, I engage in open hashtag conversations as a way to communicate with other teachers and teacher candidates.

Image showing how filter bubbles isolate you in your own ideological bubble.

Lastly, the empower section teaches you how to map your PLN. Effectively mapping your PLN helps identify the people, organizations, collectives, and others who are in your network. This allows you to rearrange and re-design your PLN as patterns emerge. The best way to map your PLN is to create a visual diagram using an online tool such as Google Drawings, Coggle, or PowerPoint. Mapping my PLN is something I hadn’t considered prior to reading this module. However, I believe it’s a good way to expand my network and support my teaching.

Example of a PLN map.

When choosing a medium to create my artifact, I took the advice of Extend Ontario and collaborated with members of my PLN to expand my knowledge. Ultimately, I decided to create a sketchnote. I chose to create a sketchnote because there was a minimal learning curve and it provided me with the best opportunity to be creative. I felt like my creativity was restricted when creating my infographic for the first multimedia assignment. I also disliked the way that Piktochart tracked and collected my data.

Image of the sketchnote I created based on the Collaborator Module.

Tagged